• Home
    • About Nourishing Matters
    • About Emily
    • Frequently Asked Questions
  • Recipes
    • Offerings
    • Past Programs and Events
    • Experience and Teaching Style
    • Articles and Features
    • Travel
Menu

nourishing matters

Street Address
City, State, Zip
Phone Number
where wholesome meets delicious

Your Custom Text Here

nourishing matters

  • Home
  • About
    • About Nourishing Matters
    • About Emily
    • Frequently Asked Questions
  • Recipes
  • Work with Me
    • Offerings
    • Past Programs and Events
  • Yoga
    • Experience and Teaching Style
  • Press
    • Articles and Features
  • Adventures
    • Travel

Zucchini Confit with Miso

July 29, 2015 Emily Watson

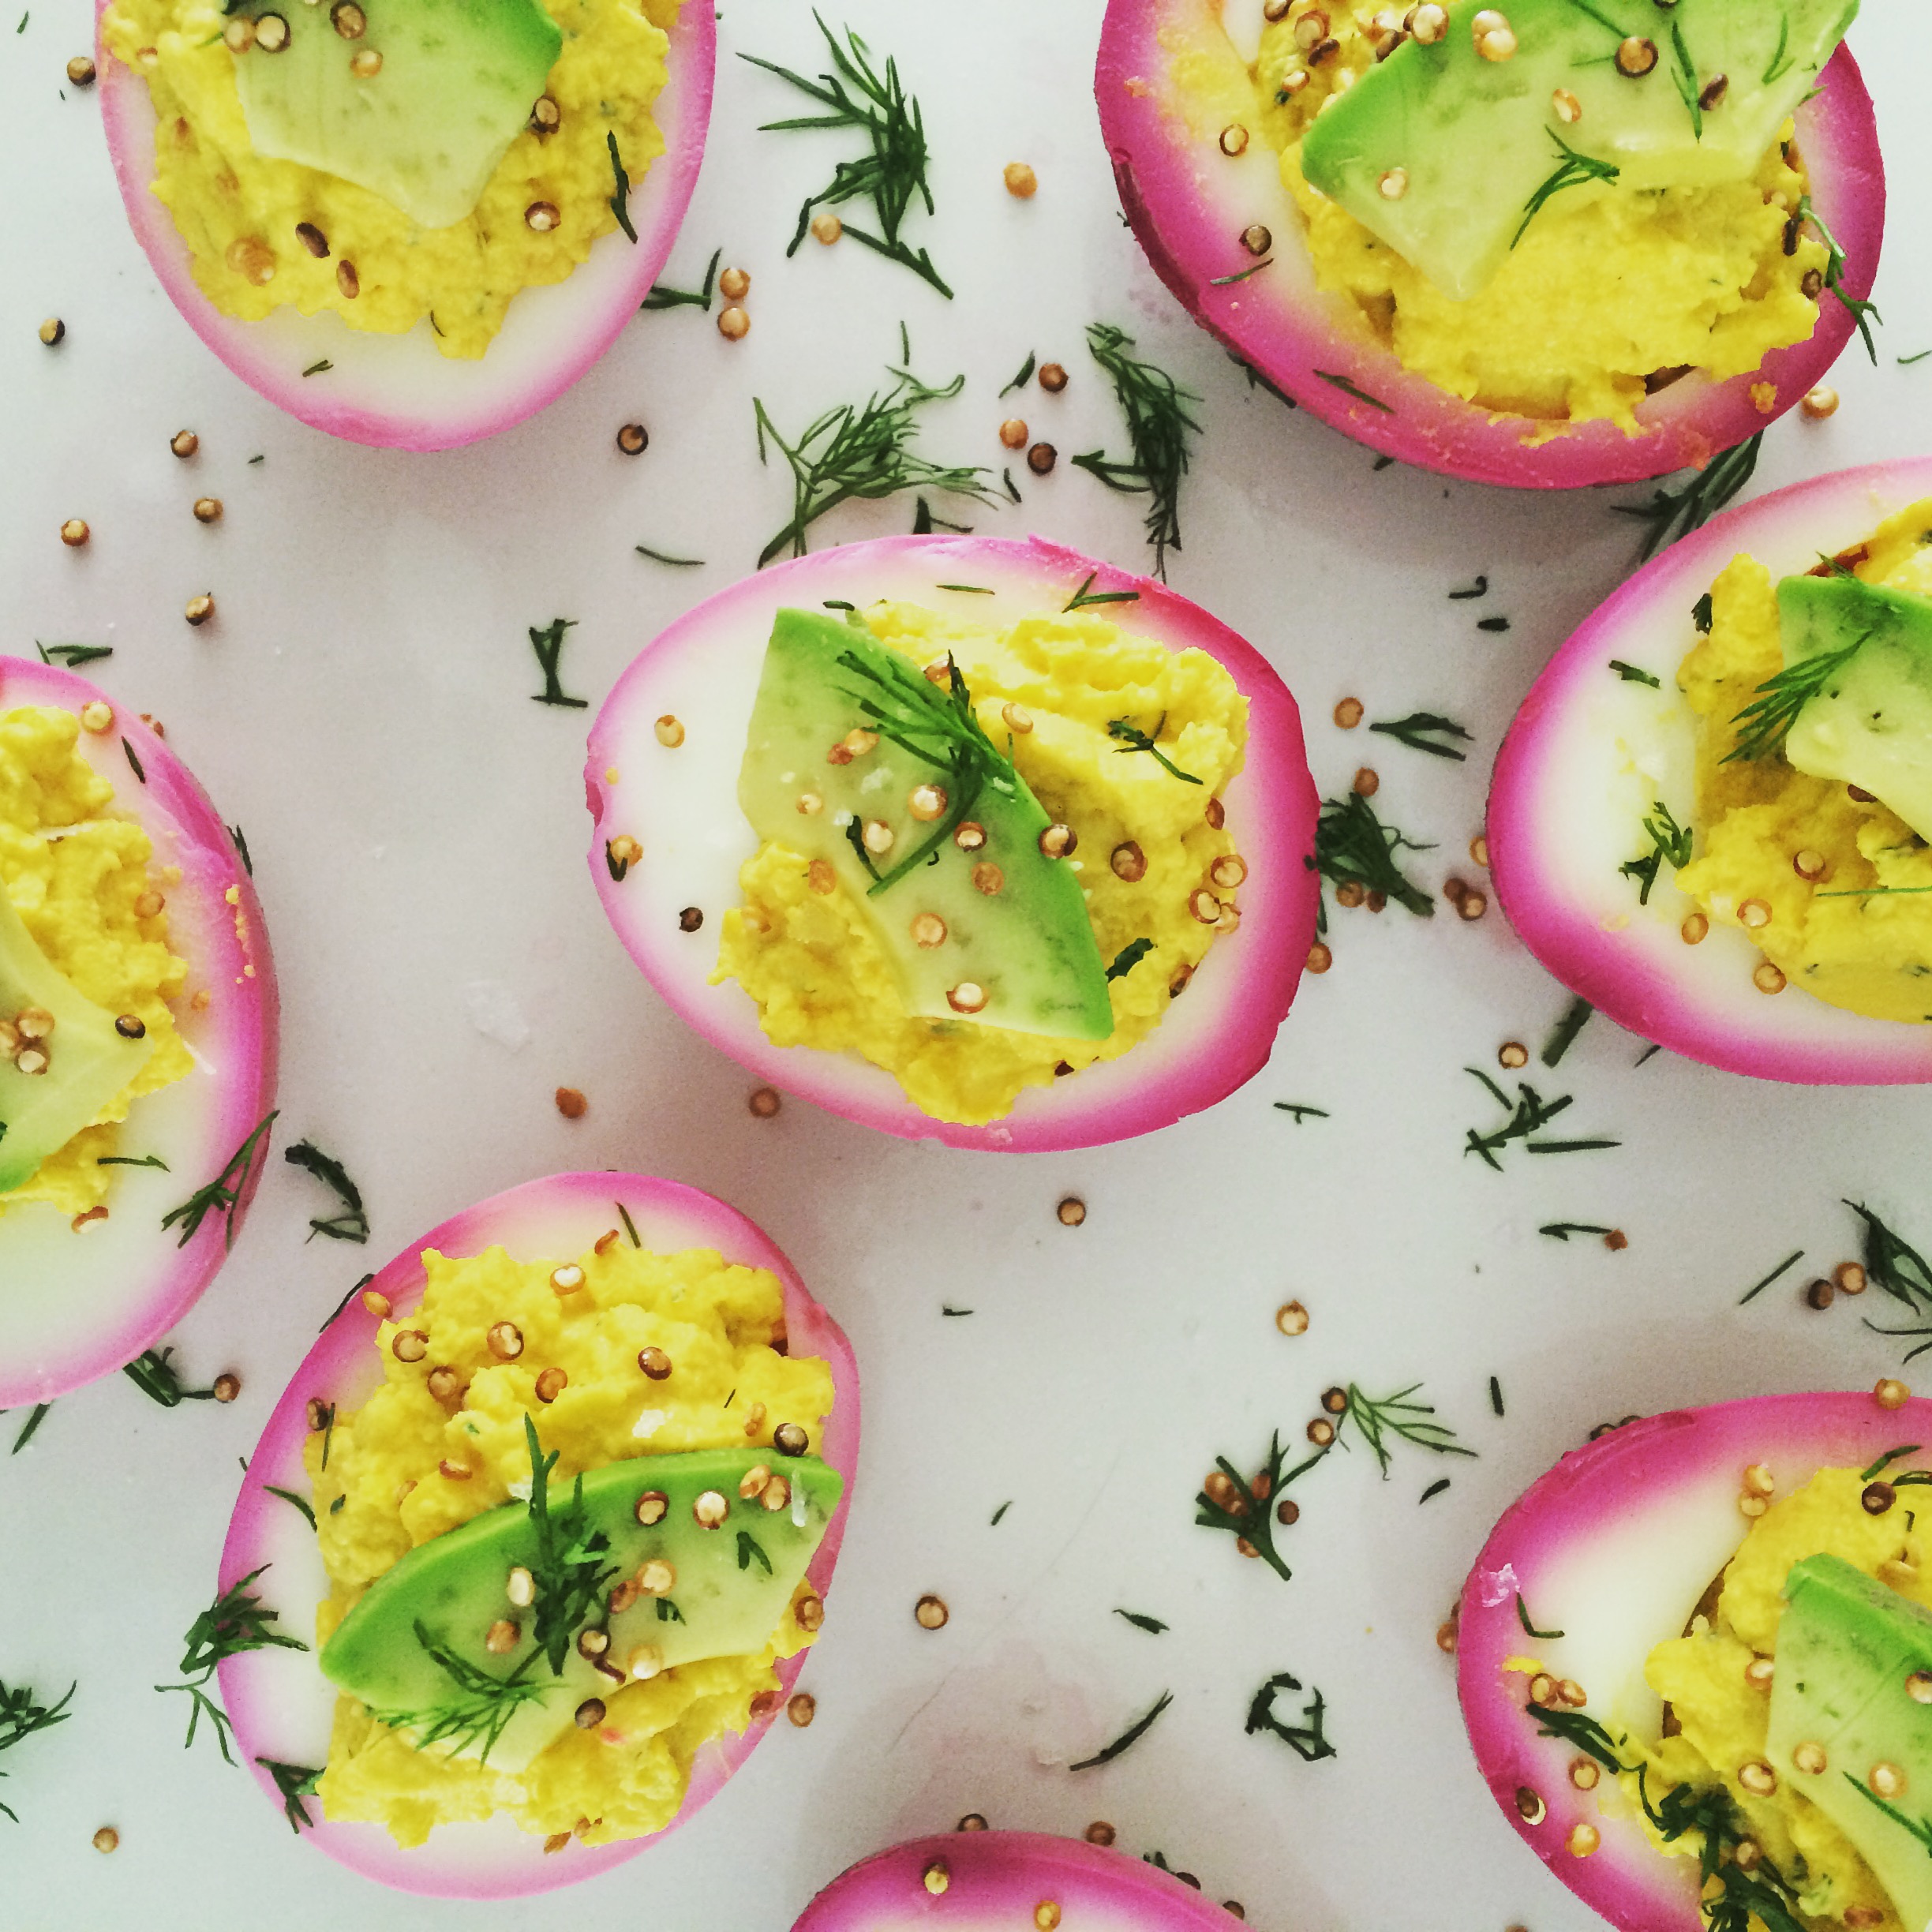
So I have a bit of a crush on the editors of Food52. It is a beautiful food site with a wealth of amazing food ideas. I always find myself learning a little something whenever I peruse their site, that is if I do not get sucked into browsing their gorgeous online shop. I was pumped to go to a free event with fellow foodie and blogger, Grace, at the Free Library of Philadelphia the other night that featured Merrill Stubb, co-founder of Food52, and Kristin Miglore, executive editor and the writer of their weekly Genius Recipes column. They were promoting their new book Food52: Genius Recipes. I honestly did not know too much about the book before going, but I left completely inspired (and still thinking that they have the coolest job ever and wish I had said coolest job).

The idea behind Genius Recipes is that each recipe features a little tip, technique, or ingredient combo that will really up your cooking game. They may seem a little odd at first and perhaps go against normal cooking rules, but then they totally, magically work. They discussed how lemon juice can turn cream into a magical dressing for figs, how salt on yogurt is their new go-to breakfast, and how cooking broccoli forever is actually not the worst idea ever.

This recipe is inspired by the recipe they discussed, Roy Finamore's Broccoli Cooked Forever. You can find the recipe in their new book, but it also here on their site. You blanch broccoli, add it to an olive oil, garlic, anchovy, and chile mixture, and simmer it on the stove, covered, for 2 hours. After 2 hours, you find murky green broccoli that they describe as a "miraculous substance" that can be smeared on bread, pureed in soup, tossed with pasta, or just eaten by itself. Supposedly all the cruciferous funkiness mellows and broccoli almost becomes a little sweet. Seems pretty awesome, right?

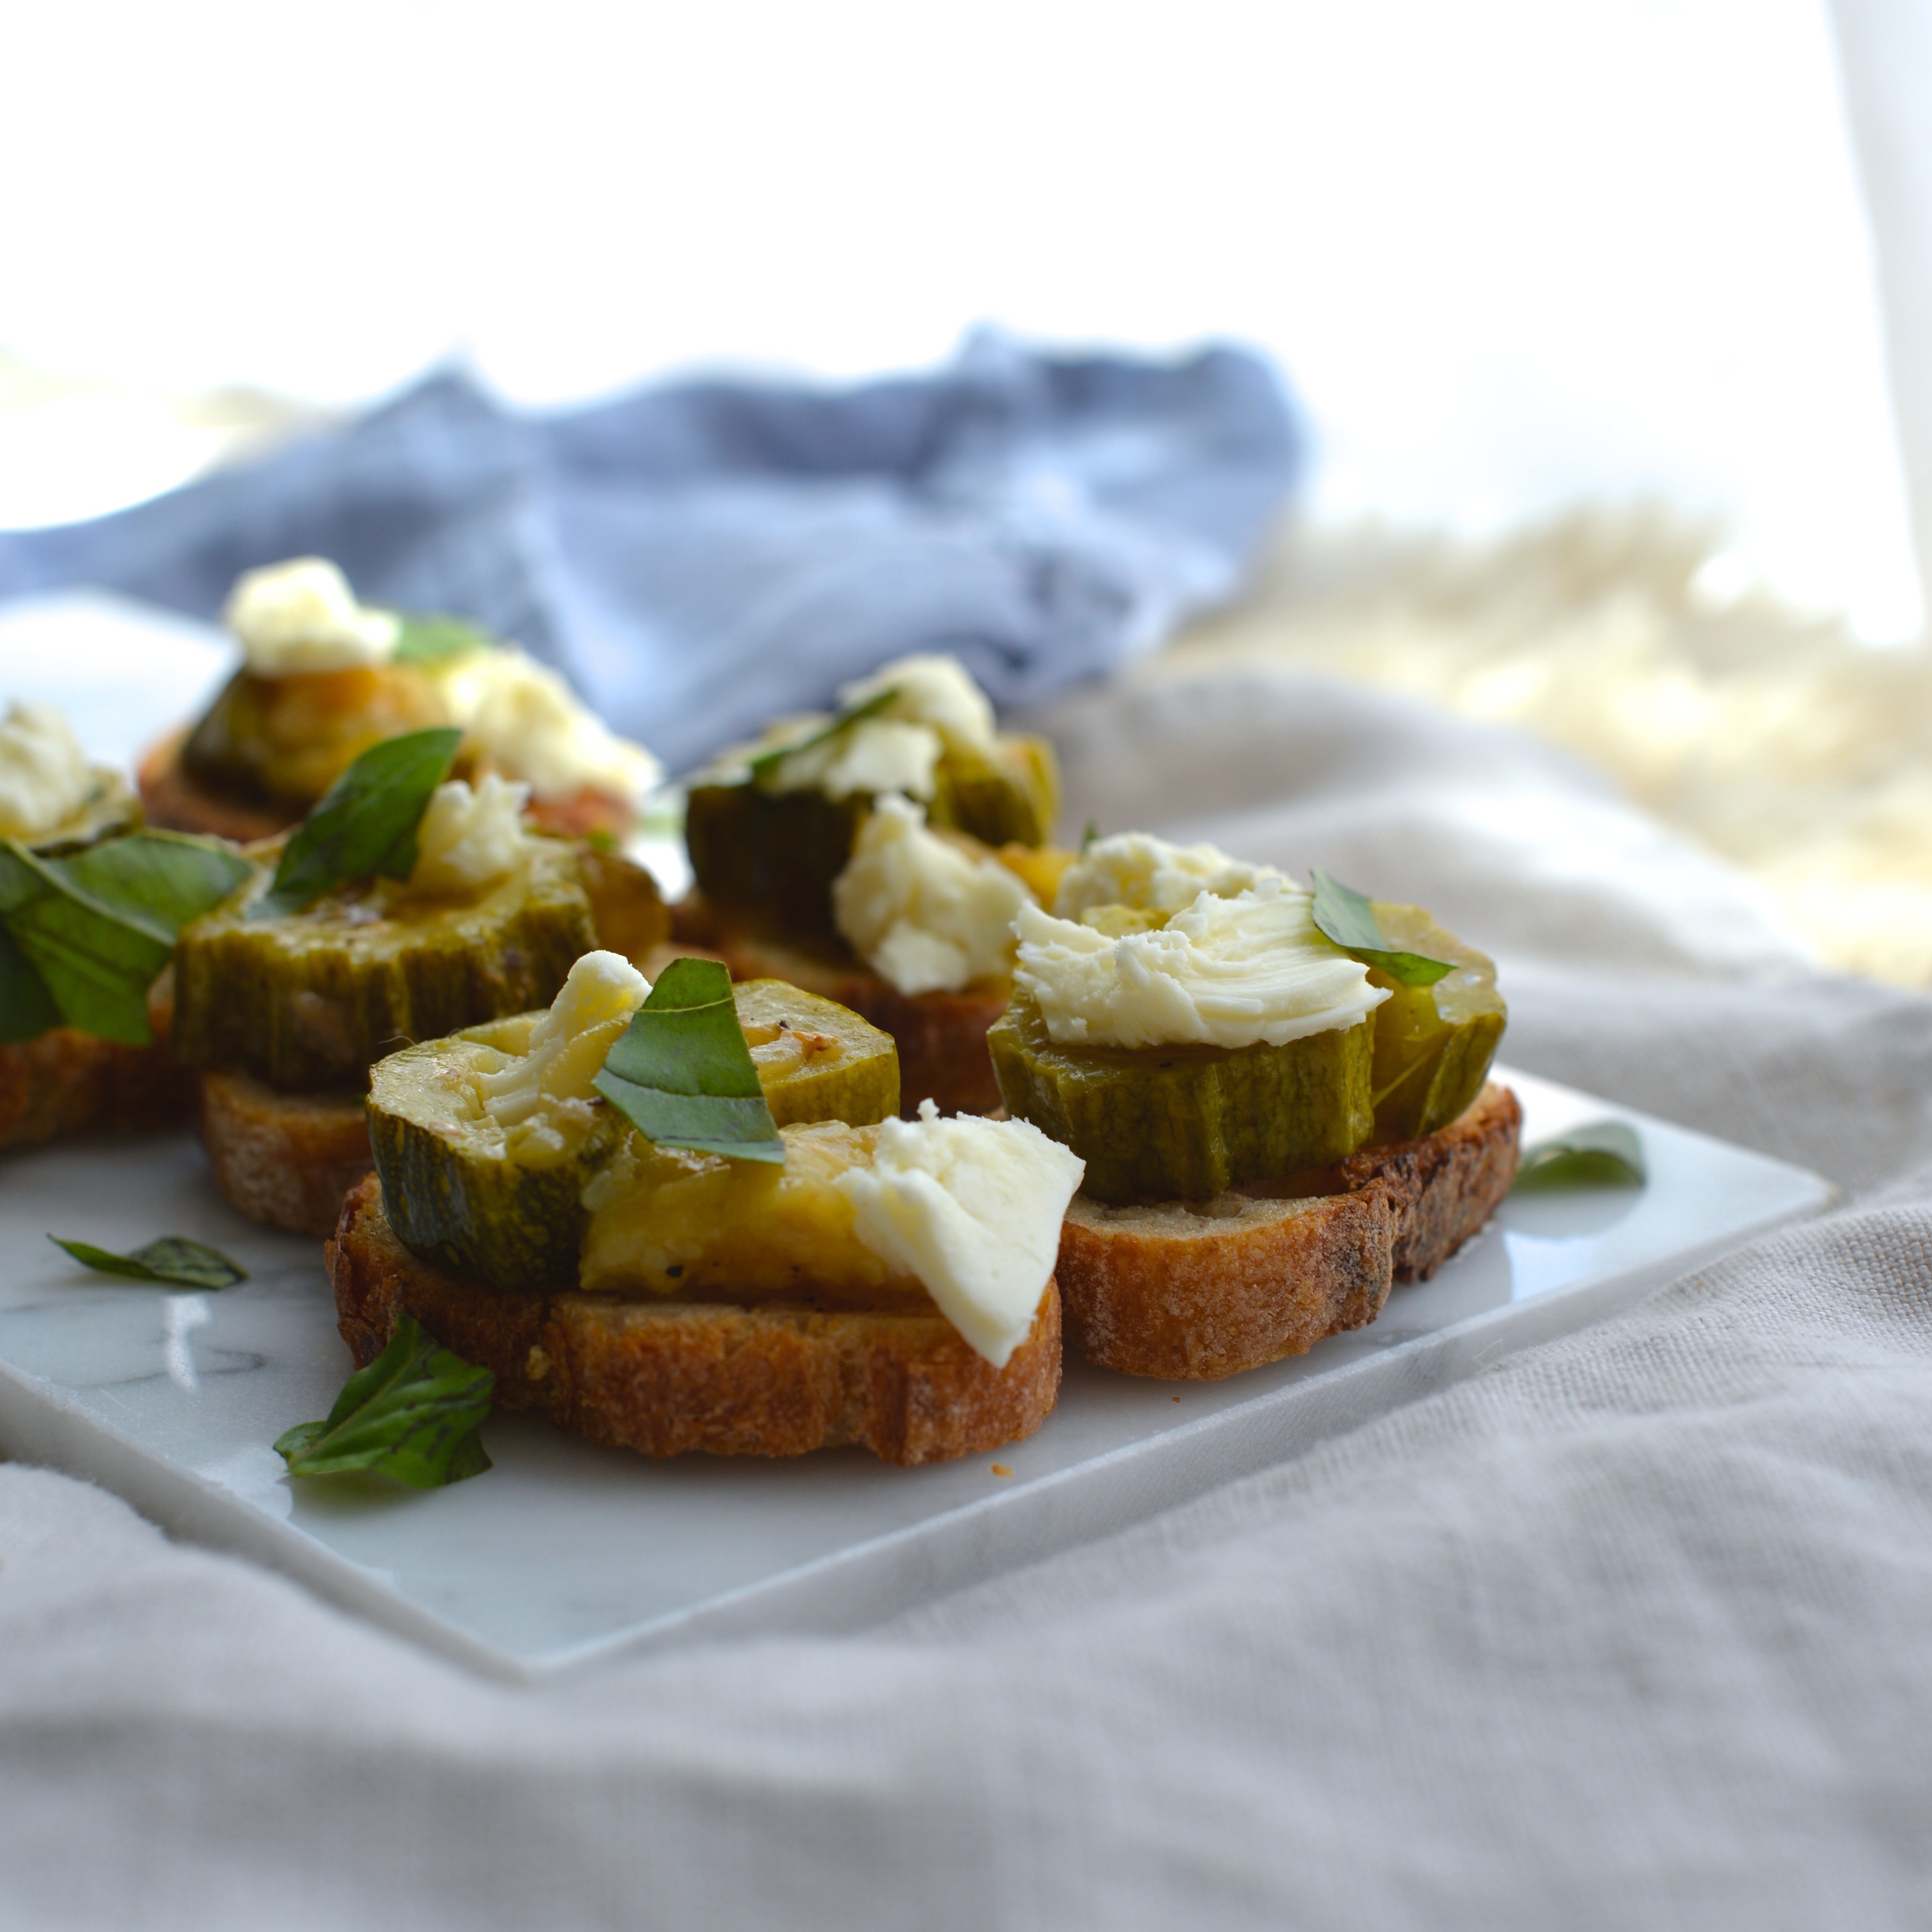
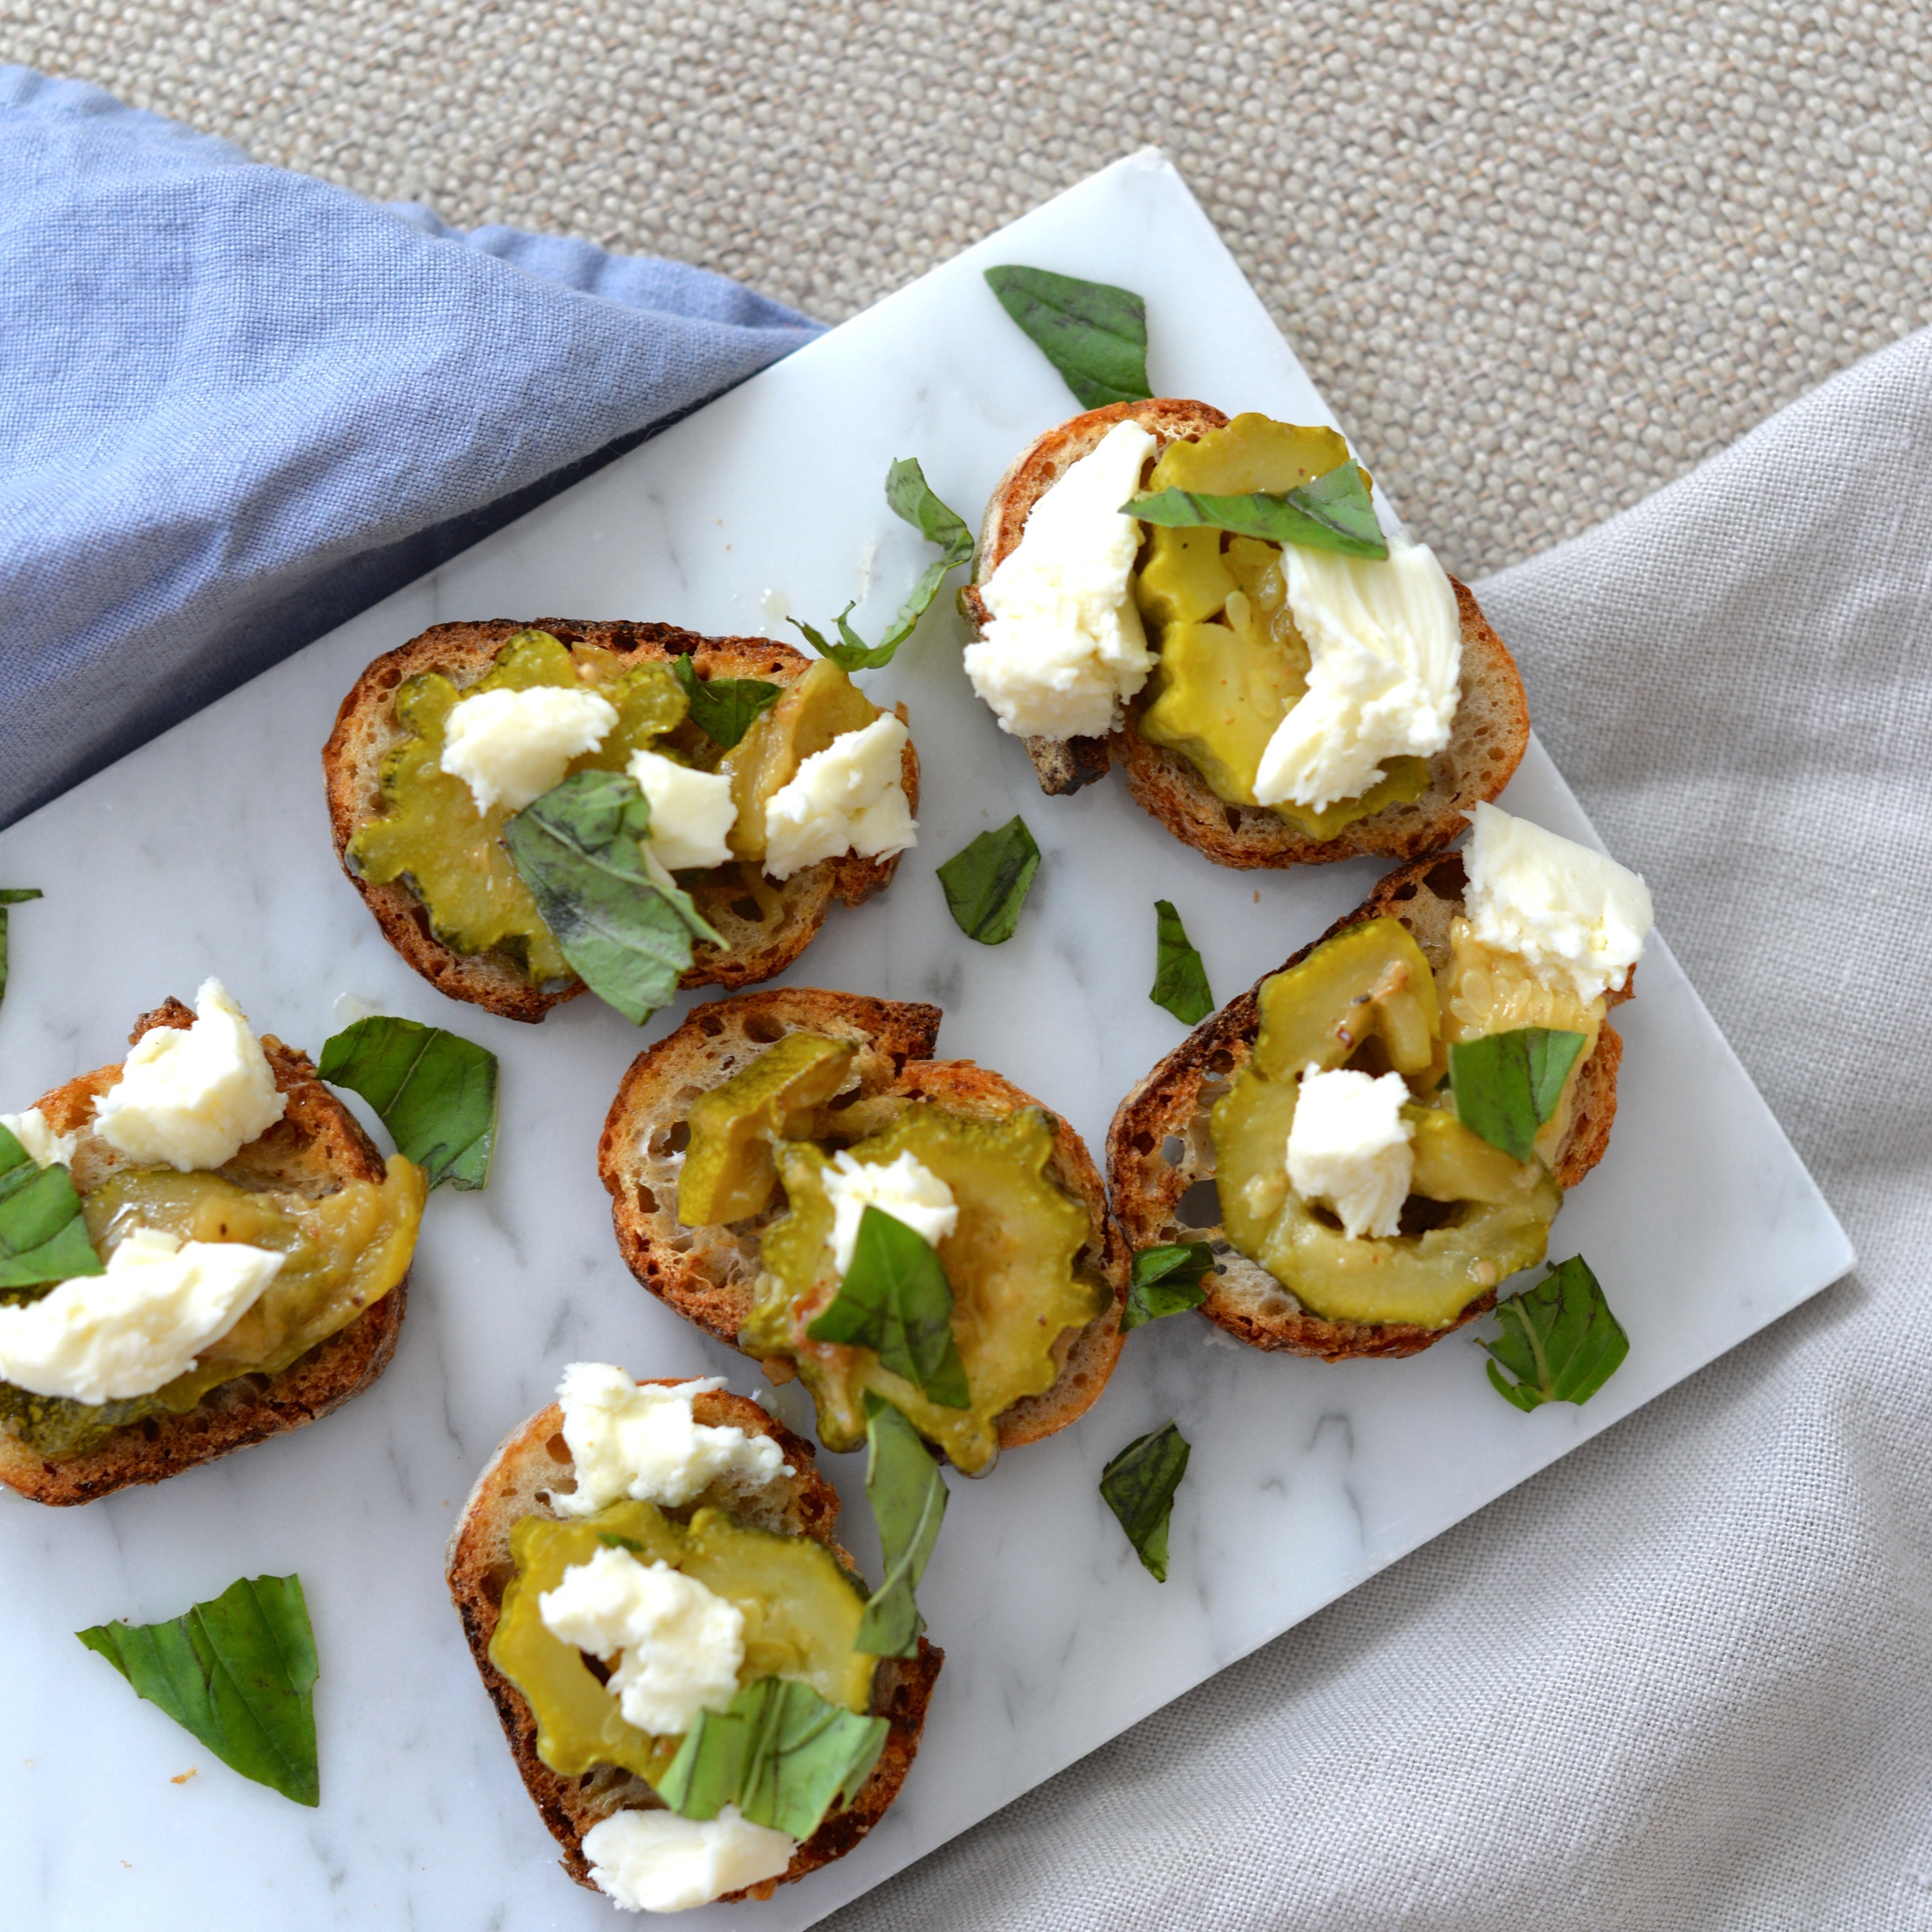
Considering I had no broccoli but loads of zucchini, I decided I would have to try this sort of vegetable "confiting" with my zucchini. And boy, is it delicious. And foolproof. And low maintenance. But also, a little ugly. This is most definitely one of those don't-judge-a-book-by-it's-cover recipes. It looks pretty anemic, but I promise that the flavor is not. I did not have any anchovies so I decided to mix in some miso paste instead, and I love the umami richness it gave. I let it cook for about 80 minutes, less time than the broccoli because it is a much softer vegetable. Because it cooked for so long though, the miso takes on a  bit of sweetness, too. You could make a big batch of this and find all sorts of uses for it. I served it on crostini here, but I tossed it in with some cooked brown rice and feta cheese a little later. And I'm planning on smearing it on a pizza before the summer ends.

And if you find this intriguing, check out Grace's beautiful rendition with summer greens from her backyard garden.

Zucchini Confit with Miso

1 1/4 pound zucchini, washed, dried, and cut into 1/2 inch rounds
1/2 cup olive oil
2 garlic cloves, peeled and thinly sliced
1/4 teaspoon chili flakes
1 teaspoon miso paste
salt and pepper, to taste

In a large bowl, use your fingers to smear the sliced zucchini pieces with the miso paste as best as you can. Heat the olive oil and sliced garlic over medium heat in a large skillet. When the garlic begins to sizzle, add the chili flakes. Add the coated zucchini pieces and a pinch of salt and stir to combine. Cover and reduce heat to very low. Cook for about 1 hour and 20 minutes, stirring every so often to distribute the zucchini, being careful not to mush zucchini. Remove from heat, uncover, and let cool. Add salt and pepper to taste. Enjoy warm, at room temperature, or slightly chilled. Makes about 2 cups.

DSC_0168.JPG
DSC_0174.jpg
DSC_0176.jpg
DSC_0206.JPG
DSC_0209.JPG
DSC_0369.jpg
In Appetizers, Side Dishes Tags zucchini, summer, vegetarian, vegan, appetizers, recipe
1 Comment

Magical Hummus

July 20, 2015 Emily Watson

Really delicious hummus is hard to come by. Mediocre hummus seems to be everywhere, taking up grocery store refrigerators and lounging in vegetable platters at barbecues and potlucks. The problem with most hummus dips is that they tend to be too thick and taste a bit tinny. One solution to this "tinny" problem is to cook your own chickpeas rather than rely on the canned version. If you have the time to cook your own chickpeas from the dried bean, it makes a world of difference. Every few weeks, I cook a large potful of chickpeas. I drain them, freeze them in a single layer on a baking sheet, and then pour them into a freezer bag for easy scooping into recipes. To thaw, I just pour hot water over them and let them sit for a few minutes. This method is even easier than using the canned version once you get used to it.

The canned chickpea problem solved, the other problem is often the texture of the hummus is way too dense. I like a smooth, pillowy hummus, almost fluffy. I find that a generous amount of tahini whipped into hummus can help achieve this fluffiness while adding a rich flavor. Yotam Ottolenghi's homemade hummus, one of my favorites, for example, has just under 1/4 cup of tahini per 1 cup of chickpeas. My favorite hummus here in Philadelphia is Michael Solomnov's hummus. He even has a whole restaurant devoted to hummus, called Dizengoff. I have a feeling that the ratio of tahini to chickpeas in his version is fairly high as well since it taste prominently of sesame.

This magical version has a surprise ingredient that gives this hummus a luscious texture that does not sacrifice on flavor. It takes a few notes from a hummus that appears on the amazing Food52 website in their Genius Recipes column. It was inspired by a recipe from Tara Duggan who wrote Root to Stalk Cooking and draws from other recipes like babaganoush and roasted red pepper spread that use softened vegetables as their base.

The original recipe calls for no chickpeas- just Swiss chard stems, garlic, olive oil, tahini, salt, and lemon juice, but I think that chickpeas are a must if you are going to call it hummus. I also like the extra bulk and protein they provide. And again, if you manage to cook your own chickpeas, even better. I also add lemon zest and an extra garlic clove because I like the zing they both give. I love that I have a new use for my chard stems- not just in pickled form! 

Magical Hummus

1 pound Swiss chard stalks, washed and chopped (I used rainbow chard)
1/2 cup cooked chickpeas
2 small garlic cloves, peeled
1/4 cup tahini (sesame paste)
1 lemon, zested and juiced
1/4 cup extra-virgin olive oil
1/2 teaspoon salt, plus more to taste

Bring a large pot of water to boil over high heat. Add the chopped chard stems, and cook for 15-20 minutes over medium heat or until chard stems are very tender. Remove from heat and drain.

In a food processor, combine chard stems and remaining ingredients. Process until smooth consistency is reached. Add more salt as necessary. Drizzle with a little extra-virgin olive oil before serving. Enjoy! Makes a little over 1 cup.


DSC_0271.JPG
DSC_0277.jpg
DSC_0286.jpg
In Appetizers, Spreads Dips Sauces Tags vegetarian, vegan, spreads, chickpeas, tahini, swiss chard, appetizers, gluten-free, recipe
Comment

Cucumber and Avocado Crisps with Edamame and Goat Cheese Spread

May 27, 2015 Emily Watson

Crispy cucumber and creamy avocado come together on this little crisp for a delightful bite. I love the combination in sushi and grain salads, but wanted another way of enjoying it, especially as a snack or appetizer for a party. The edamame and goat cheese spread does two things for this crisp. One, it helps the cucumber and avocado adhere to the base, and two, it offers a perfect tang and a little touch of protein to make this even more satisfying.

I grate a hard-boiled egg on top because I happen to love avocado and egg, and it leaves a pretty cool color blast, but if you are not in an egg mood, leave it off! I used the mini Persian cucumbers because they are small, crisp, and thin-skinned. If using regular American cucumbers, you may want to peel, halve, and de-seed before thinly slicing, and if using a seedless English cucumber could be halved before thinly slicing. I also used crisp breads that I had on hand, but crackers, crostini, toasted pita or any sturdy, toasted bread would work beautifully. The quantities needed for these will vary by which type of bread you use and how big your vegetables are, but this gives a general idea of what worked for me.

Cucumber and Avocado Crisps with Edamame and Goat Cheese Spread

1-2 Persian (mini) cucumbers, thinly sliced
1/2 avocado, peeled, pitted and thinly sliced
6 long flatbreads, 12 slices baguette toasted, or 12 small-medium size crackers
Edamame and Goat Cheese Spread (recipe here)
salt, for sprinkling
1 hard-boiled egg*, grated, for sprinkling (optional)

Spread the bread or cracker of choice with a layer of the edamame and goat cheese spread. Alternate slices of cucumber and avocado on top. Sprinkle with salt, and grated hard-boiled egg, if using. Enjoy! Makes 6-12 pieces, depending on the bread used.

* To hard-boil eggs: Place eggs in a pot and cover with water. Place over high heat until water just starts to boil. Remove pot from the heat, cover with the lid, and set the timer for 9 minutes. Immediately remove the eggs from the water, and place in a bowl of ice water. Allow to cool before peeling. For an easier way to peel eggs, check out this recipe.

IMG_6771.JPG
In Appetizers, Snacks Tags recipe, goat cheese, edamame, crostini, cucumber, avocado, vegetarian, spring
2 Comments

Pickled Deviled Eggs with Dill and Crispy Quinoa

May 1, 2015 Emily Watson

I grew up with deviled eggs making an appearance at least once a week in our house. They were always a little different, depending on the mood of our babysitter, Louise, that week. Sometimes the filling was a tad runny, sometimes it packed a bit more of a mustard punch, sometimes there was relish involved. Louise never really measured anything, but after watching her enough times, I figured out the basic idea of deviled egg-making. Hard-boil some eggs, mash the yolks with mayonnaise, mustard- she used yellow mustard, salt, pepper, maybe a little Mt. Olive relish. Taste and adjust. Fill the egg whites up and sprinkle with a healthy dose of paprika to make them pretty.

My version is a tad more refined and geared towards spring, but I promise the extra work is worth it. Maybe you do not choose to pickle the eggs or make the crispy quinoa topping, and that is absolutely okay. The filling is still bright and creamy, and you will still get a delicious deviled egg.

Pickling the eggs is optional, but it not only creates a beautiful color, but it also gives the egg a meatier texture and a zing. I use plain Greek yogurt in place of the more traditional mayo to fluff the filling. Fresh dill pairs nicely with the lemon and just makes me think of pickles, but leave it out if you wish. A sliver of avocado gives additional richness and toasted quinoa acts like a crunchy breadcrumb. These eggs can be made a day before, but if you are pickling them, be sure to start that process at least 8 hours before hand so that the pink color has a chance to penetrate the whites. These would make a fantastic spring party appetizer either for the Kentucky Derby or Mother's Day maybe?

The pickling of the eggs is based very loosely on the Beet Pickled Eggs at Cookistry. I used a few different spices and just one beet to get the hue because I know how one beet can give off a tremendous amount of color. Beet stains on hands for days, anyone? The crispy quinoa is adapted from a Real Simple magazine recipe.

Pickled Deviled Eggs with Dill and Crispy Quinoa

4 beet-pickled hard-boiled eggs, see recipe below, or just 4 hard-boiled eggs, peeled
3 tablespoons 2% plain Greek yogurt (Fage is my favorite brand)
2 teaspoons Dijon mustard
3 tablespoons fresh dill, finely chopped, divided
zest of 1/2 lemon
1 teaspoon sea salt + more for sprinkling on at very end
1/4 avocado, thinly sliced, for garnish
crispy quinoa, see recipe below (optional)

Slice the hard-boiled eggs in half length-wise. If using beet-pickled eggs, have a towel nearby so you do not stain your hands. Carefully spoon out the yolks and place in a small bowl. Add the yogurt, mustard, 2 tablespoons of fresh dill, lemon zest, and salt. Mash everything together with a fork until smooth and creamy.

Fill the egg whites up with heaping spoonfuls of the yolk mixture. Place a sliver of avocado on top of each half, sprinkle with remaining fresh dill, crispy quinoa, if using, and a little sprinkle of sea salt. Enjoy! Makes 8 deviled egg halves.

IMG_5928.JPG
IMG_5933.JPG
IMG_5943.JPG
IMG_5951.JPG
IMG_6068.JPG

Beet-Pickled Eggs

4 eggs
1 beet, peeled and chopped into 1-inch pieces
1 cup water
3/4 cup apple cider vinegar
1 bay leaf
1 inch piece of ginger, peeled and sliced into 3 pieces
1/4 teaspoon mustard seeds
3/4 teaspoon salt

Hard-boil the eggs. Place the eggs in a pot and add water to cover by 2 inches. Bring the water to a boil, cover with a lid, and remove pot from the heat. Allow eggs to sit 9 minutes. Immediately drain and rinse with cold water. Place eggs in a bowl of ice water and allow to cool. Peel the eggs carefully. I use a spoon to slip under the thin skin just beneath the shell to slide the shell off. Set eggs aside.

Cook the beet. Add the beet to a small pan with about an inch of water. Cover the pot and allow beet to steam on medium-high heat for about 15-20 minutes or until beet is tender. Drain and place the beets in a clean glass jar that is large enough to hold the eggs. Add the eggs on top of the beets.

Make the pickling mixture. Add the water, vinegar, bay leaf, ginger, mustard seeds, and salt to a pot. Bring to boil and then turn off heat and allow to cool to room temperature.

Add the pickling mixture to the beets and eggs in the glass jar. If the eggs are not covered with liquid, add a little water to the jar or stir to rearrange the eggs so that they are covered. Place in the refrigerator and allow to pickle for at least eight hours. Remove from mixture and allow to drain prior to making deviled eggs.

IMG_5792.JPG
IMG_5791.JPG
IMG_5793.JPG
IMG_5797.JPG
IMG_5789.JPG
IMG_5802.JPG

Crispy Quinoa

1/4 cup quinoa
1/4 cup water
1 tablespoon olive oil
1/4 teaspoon salt

Add all ingredients to a non-stick skillet. Heat over medium heat and cook until water evaporates and quinoa begins to toast. Stir often until quinoa is golden brown. Mine took 15 minutes. Remove to drain on a paper towel. Make about 1/3 cup of toasted quinoa which can be used in numerous recipes.

IMG_5825.jpg
In Appetizers Tags eggs, vegetarian, dill, spring, quinoa, recipe, appetizers, yogurt, gluten-free
1 Comment

Endive with Pear, Feta, and Walnut Relish

March 30, 2015 Emily Watson

I am excited to share with you some bits and pieces of my latest travels to southern California! In the meantime, I'll share with you a pretty dish that works well as the weather starts to warm up and we say goodbye to winter. These little leaves take a few cues from the classic cheese plate, where it's not just about the rich and salty cheese, but all of the accoutrements that come with it- the thinly sliced fruits, crunchy toasted nuts, and sweet and floral honey drizzles. I chose feta not only because it's easy to find but because it packs a clean salty punch. I'm sure goat cheese would work wonderfully, though. I chose pear versus apple because it's a bit softer in texture and does not compete with the crunch of the walnuts. Endive, as delicate of a vegetable as it is, proves sturdy enough to hold this delicious relish. These make perfect appetizers as you can make them a few hours ahead of time. They are also delicious served atop a simple salad of mixed greens. I hope you enjoy!

Endive with Pear, Feta, and Walnut Relish

2 endive heads
1/2 pear, diced (I used a Comice pear because it's particularly sweet and juicy)
1/3 c. crumbled feta cheese**
1/3 c. walnuts
Zest and juice of 1/2 lemon
Local honey, for drizzling
Extra-virgin olive oil, for drizzling
Good quality thick balsamic vinegar, for drizzling (optional)

Toast the walnuts in an oven at 400 degrees Fahrenheit or in a dry skillet on the stove-top for 8-10 minutes or until golden. Remove from heat, allow to cool, and roughly chop.

In a medium bowl, mix the diced pears with freshly crumbled feta, and the zest and juice of 1/2 lemon.

IMG_3357.jpg
IMG_3359.jpg

Trim about 1/2 inch from the bottom of each endive head. Remove the outer leaves, one by one, and place on a platter. Fill each leaf with a bit of the feta and pear filling. Sprinkle chopped walnuts over top, and drizzle with local honey and extra-virgin olive oil and if available, a little balsamic vinegar. Enjoy!

IMG_3358.jpg
IMG_3360.jpg
IMG_3362.jpg
IMG_3363.jpg

Makes 16-20 bites, depending on the size of the endive.

**I prefer to buy feta in the blocks and crumble myself. I find that pre-crumbled feta is often drier and less flavorful.


In Appetizers Tags recipe, endive, feta, walnuts, pears, vegetarian
Comment
← Newer Posts Older Posts →
Hi! I'm Emily. I love to cook whole, nourishing foods, and this is where I share my kitchen experiments and sometimes a little bit of life.

Hi! I'm Emily. I love to cook whole, nourishing foods, and this is where I share my kitchen experiments and sometimes a little bit of life.

Featured
  • July 2017
  • May 2017
  • April 2017
  • March 2017
  • February 2017
  • January 2017
  • December 2016
  • November 2016
  • October 2016
  • September 2016
  • August 2016
  • July 2016
  • June 2016
  • May 2016
  • April 2016
  • March 2016
  • February 2016
  • January 2016
  • December 2015
  • November 2015
  • October 2015
  • September 2015
  • August 2015
  • July 2015
  • June 2015
  • May 2015
  • April 2015
  • March 2015
  • February 2015

  • Appetizers 18
  • Breakfast 18
  • Life 4
  • Mains 39
  • Miscellaneous 2
  • Salads 21
  • Sandwiches 6
  • Side Dishes 8
  • Smoothies 4
  • Snacks 10
  • Soups 14
  • Spreads Dips Sauces 5
  • Sweets 6
  • Vegetarian 1

  • almonds
  • appetizers
  • autumn
  • avocado
  • breakfast
  • brown rice
  • chickpeas
  • chocolate
  • cilantro
  • coconut
  • coconut milk
  • fall
  • gluten-free
  • kale
  • lentils
  • make ahead
  • mint
  • oatmeal
  • recipe
  • salad
  • snack
  • soup
  • spring
  • summer
  • sweet potatoes
  • tahini
  • vegan
  • vegetarian
  • walnuts
  • winter

subscribe

Sign up with your email address to receive new posts directly

We respect your privacy.

Thank you!

All photographs, recipes and content are property of Nourishing Matters, unless otherwise noted. Please do not redistribute without my permission. Thank you!

Powered by Squarespace