• Home
    • About Nourishing Matters
    • About Emily
    • Frequently Asked Questions
  • Recipes
    • Offerings
    • Past Programs and Events
    • Experience and Teaching Style
    • Articles and Features
    • Travel
Menu

nourishing matters

Street Address
City, State, Zip
Phone Number
where wholesome meets delicious

Your Custom Text Here

nourishing matters

  • Home
  • About
    • About Nourishing Matters
    • About Emily
    • Frequently Asked Questions
  • Recipes
  • Work with Me
    • Offerings
    • Past Programs and Events
  • Yoga
    • Experience and Teaching Style
  • Press
    • Articles and Features
  • Adventures
    • Travel

Pork Carnitas Tacos with Pineapple Relish

May 2, 2015 Emily Watson

Pork carnitas have been somewhat of an elusive thing to me in the kitchen. They have always seemed like the perfect dish to serve at a big group dinner or at a Cinco de Mayo fiesta, but I had trouble executing carnitas that I was proud of serving. In my previous efforts to make them, the results ranged from fairly bland to too tough to too greasy. When I stumbled upon a recipe for Carnitas Tacos in Philadelphia's March issue of Grid Magazine, I was once again inspired to give them another go. I was skeptical that I would get enough flavor without browning the onions or the meat first, instead just dumping everything in a pot and leaving it alone for almost 4 hours. And the result? Melt in your mouth, flavorful pork that rivaled any carnitas that I have eaten in any Mexican place.

I modified a quite things in the recipe after making it once, but the method and basic ingredients were pretty consistent with the recipe I found. On the second go around, I toasted the spices before grinding them, used chipotle chili powder instead of regular chili powder (and more of it), decreased the cinnamon, used apple cider vinegar and water instead of apple cider, seared the meat a little before shredding for tacos since not enough liquid had evaporated, and served it with a bright pineapple relish and avocado instead of a chile sauce that was recommended. The recipe I have written below reflects those changes.

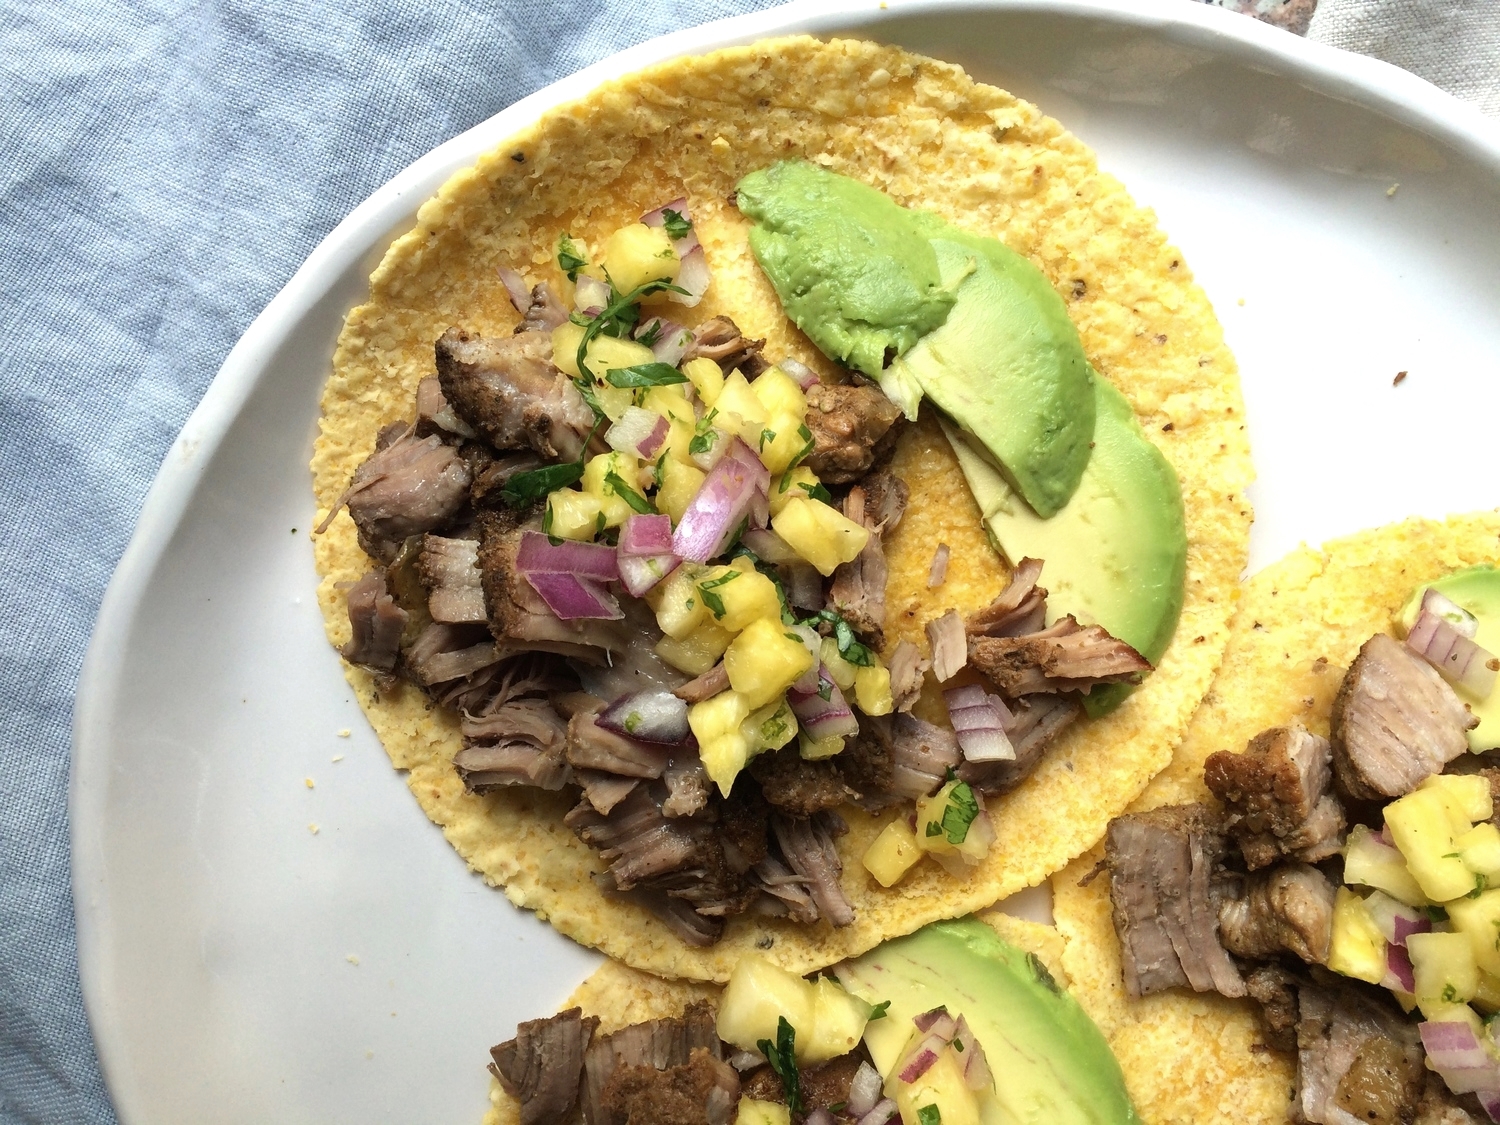
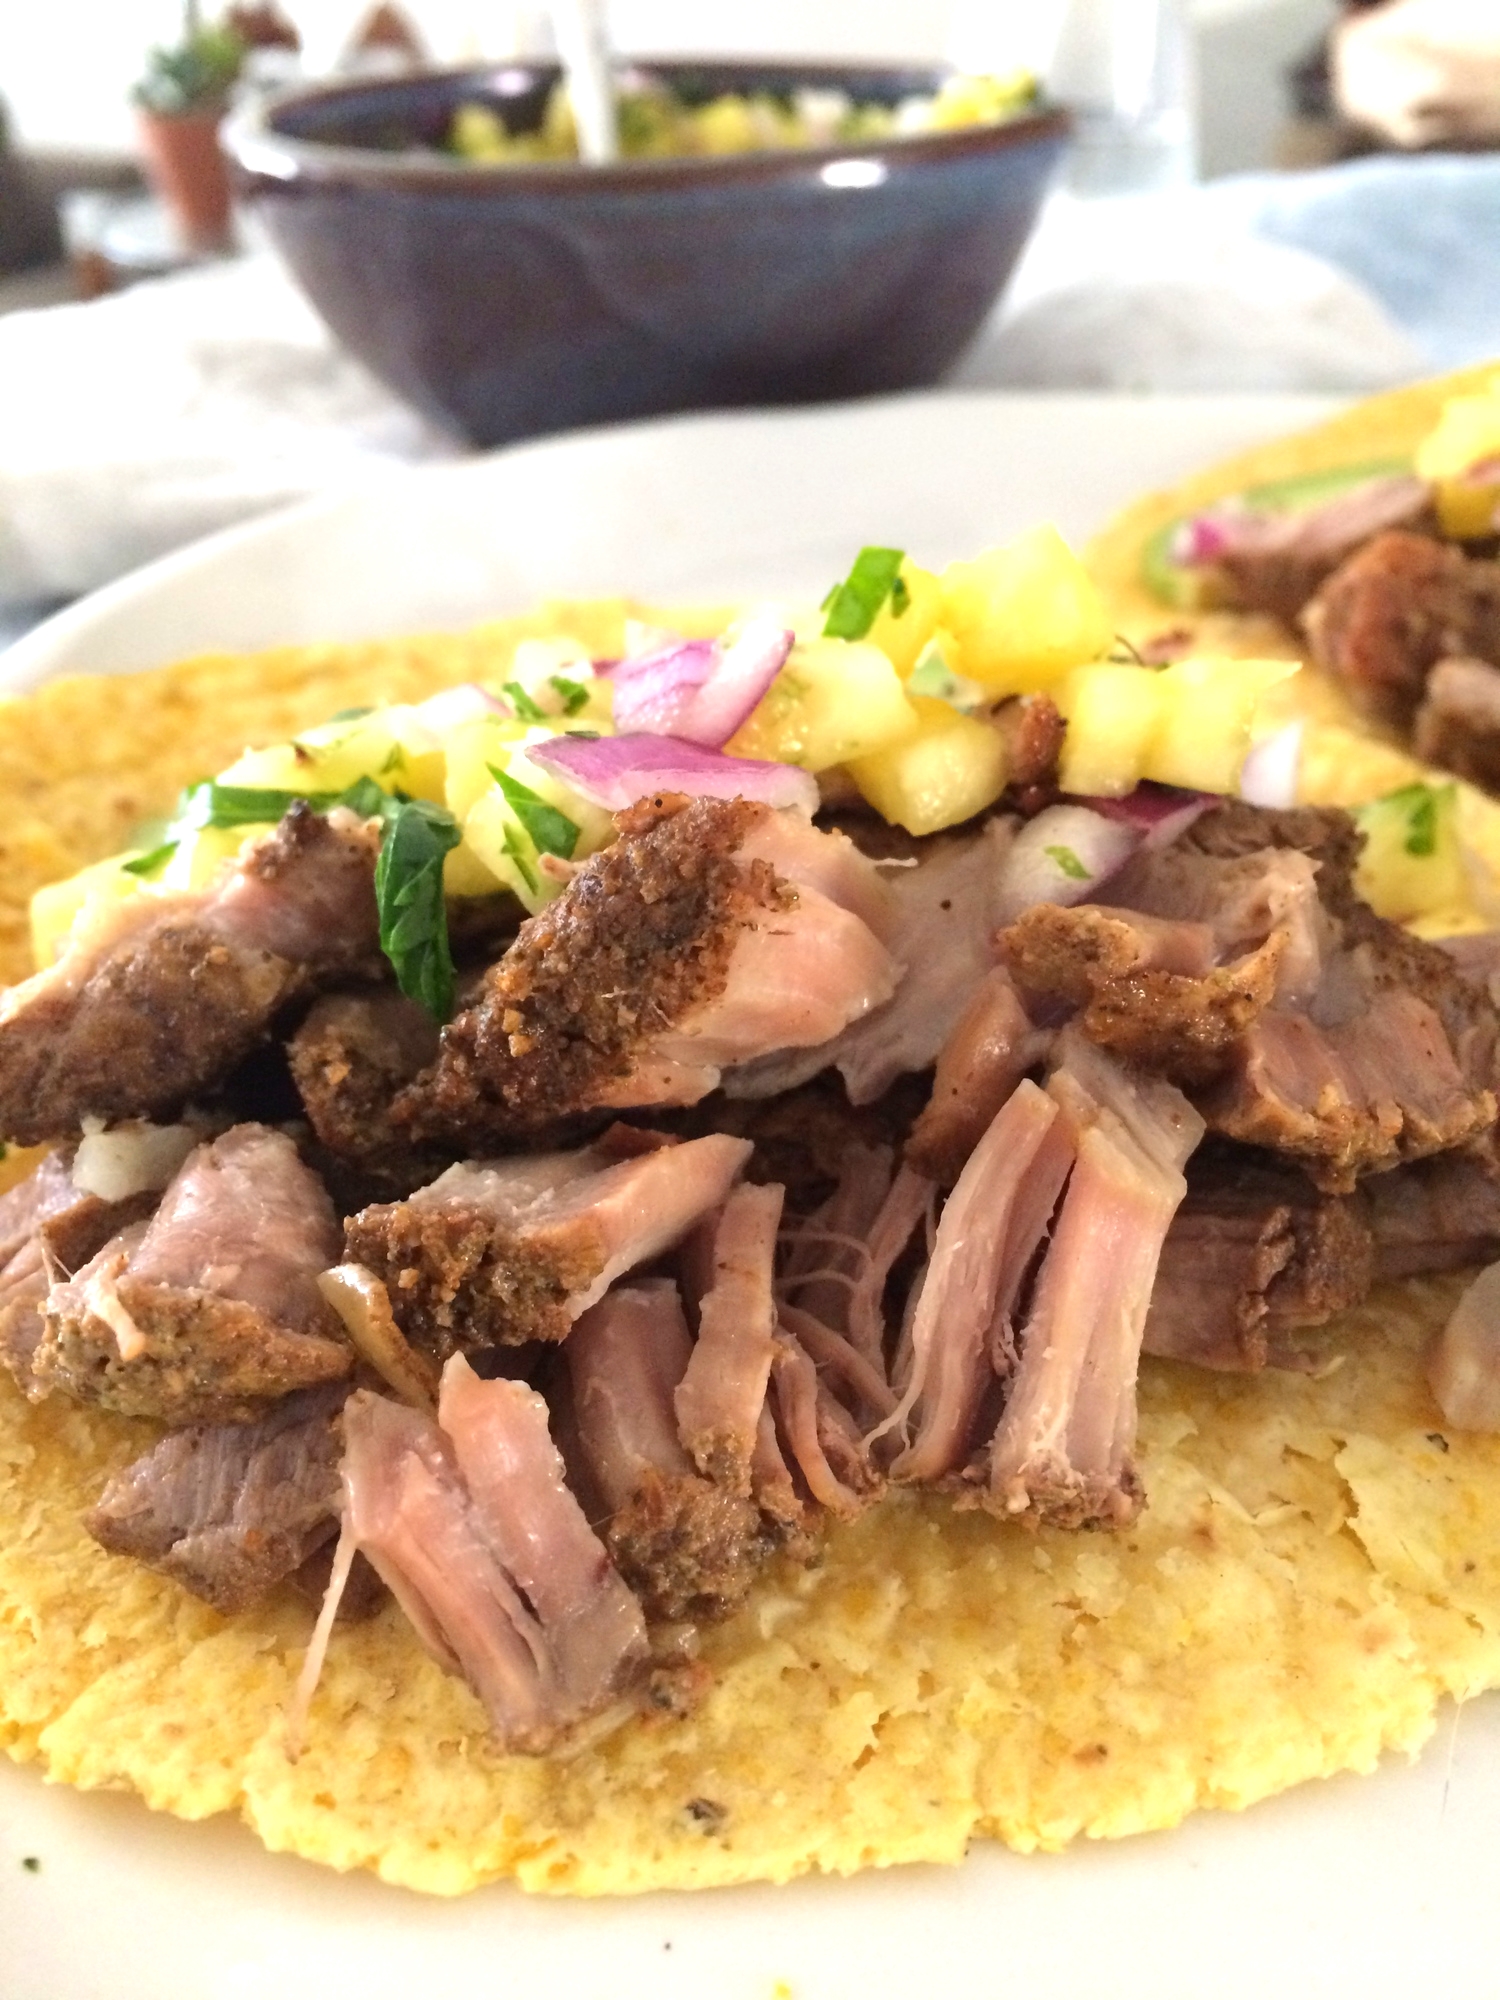
You can easily make the pork a day or two before and allow it to rest in its cooking liquid until you are ready to serve. If you are going to freeze cooked carnitas, I recommend storing it in a little bit of its cooking liquid to prevent it from drying out. Once ready to serve, remove the chunks of meat from the liquid and heat it in a well-oiled cast iron skillet until just a little brown on the edges. Pull it apart with a fork or your fingers (if it has not already fallen apart) and serve with soft, warm corn tortillas, a little pineapple relish, and avocado slices.

Pork Carnitas Tacos with Pineapple Relish

Carnitas:
3 1/2 lb. pork shoulder, excess fat trimmed and cut into 2-inch cubes
1 medium onion, peeled and chopped
8 cloves garlic, peeled and smashed
1 tablespoon cumin seeds
1 tablespoon dried oregano or marjoram
1/2 teaspoon ground cinnamon
1 1/2 teaspoons chipotle chili powder
1 tablespoon salt
1 orange, zest removed in thick strips with a vegetable peeler
2 bay leaves
1/2 cup apple cider vinegar
2- 2 1/2 cups water

Pineapple Relish:
1/2 pineapple, outer layer removed and yellow flesh finely diced
1 small red onion, peeled and finely diced
1 lime (1/2 teaspoon zest + juice)
3 tablespoons finely chopped fresh cilantro
sprinkle of salt

For serving:
Corn tortillas, warmed to soften
Avocado, cut into slices
Cilantro
Lime wedges

Toast the spices. In a small skillet, toast the cumin seeds for 2-3 minutes over medium-low heat until they slightly darken and begin to release their aroma. Add the oregano, cinnamon, and chili powder and cook for 30 seconds or until they can be smelled. Remove from heat.

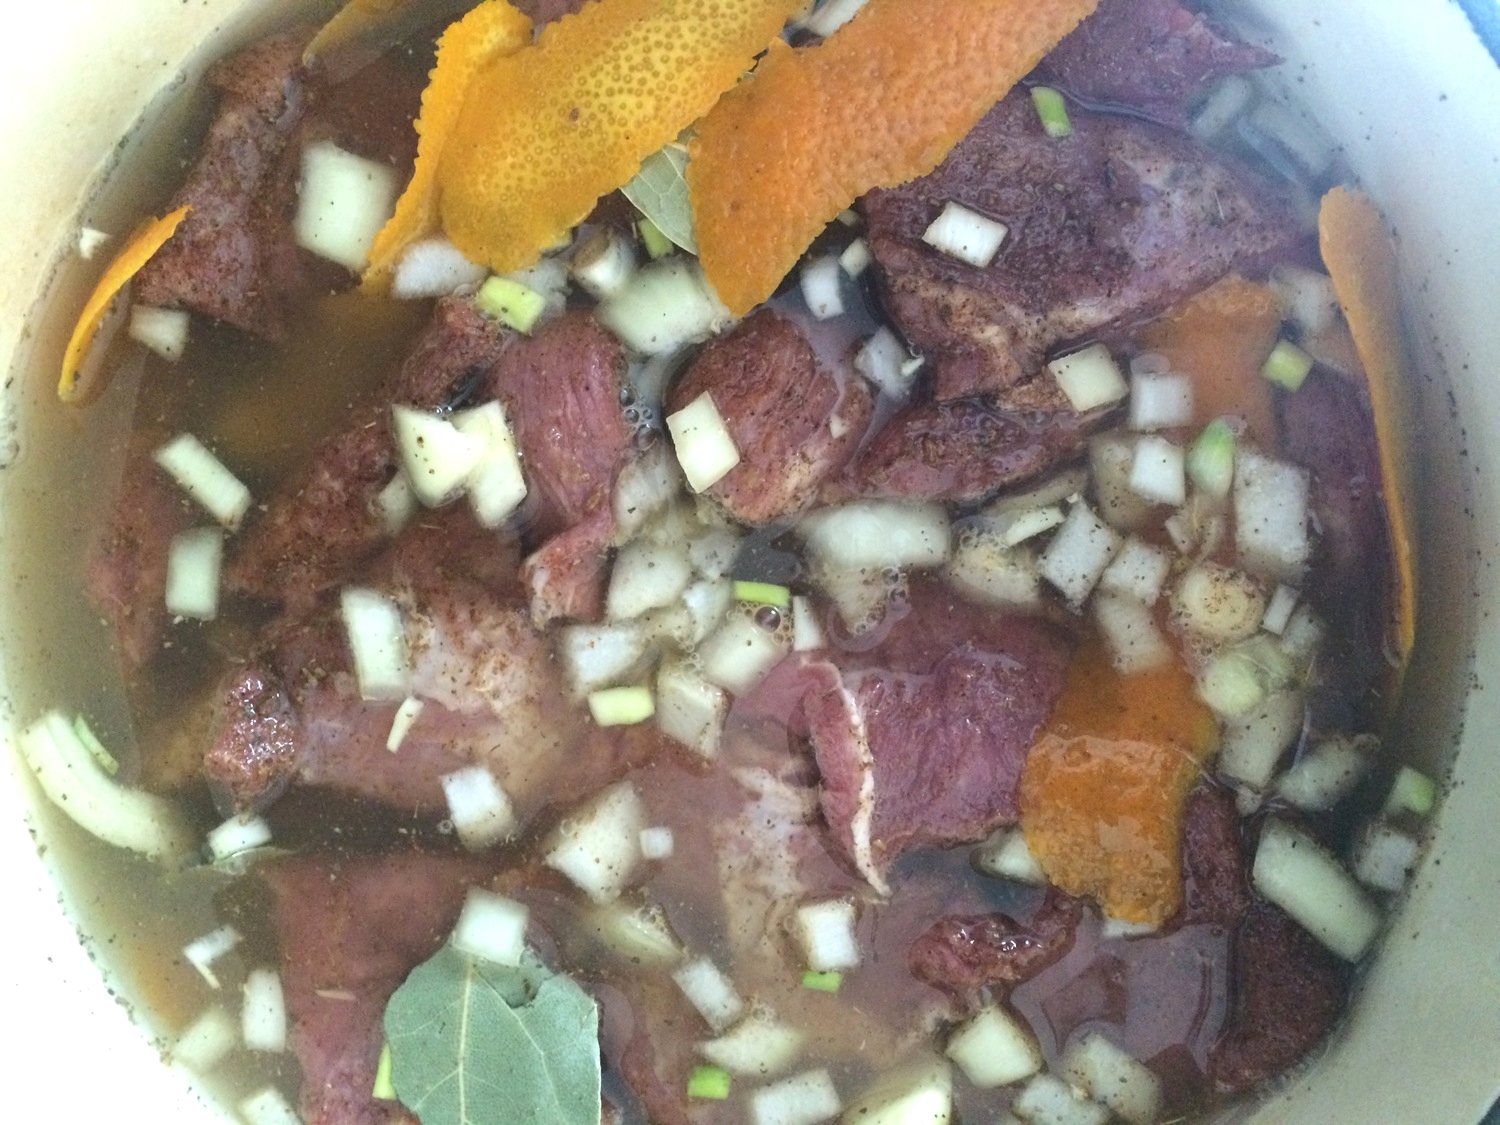
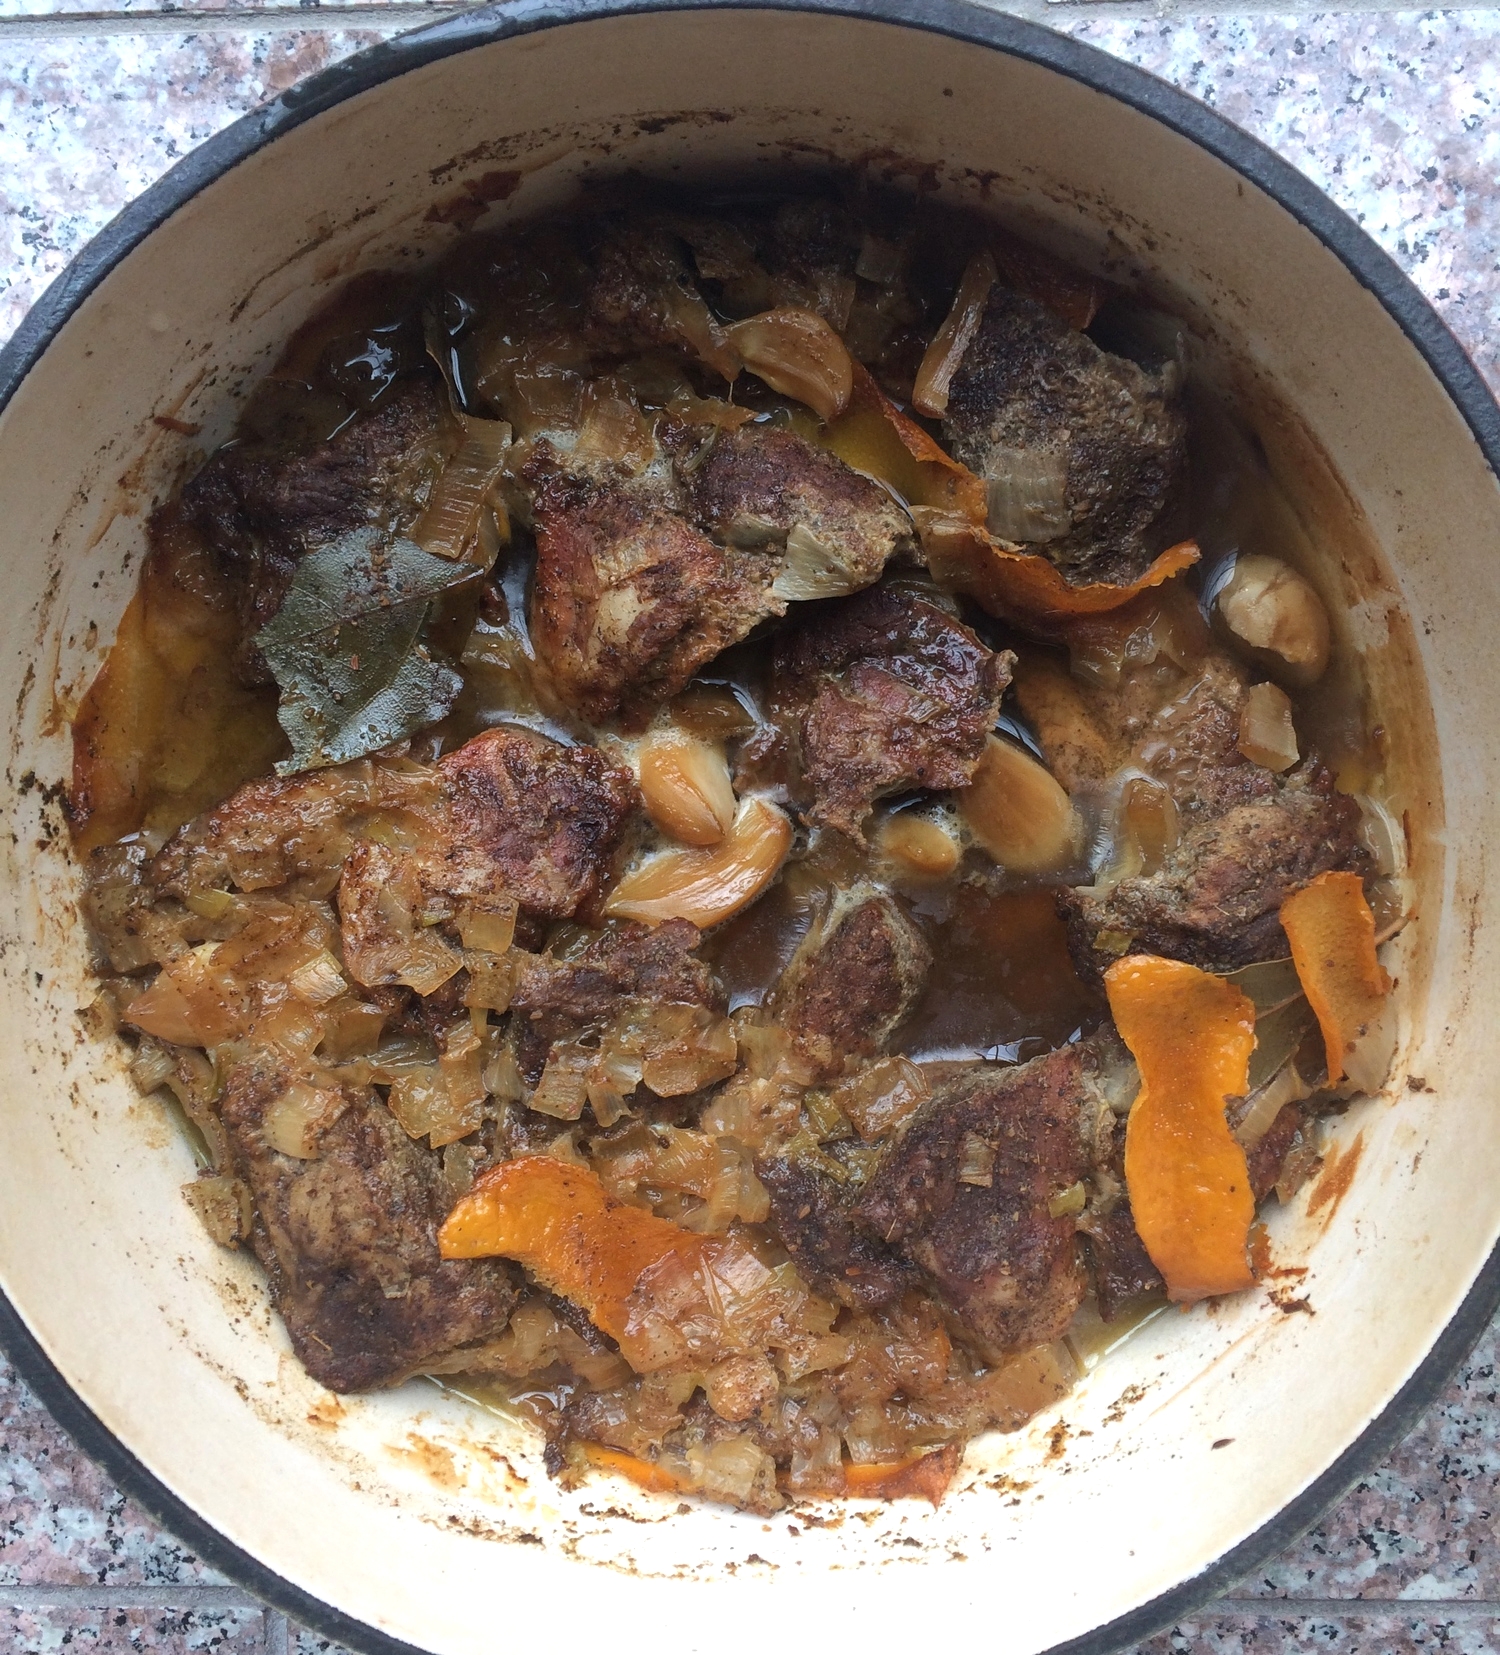
Place the pork, onions, garlic cloves, toasted spices, and salt in a large pot or Dutch oven. Toss everything together to coat. Use a vegetable peeler or sharp knife to remove outer peel of orange in thick strips. Tuck the orange zest strips and bay leaves in between the pieces of meat. Squeeze the remaining orange fruit flesh to release all of the juice into the pot. Add the apple cider vinegar and 2 cups of water to mostly cover the pork. It is okay if a little bit of the pork is sticking above the water, but add more water if the pork is still not well covered. Turn the heat to high, bring to a boil, and then reduce the heat to a simmer. Cover and cook on low for 2 hours.

IMG_5995.JPG
IMG_5996.JPG
IMG_6001.JPG
IMG_6003.JPG

After 2 hours, uncover the pot and continue to cook for another 90 minutes or up to 2 hours. A lot of the liquid will evaporate. At this point, you can remove the pork from the heat to cool and then store the pork in its cooking liquid in the refrigerator if you are making ahead of time. Otherwise, you can slightly drain the pork and serve at once, shredding with forks. Or you can remove the pork with a slotted spoon to a well-oiled skillet to crisp up the outer bits of the pork prior to shredding and serving.

IMG_6052.jpg

Make the relish. Combine all of the ingredients in a bowl and stir to combine. You can make this up to a day in advance.

To serve, fill a tortilla with some carnitas, a spoonful of pineapple relish, a few avocado slices, and garnish with extra cilantro and lime wedges, if desired. Serves 8.

IMG_6140_2.jpg
IMG_6143.jpg
In Mains Tags recipe, Mexican, pork, pineapple, gluten-free
6 Comments

Pickled Deviled Eggs with Dill and Crispy Quinoa

May 1, 2015 Emily Watson

I grew up with deviled eggs making an appearance at least once a week in our house. They were always a little different, depending on the mood of our babysitter, Louise, that week. Sometimes the filling was a tad runny, sometimes it packed a bit more of a mustard punch, sometimes there was relish involved. Louise never really measured anything, but after watching her enough times, I figured out the basic idea of deviled egg-making. Hard-boil some eggs, mash the yolks with mayonnaise, mustard- she used yellow mustard, salt, pepper, maybe a little Mt. Olive relish. Taste and adjust. Fill the egg whites up and sprinkle with a healthy dose of paprika to make them pretty.

My version is a tad more refined and geared towards spring, but I promise the extra work is worth it. Maybe you do not choose to pickle the eggs or make the crispy quinoa topping, and that is absolutely okay. The filling is still bright and creamy, and you will still get a delicious deviled egg.

Pickling the eggs is optional, but it not only creates a beautiful color, but it also gives the egg a meatier texture and a zing. I use plain Greek yogurt in place of the more traditional mayo to fluff the filling. Fresh dill pairs nicely with the lemon and just makes me think of pickles, but leave it out if you wish. A sliver of avocado gives additional richness and toasted quinoa acts like a crunchy breadcrumb. These eggs can be made a day before, but if you are pickling them, be sure to start that process at least 8 hours before hand so that the pink color has a chance to penetrate the whites. These would make a fantastic spring party appetizer either for the Kentucky Derby or Mother's Day maybe?

The pickling of the eggs is based very loosely on the Beet Pickled Eggs at Cookistry. I used a few different spices and just one beet to get the hue because I know how one beet can give off a tremendous amount of color. Beet stains on hands for days, anyone? The crispy quinoa is adapted from a Real Simple magazine recipe.

Pickled Deviled Eggs with Dill and Crispy Quinoa

4 beet-pickled hard-boiled eggs, see recipe below, or just 4 hard-boiled eggs, peeled
3 tablespoons 2% plain Greek yogurt (Fage is my favorite brand)
2 teaspoons Dijon mustard
3 tablespoons fresh dill, finely chopped, divided
zest of 1/2 lemon
1 teaspoon sea salt + more for sprinkling on at very end
1/4 avocado, thinly sliced, for garnish
crispy quinoa, see recipe below (optional)

Slice the hard-boiled eggs in half length-wise. If using beet-pickled eggs, have a towel nearby so you do not stain your hands. Carefully spoon out the yolks and place in a small bowl. Add the yogurt, mustard, 2 tablespoons of fresh dill, lemon zest, and salt. Mash everything together with a fork until smooth and creamy.

Fill the egg whites up with heaping spoonfuls of the yolk mixture. Place a sliver of avocado on top of each half, sprinkle with remaining fresh dill, crispy quinoa, if using, and a little sprinkle of sea salt. Enjoy! Makes 8 deviled egg halves.

IMG_5928.JPG
IMG_5933.JPG
IMG_5943.JPG
IMG_5951.JPG
IMG_6068.JPG

Beet-Pickled Eggs

4 eggs
1 beet, peeled and chopped into 1-inch pieces
1 cup water
3/4 cup apple cider vinegar
1 bay leaf
1 inch piece of ginger, peeled and sliced into 3 pieces
1/4 teaspoon mustard seeds
3/4 teaspoon salt

Hard-boil the eggs. Place the eggs in a pot and add water to cover by 2 inches. Bring the water to a boil, cover with a lid, and remove pot from the heat. Allow eggs to sit 9 minutes. Immediately drain and rinse with cold water. Place eggs in a bowl of ice water and allow to cool. Peel the eggs carefully. I use a spoon to slip under the thin skin just beneath the shell to slide the shell off. Set eggs aside.

Cook the beet. Add the beet to a small pan with about an inch of water. Cover the pot and allow beet to steam on medium-high heat for about 15-20 minutes or until beet is tender. Drain and place the beets in a clean glass jar that is large enough to hold the eggs. Add the eggs on top of the beets.

Make the pickling mixture. Add the water, vinegar, bay leaf, ginger, mustard seeds, and salt to a pot. Bring to boil and then turn off heat and allow to cool to room temperature.

Add the pickling mixture to the beets and eggs in the glass jar. If the eggs are not covered with liquid, add a little water to the jar or stir to rearrange the eggs so that they are covered. Place in the refrigerator and allow to pickle for at least eight hours. Remove from mixture and allow to drain prior to making deviled eggs.

IMG_5792.JPG
IMG_5791.JPG
IMG_5793.JPG
IMG_5797.JPG
IMG_5789.JPG
IMG_5802.JPG

Crispy Quinoa

1/4 cup quinoa
1/4 cup water
1 tablespoon olive oil
1/4 teaspoon salt

Add all ingredients to a non-stick skillet. Heat over medium heat and cook until water evaporates and quinoa begins to toast. Stir often until quinoa is golden brown. Mine took 15 minutes. Remove to drain on a paper towel. Make about 1/3 cup of toasted quinoa which can be used in numerous recipes.

IMG_5825.jpg
In Appetizers Tags eggs, vegetarian, dill, spring, quinoa, recipe, appetizers, yogurt, gluten-free
1 Comment

Pickled Chard Stems

April 30, 2015 Emily Watson

One of the things I am constantly working on is limiting my food waste. A few things I do to help reduce waste are:

  • freeze produce that is about to spoil (washing, peeling, chopping if need be before freezing)
  • make soups or smoothies with produce that is about to spoil
  • make pesto with herbs that are about to spoil and the freeze the pesto in ice cube trays
  • freeze leftovers that we are tired of eating
  • make breadcrumbs or croutons with bread that is about to go stale
  • re-purpose leftovers (for example, pasta sauce or sauteed vegetables on pizza, roasted vegetables on a sandwich, grilled meat or vegetables in a taco)

The other way of reducing food waste is to use parts of vegetables that normally get discarded. Broccoli stems can be peeled and the tender part used just as you would the broccoli florets. Beet greens can be sauteed and treated like spinach. Mushroom stems and vegetable scraps can be used to make an umami-rich mushroom stock.

When I saw that Jeanine of Love and Lemons made Pickled Chard Stems, I knew that I had to try them. Not only are they beautiful, especially if you are able to get rainbow chard, but the recipe could not be easier. It is a genius way to use up the tougher stems of Swiss chard that are not always preferable in certain dishes. I made some minor changes to the recipe based on what I had on hand and what I thought I would prefer, and the result is delicious. I especially like them sprinkled on brown rice with toasted nuts and a salty cheese. Talk about flavor-packed.

Pickled Chard Stems

1 1/2 cups chopped Swiss chard stems (this was one bunch of chard at the grocery store)
1/2 teaspoon salt
1 tablespoon mustard seeds
3/4 cup Champagne vinegar or white wine vinegar
1/4 cup honey

Clean the chard stems by placing them in a bowl with enough water so that they are floating. Swish them around so that the dirt sinks to the bottom, and scoop them out to drain. I did this in a salad spinner which made quick work for washing and draining. Sprinkle the chard with salt and place into a clean jar. I used a 16 ounce jar.

IMG_5554.jpg
IMG_5556.jpg
IMG_5557.jpg
IMG_5561.jpg

Heat a small saucepan to medium heat. Add the mustard seeds and allow to toast until fragrant, about 1 minute. Add the vinegar and honey to the pan. Bring to a boil and then reduce heat to simmer. Simmer for 2 minutes. Remove the mixture from the heat and allow to cool.

IMG_5564.jpg

When cool, pour liquid over chard stems in jar. Make sure the stems are covered. Refrigerate for at least a few hours, but overnight is even better. Sprinkle on grain salads or rice dishes for added crunch and a bit of zest. Makes about 1 1/2 cups.


In Miscellaneous Tags recipe, swiss chard, condiment
Comment

Buckwheat Crepes with Mushroom and Chard Filling

April 28, 2015 Emily Watson

Crepes are such a romantic food. My first encounter with them was on a trip to Barcelona when I was studying abroad after high school. They were selling them at a little cart at the beach, and my friends insisted I try one. Filled with nothing but Nutella, they were enormous. And they were heavenly. Thin and delicate, yet sturdy enough to hold the chocolatey hazelnut spread within it. I loved the crispy little edges, too. We sat on the dock eating them, allowing our feet to dangle over the edge, barely tickling the Mediterranean. I was determined to learn how to make crepes before leaving Barcelona and enrolled in a culinary class with some friends. Our instructor decided to teach us how to flip them in the pan with a swift flick of the wrist, and my all-too-eager friend jumped at the challenge. The next thing we knew, we had a buttery crepe stuck to the newly painted ceiling of our culinary instructor's apartment. It eventually fell, but not without leaving a perfect grease circle in its wake. Oops.

I have had quite a few crepes since then, but my favorite has been from the French inspired Cafe L'Aube here in Philadelphia that serves a beautiful buckwheat crepe with ham, egg, and Emmentaler cheese. The buckwheat gives the crepe an earthiness and robustness that I love. I was inspired to try my own buckwheat crepe at home, relying on a few tips from my crepe-making lesson in Barcelona to create ever so thin pancakes with crispy edges. I branched out with the filing too, incorporating spring vegetables and a fresh local goat's milk cheese. I served a medium-boiled egg alongside the crepe and found myself cutting pieces of egg and pieces of crepe to make the perfect little bite. A plate of these really made me feel like I was at a European cafe, if only temporarily.

A few things to make note of while you cook. For one, take the time to wash the chard and drain it well. You want to eliminate any grit and sand that so often sticks to chard leaves. I use goat cheese here because it offers a nice tang to the heavier, earthier vegetables, but just about any cheese would do, but be sure to mix it into the filling while it is hot so that it melts well. The batter can be made a day ahead, and stored in the refrigerator, and the cooked crepes can be frozen for up to a month with parchment paper slices in between to prevent sticking.

Buckwheat Crepes with Mushroom and Chard Filling

8 Buckwheat Crepes (see recipe below)
1 tablespoon olive oil
1/2 tablespoon unsalted butter
1 shallot, peeled and finely chopped
2 garlic cloves, peeled and finely chopped
1/2 pound cremini mushrooms, stems removed and thinly sliced
1/2 pound chard leaves (stems removed**), washed, dried and sliced into 1/2 inch ribbons (about 6 cups)
1/2 cup walnuts, chopped
3 tablespoons fresh goat cheese
salt and pepper to taste
1/4 cup pecorino romano for sprinkling, optional
4 hard-boiled eggs for serving, optional

Heat oil and butter in a skillet over medium heat until butter has melted. Add shallots and sweat for 2 minutes or until softened. Add garlic and cook for 1 minute. Add mushrooms and 1/2 teaspoon of salt and allow to cook for 3-5 minutes or until mushrooms have released liquid and being to brown around the edges. Add the cleaned chard. Mix to combine and cook for 8 minutes or until chard has wilted. If there is a lot of liquid remaining in the pan and the chard and mushrooms are cooked, briefly drain it and return mixture to pan. Turn off the heat. While the mixture is hot, add the goat cheese and stir to combine. Taste and adjust for salt and pepper. Set aside.

Toast the walnuts. Place the walnuts in a dry skillet over medium heat and toast for 8-10 minutes, shaking often, or until walnuts are toasted. Add half of the toasted walnuts to the mushroom and chard mixture and stir to combine.

Set up your assembly station. Place one crepe on the surface, sprinkle with about 2-3 tablespoons of the vegetable and nut mixture. Roll up and place seam side down on a plate. Complete with the remaining filling and remaining crepes. Sprinkle with the remaining toasted walnuts, grated pecorino romano, if using, and serve with a hard-boiled egg. Enjoy! Serves 4 people. 

**You can use the stems to make my Pickled Chard Stems recipe for sprinkling on any grain salad or rice bowl.

IMG_5700.jpg
IMG_5704.jpg
IMG_5709.JPG
IMG_5711.JPG
IMG_5732.JPG
IMG_5735.JPG
IMG_5764.JPG

Buckwheat Crepes

2 cups buckwheat flour
2 eggs
2 tablespoons unsalted butter, melted
2 cups milk (I used 2%)
1/2 cup water
1 teaspoon salt
1-2 tablespoons unsalted butter, divided, for cooking

Combine all of the ingredients in a blender, except the 1-2 tablespoons of butter for cooking. Blend for 30-45 seconds or until smooth. Pour the mixture into a bowl, cover with plastic wrap, and allow it to rest in the refrigerator for at least an hour or even overnight. Allow the mixture to sit at room temperature for 15 minutes before proceeding.

Heat a 10-inch non-stick skillet over medium heat. Add 1/2 teaspoon of butter to the skillet, swirling to coat. I use a pastry brush to make sure the butter is evenly distributed. Use a 1/4 cup measuring cup to scoop the batter and pour it into the pan. Work quickly to swirl the batter all over the pan to create a thin even layer. The first and maybe even second crepe are usually far from perfect as you are still finding a rhythm and finding the right temperature. So do not give up! You can see my first failed attempt in the picture below. Cook the first side about 1 minute or until the edges of the crepe begin to pull away from the pan and then flip to cook the other side about 20 seconds. I use a spatula and my fingers to usually do this. When the crepe is done, move to a plate and continue with the rest of the batter, buttering the pan as necessary. I usually have to re-butter the pan every 2-3 crepes.

IMG_5698.jpg
IMG_5715.jpg
IMG_5719.jpg
IMG_5722.jpg

You can use the crepes immediately, stored in the refrigerator for 2-3 days, or the crepes can be stored in the freezer for about a month with a piece of parchment in between them to prevent sticking. If you want to melt more cheese on them, you can do so like you would a quesadilla. Place the crepe in a hot skillet, layer on the cheese or other fillings and wait for the cheese to melt. Remove it from the skillet, roll or fold, and enjoy! Make about 12-15 crepes, depending on how many you end up using as practice :)

IMG_5726.JPG
In Mains Tags recipe, brunch, breakfast, swiss chard, mushrooms, vegetarian, goat cheese, walnuts, buckwheat flour, gluten-free
1 Comment

Strawberry Vanilla Chia Jam

April 24, 2015 Emily Watson

Homemade fruit jam is one of those things that I always tell myself to make when the fruit is in peak season, but I have yet to take the plunge. There are a few things stopping me. First, I would often rather eat the perfectly ripe fruit plain or in a dish that celebrates its freshest form. Second, the act of canning sort of scares me. Supposedly it is nothing to be intimidated about, as you just make sure your jars are sterilized, you have enough sugar in them to prevent spoilage, and that they are completely sealed. Basically, I have a romantic idea of canning and preserving, but in all likelihood, it will remain an idea.

So what am I to do if I want homemade jam to slather on toast, swirl into yogurt, or dollop on my oatmeal but without all of the fuss? Make chia jam! Chia jam is essentially fruit + sweetener + chia seeds that are blended together and allowed to sit until the chia seeds swell and create a jelly-like texture. I had seen chia jam in a few places before attempting my own, but the Raspberry Chia Jam from Sarah of A House in the Hills had attracted my attention for its ease and simplicity.

In my version, I used frozen strawberries (thawed), honey, chia seeds, and the beans of half of a vanilla pod because strawberry-vanilla chia jam sounded fancier. And for the record, it tastes fancier, too. If you do not have a vanilla bean, you can leave the vanilla out or substitute 1/2 teaspoon vanilla extract.

Strawberry Vanilla Chia Jam

1 1/4 cup frozen strawberries, thawed
1 tablespoons chia seeds
1 tablespoon honey
1/2 vanilla bean pod, seeds removed (optional)

Combine all ingredients in a food processor or blender and blend until mostly smooth. Pour in a jar and allow to set for at least 30 minutes. Refrigerate to store and use within the week. Makes about 8 ounces.

**I served this on a toasted multi-grain bread with ricotta cheese and toasted almonds, but the possibilities are endless, including on my Lemon Ricotta Pancakes!

IMG_5541.JPG
IMG_5551.jpg
IMG_5545.JPG
IMG_5546.jpg
In Spreads Dips Sauces Tags strawberries, jam, spreads, vanilla, chia, recipe
2 Comments
← Newer Posts Older Posts →
Hi! I'm Emily. I love to cook whole, nourishing foods, and this is where I share my kitchen experiments and sometimes a little bit of life.

Hi! I'm Emily. I love to cook whole, nourishing foods, and this is where I share my kitchen experiments and sometimes a little bit of life.

Featured
  • July 2017
  • May 2017
  • April 2017
  • March 2017
  • February 2017
  • January 2017
  • December 2016
  • November 2016
  • October 2016
  • September 2016
  • August 2016
  • July 2016
  • June 2016
  • May 2016
  • April 2016
  • March 2016
  • February 2016
  • January 2016
  • December 2015
  • November 2015
  • October 2015
  • September 2015
  • August 2015
  • July 2015
  • June 2015
  • May 2015
  • April 2015
  • March 2015
  • February 2015

  • Appetizers 18
  • Breakfast 18
  • Life 4
  • Mains 39
  • Miscellaneous 2
  • Salads 21
  • Sandwiches 6
  • Side Dishes 8
  • Smoothies 4
  • Snacks 10
  • Soups 14
  • Spreads Dips Sauces 5
  • Sweets 6
  • Vegetarian 1

  • almonds
  • appetizers
  • autumn
  • avocado
  • breakfast
  • brown rice
  • chickpeas
  • chocolate
  • cilantro
  • coconut
  • coconut milk
  • fall
  • gluten-free
  • kale
  • lentils
  • make ahead
  • mint
  • oatmeal
  • recipe
  • salad
  • snack
  • soup
  • spring
  • summer
  • sweet potatoes
  • tahini
  • vegan
  • vegetarian
  • walnuts
  • winter

subscribe

Sign up with your email address to receive new posts directly

We respect your privacy.

Thank you!

All photographs, recipes and content are property of Nourishing Matters, unless otherwise noted. Please do not redistribute without my permission. Thank you!

Powered by Squarespace