When I was little, until I was well into my teenage years, we gifted my father a box of Godiva chocolates every year for his birthday. And every year, like a good dad, he acted completely and totally surprised when he unveiled the little golden box from beneath the wrapping paper. He would break the plastic seal to the sounds of ooohs and ahhhs of his children, pass around the little pamphlet revealing what was inside each chocolate, and let each of us four kids take a piece of chocolate for ourselves. By the time I was in middle school, I no longer needed that little pamphlet to tell me which chocolate I wanted. The Open Oyster, with its hazelnut praline center, had become my favorite. It was my first introduction to the amazingness of hazelnuts mixed with chocolate, even before my first taste of Nutella, and there has been no looking back since.
These truffles take a little work, but after one bite, all that time spent in the kitchen will seem completely worth it. Not to mention you will smell like a jar of Nutella by the end of it all. They make great gifts or party favors, and people will have a hard time believing they are homemade and have so few ingredients. The utterly genius and absolutely delicious idea of a maple syrup-based praline came from the Almond Praline from Gourmande in the Kitchen, so I cannot take full credit for this magical combo.
Chocolate and Hazelnut Praline Truffles
1 c. raw hazelnuts, divided
1/4 c. maple syrup
1 t. vanilla extract
1/2 t. sea salt
1 c. 70% dark chocolate, roughly chopped
1 c. 70% - 80% dark chocolate, depending on preference, roughly chopped
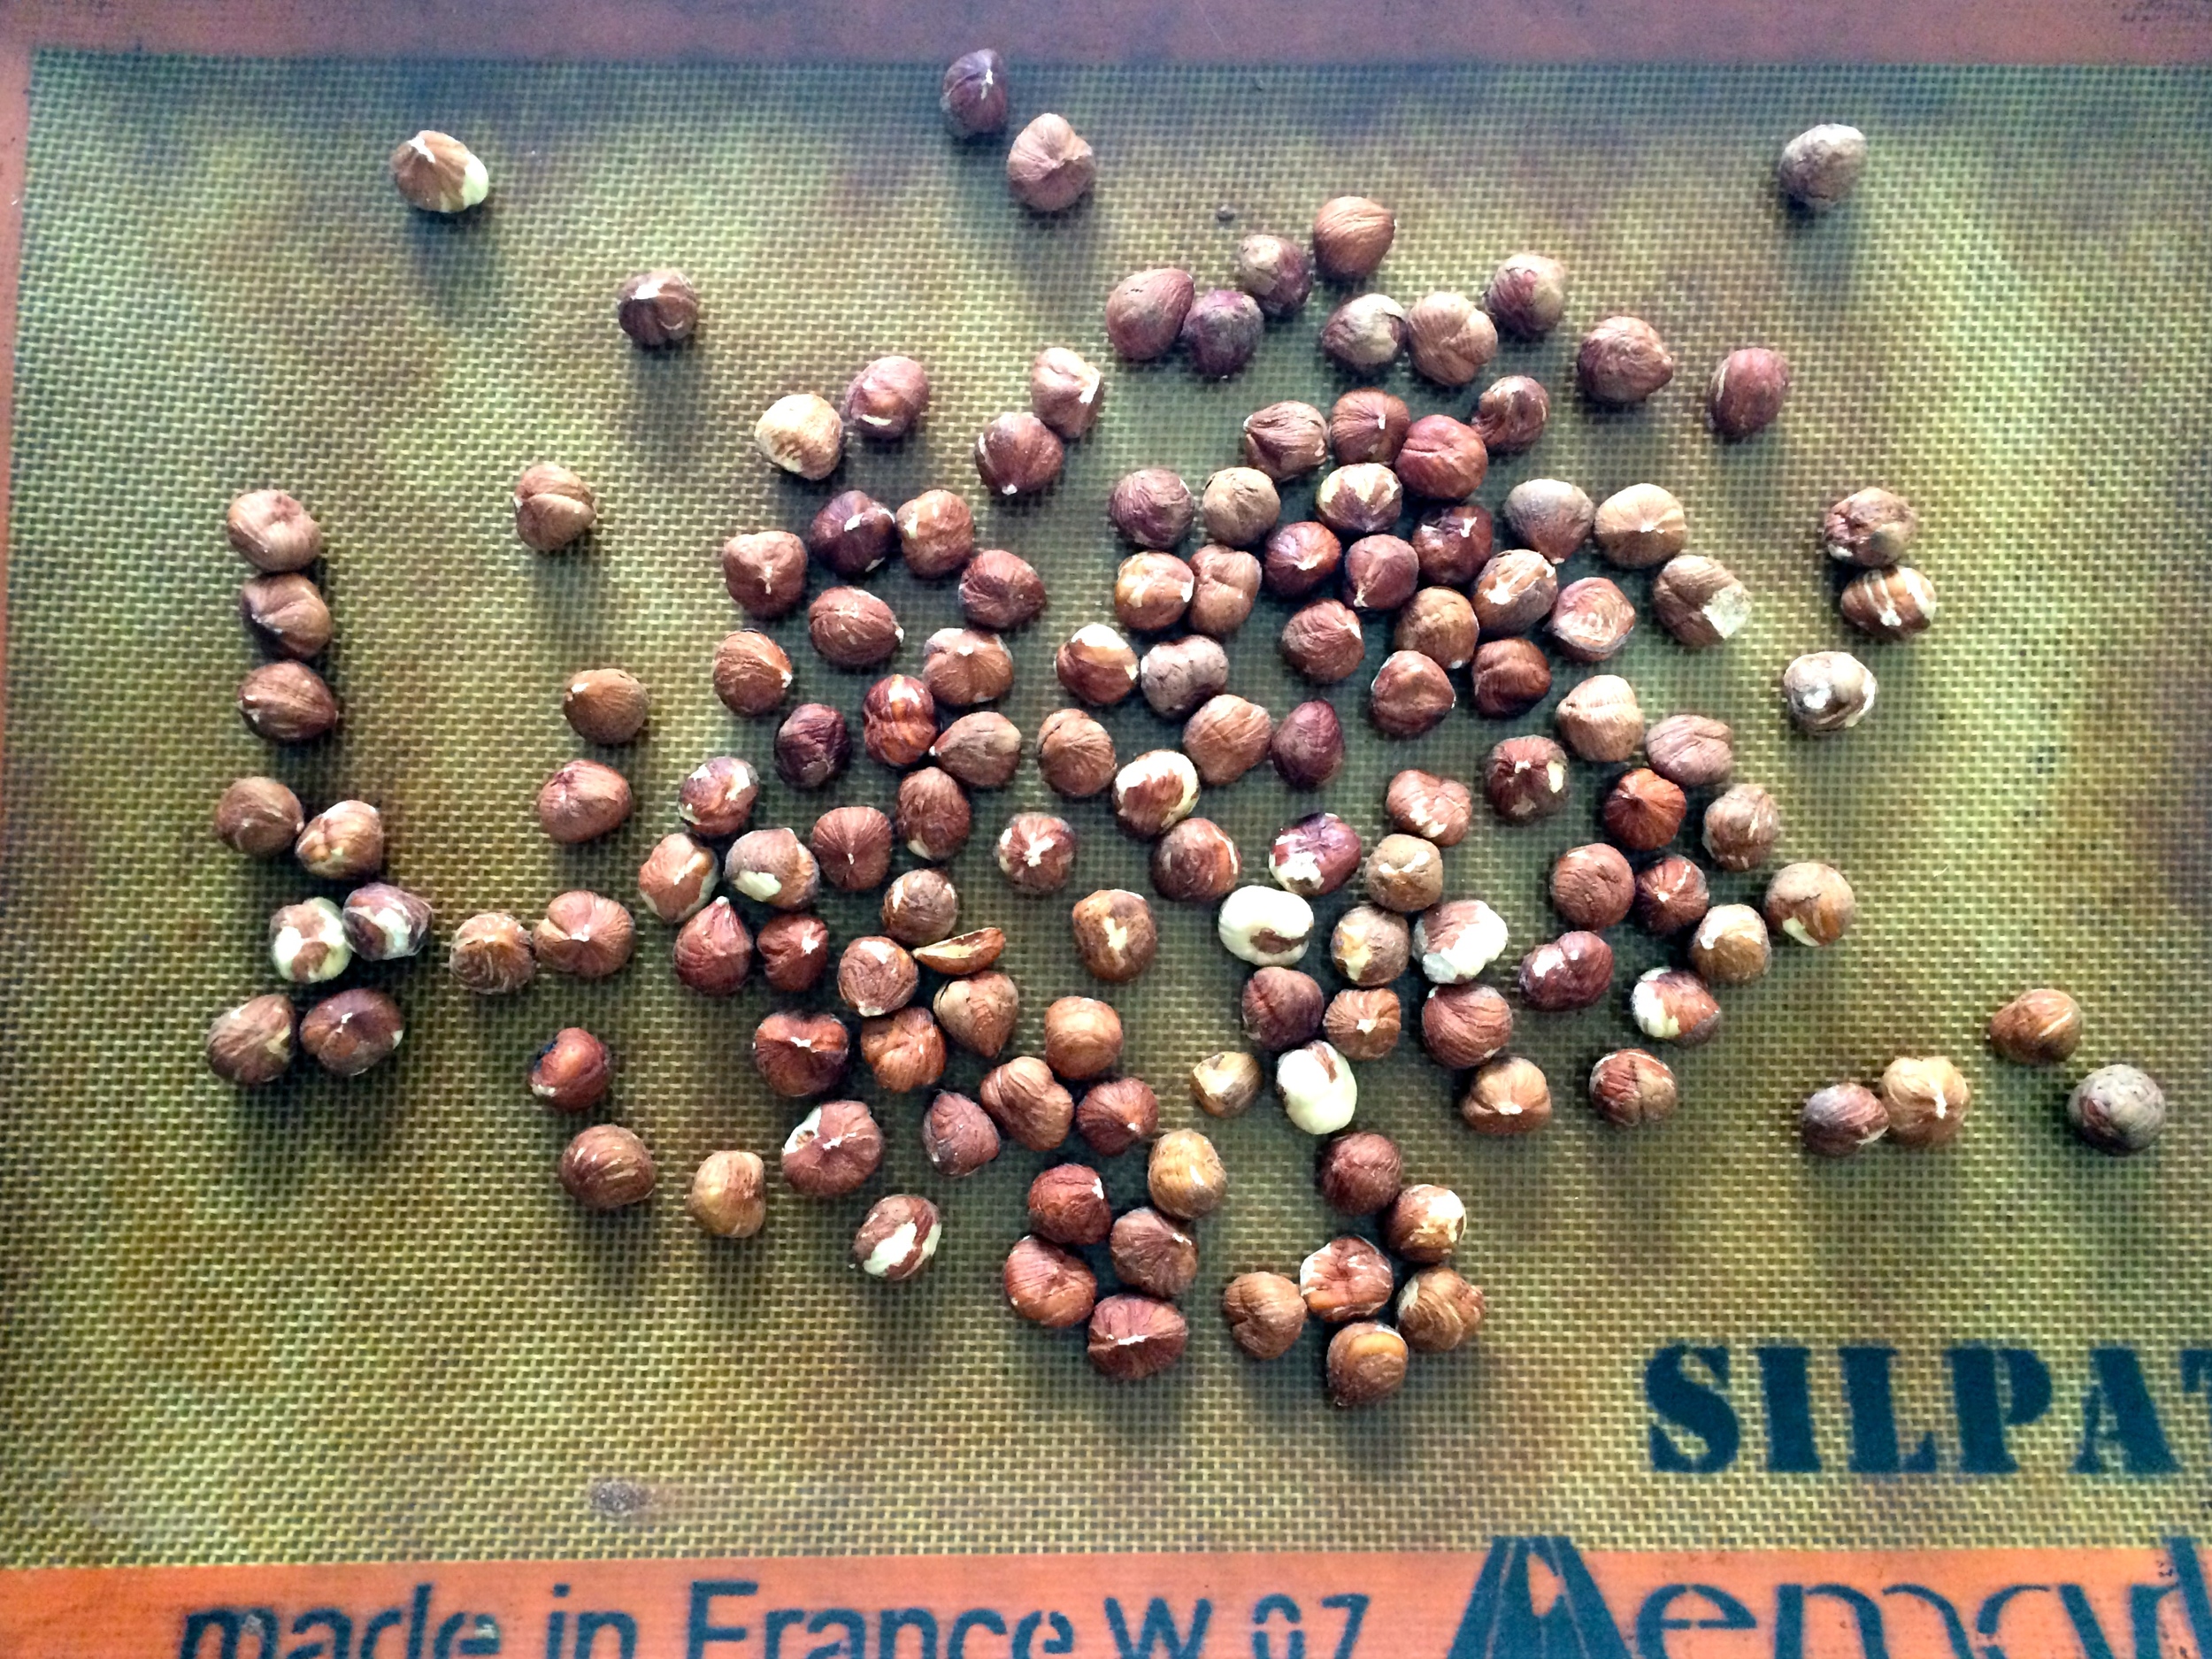
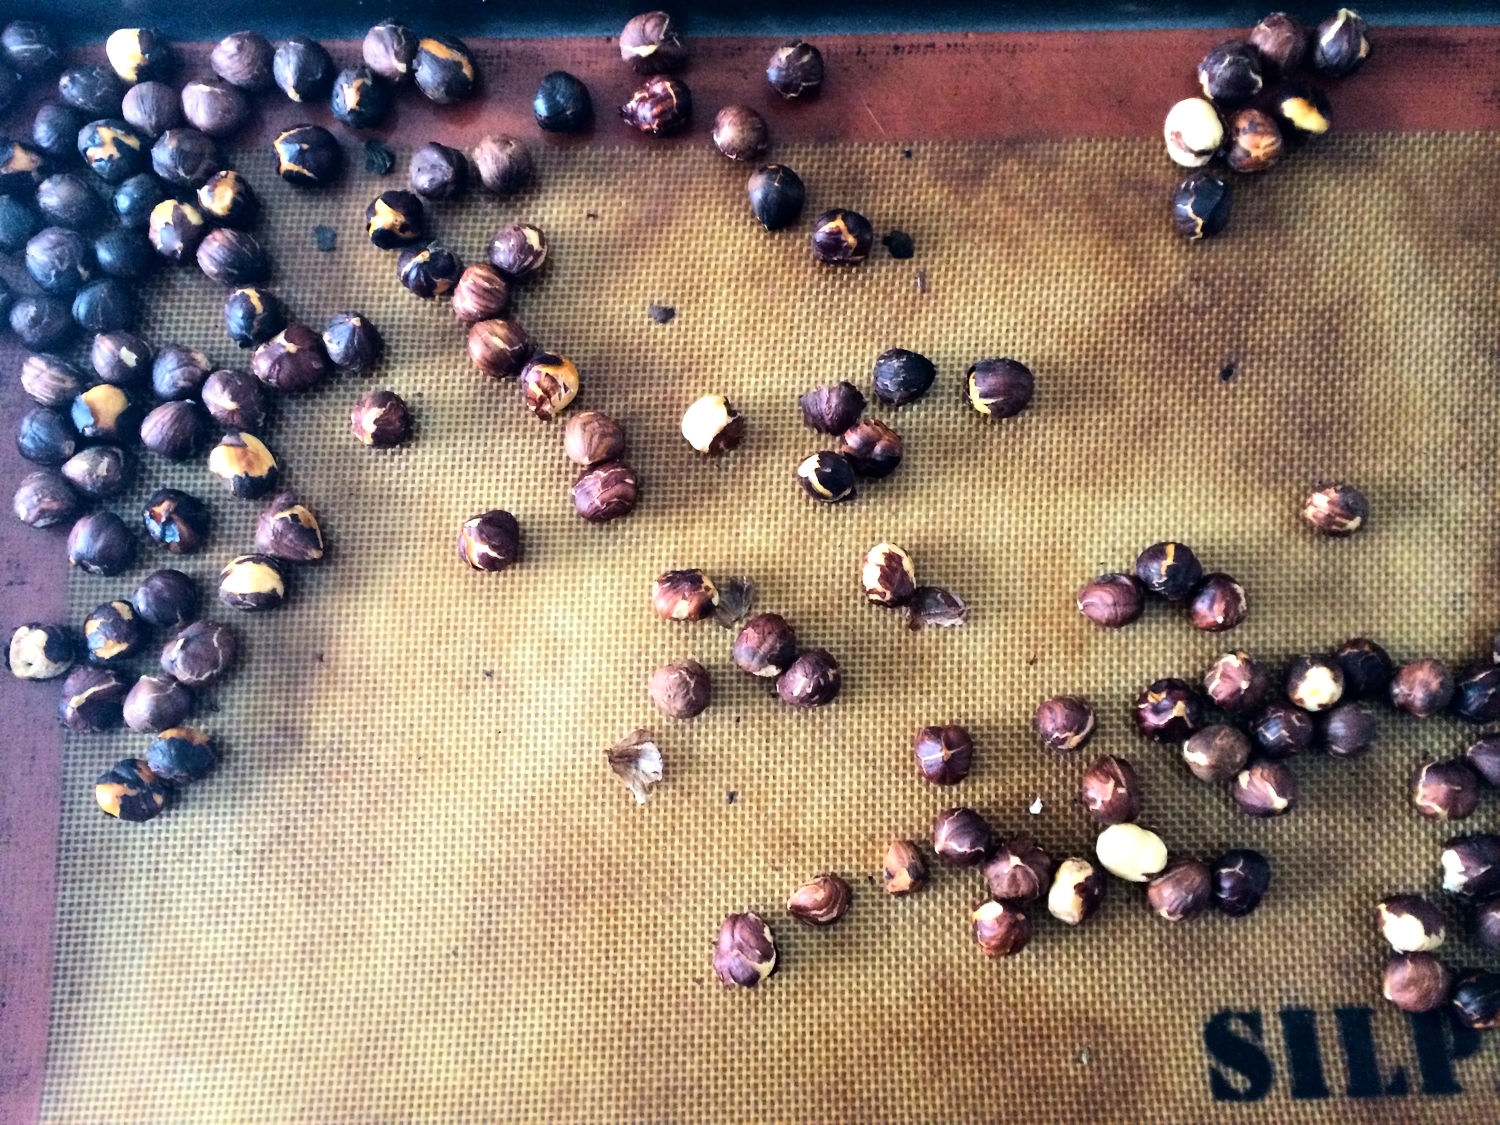
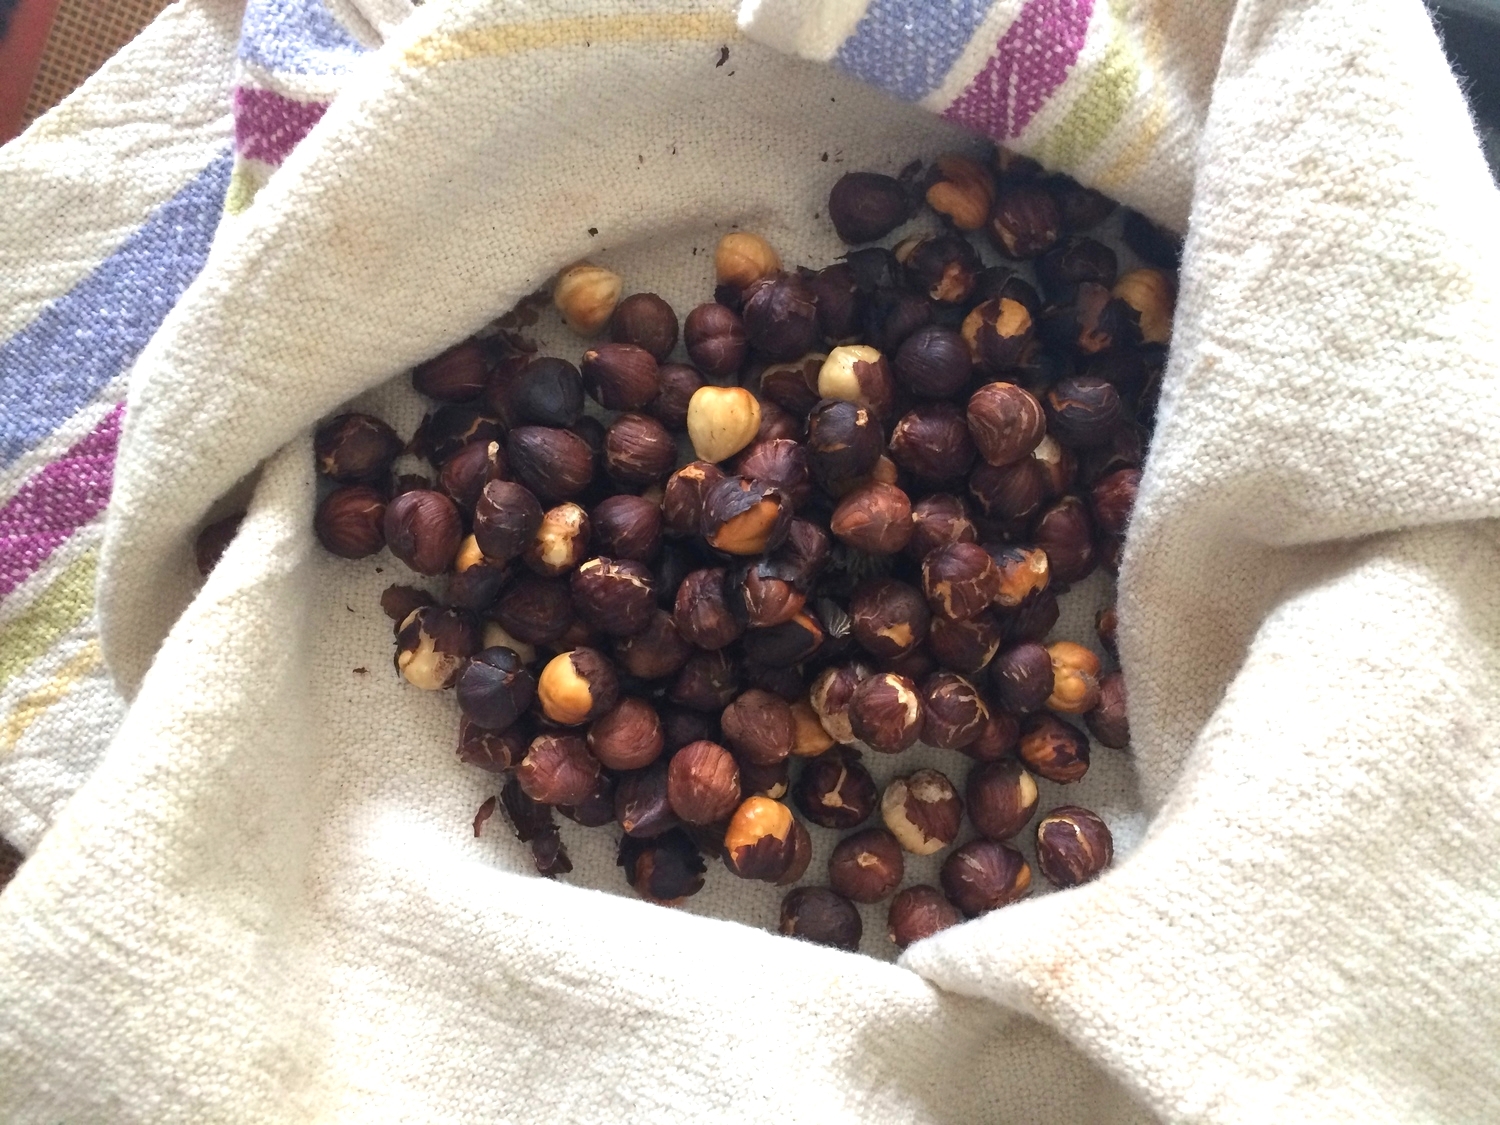
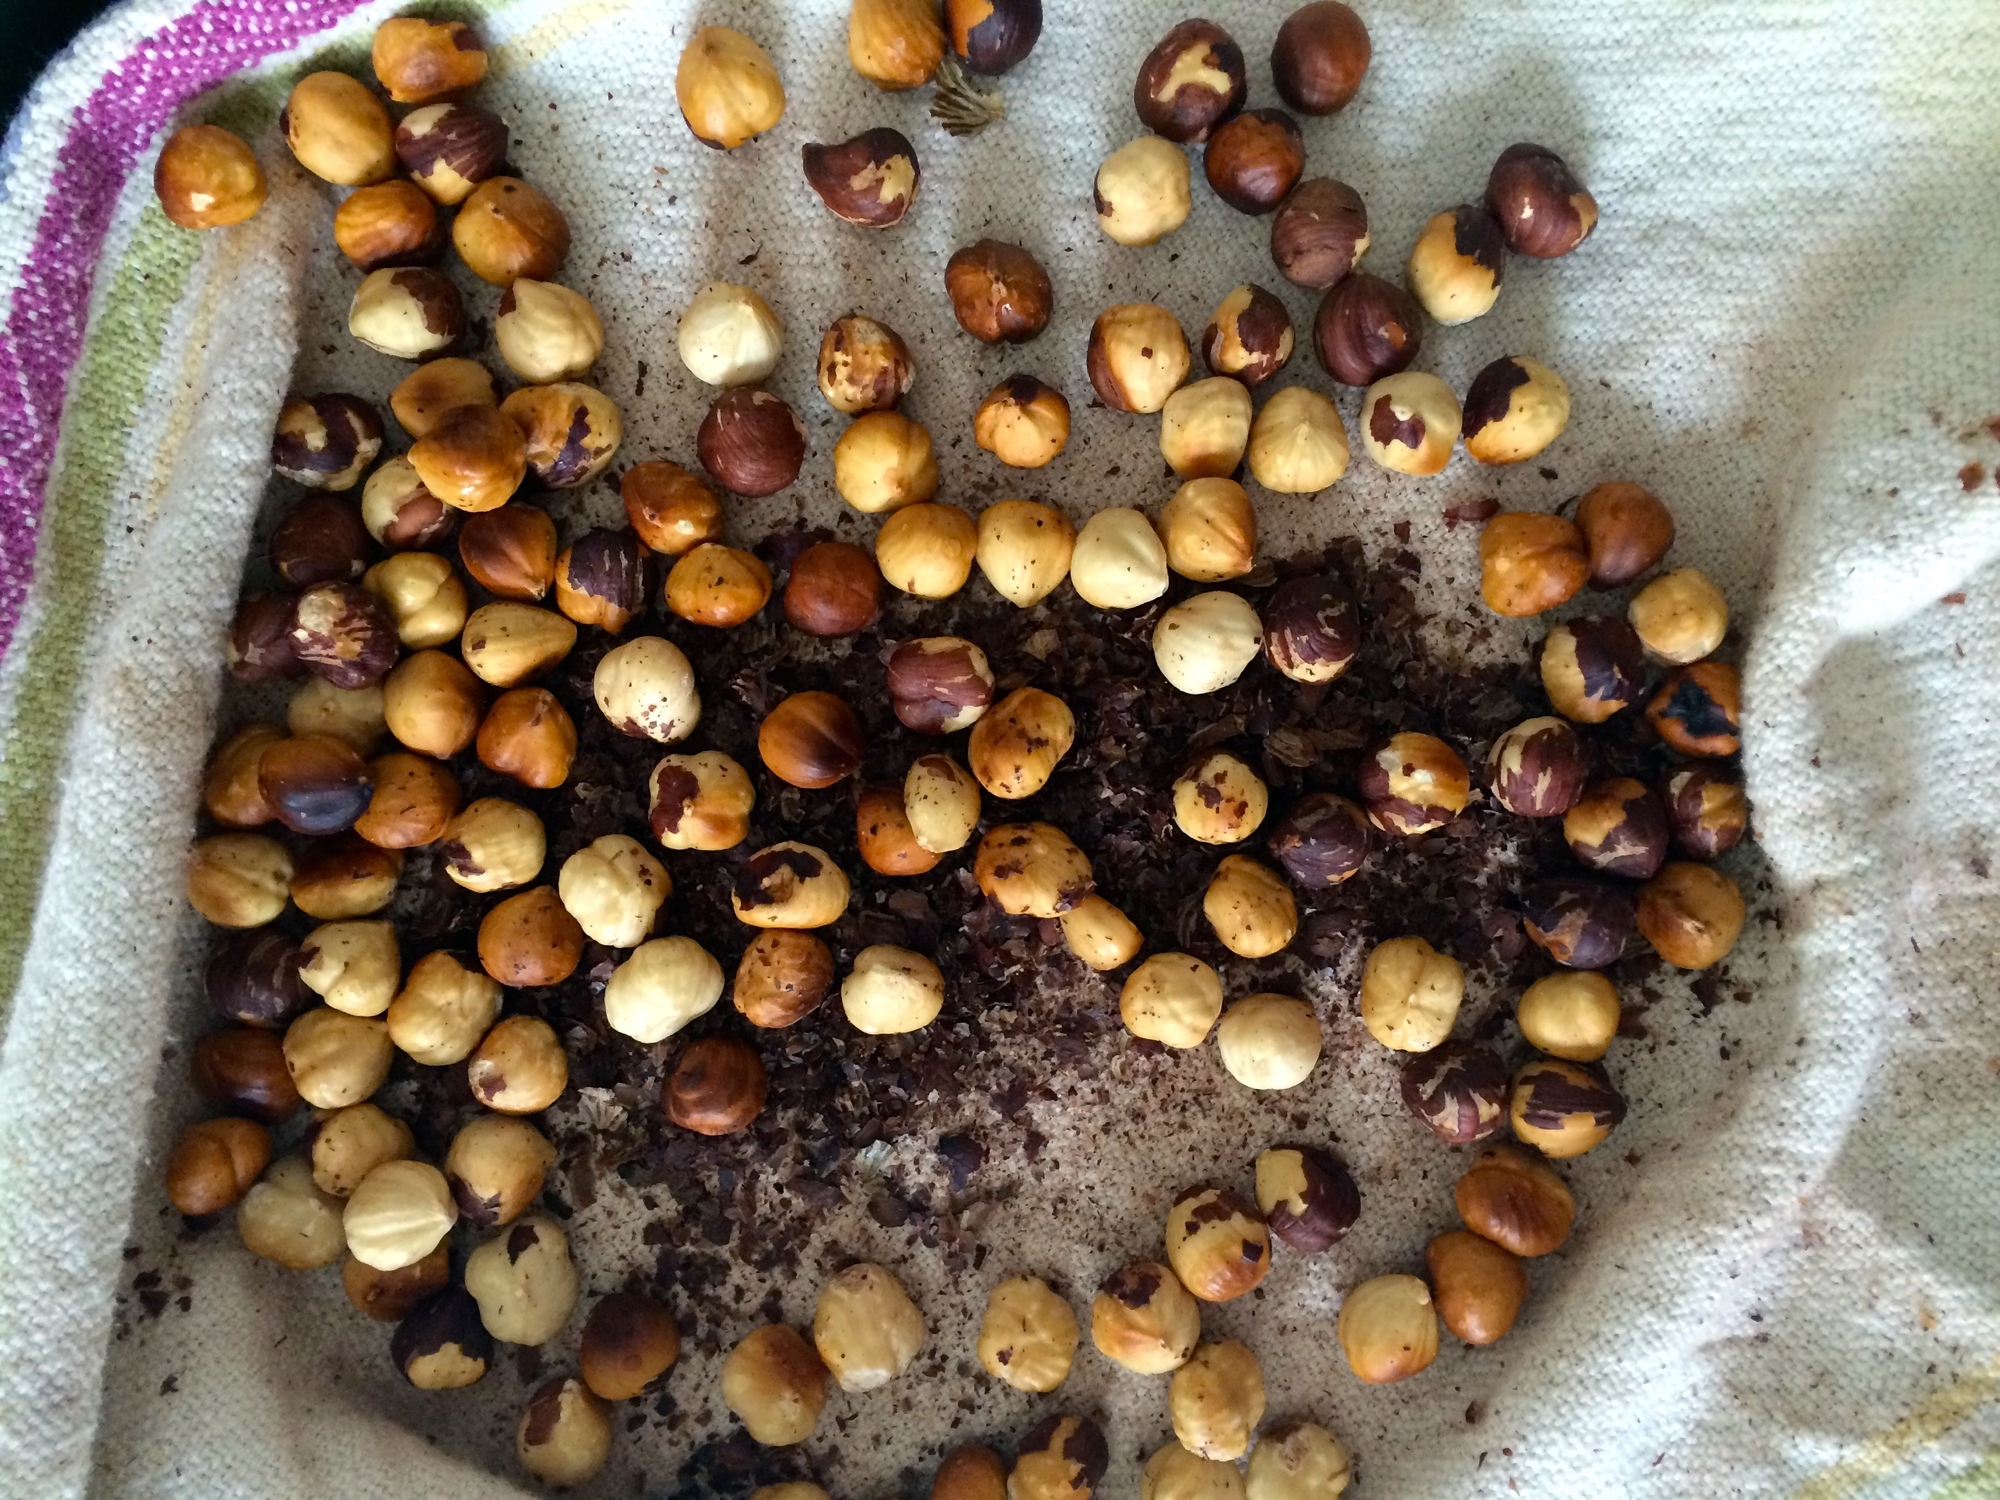
Begin by toasting all of the hazelnuts. Preheat the oven to 400 degrees Fahrenheit. Toast the hazelnuts for 8-10 minutes on a baking sheet or until they begin to look golden and their papery skins are beginning to loosen. Remove the nuts from the oven, allow them to cool for a bit, and move to a kitchen towel. Wrap the hazelnuts in the towel, and rub them together to remove their bitter, papery skins.
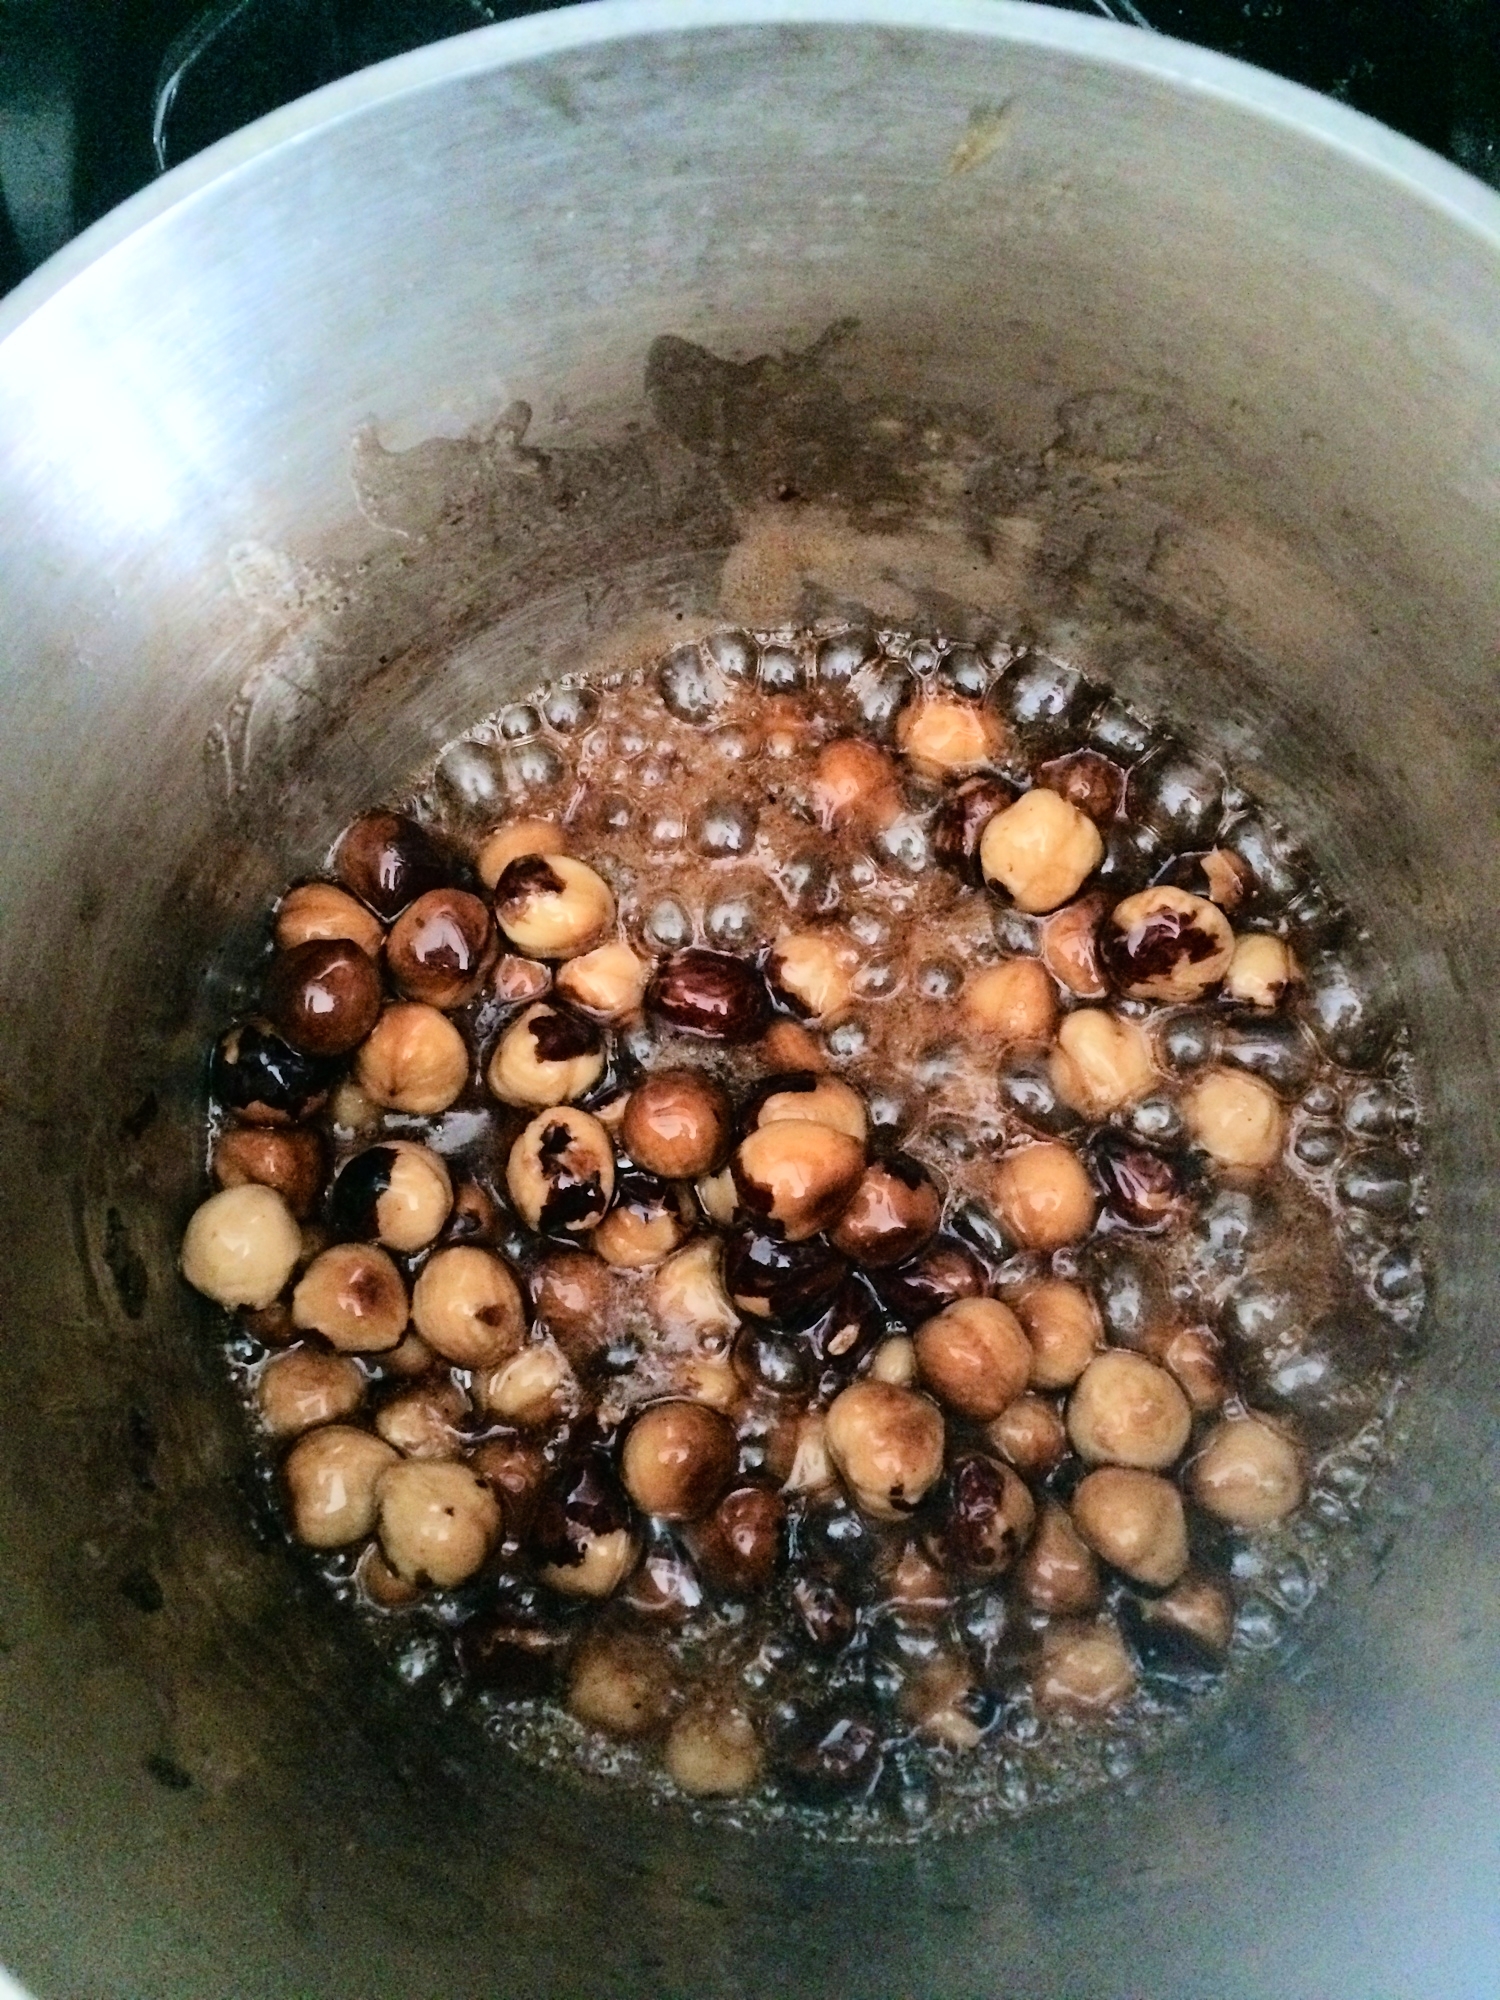
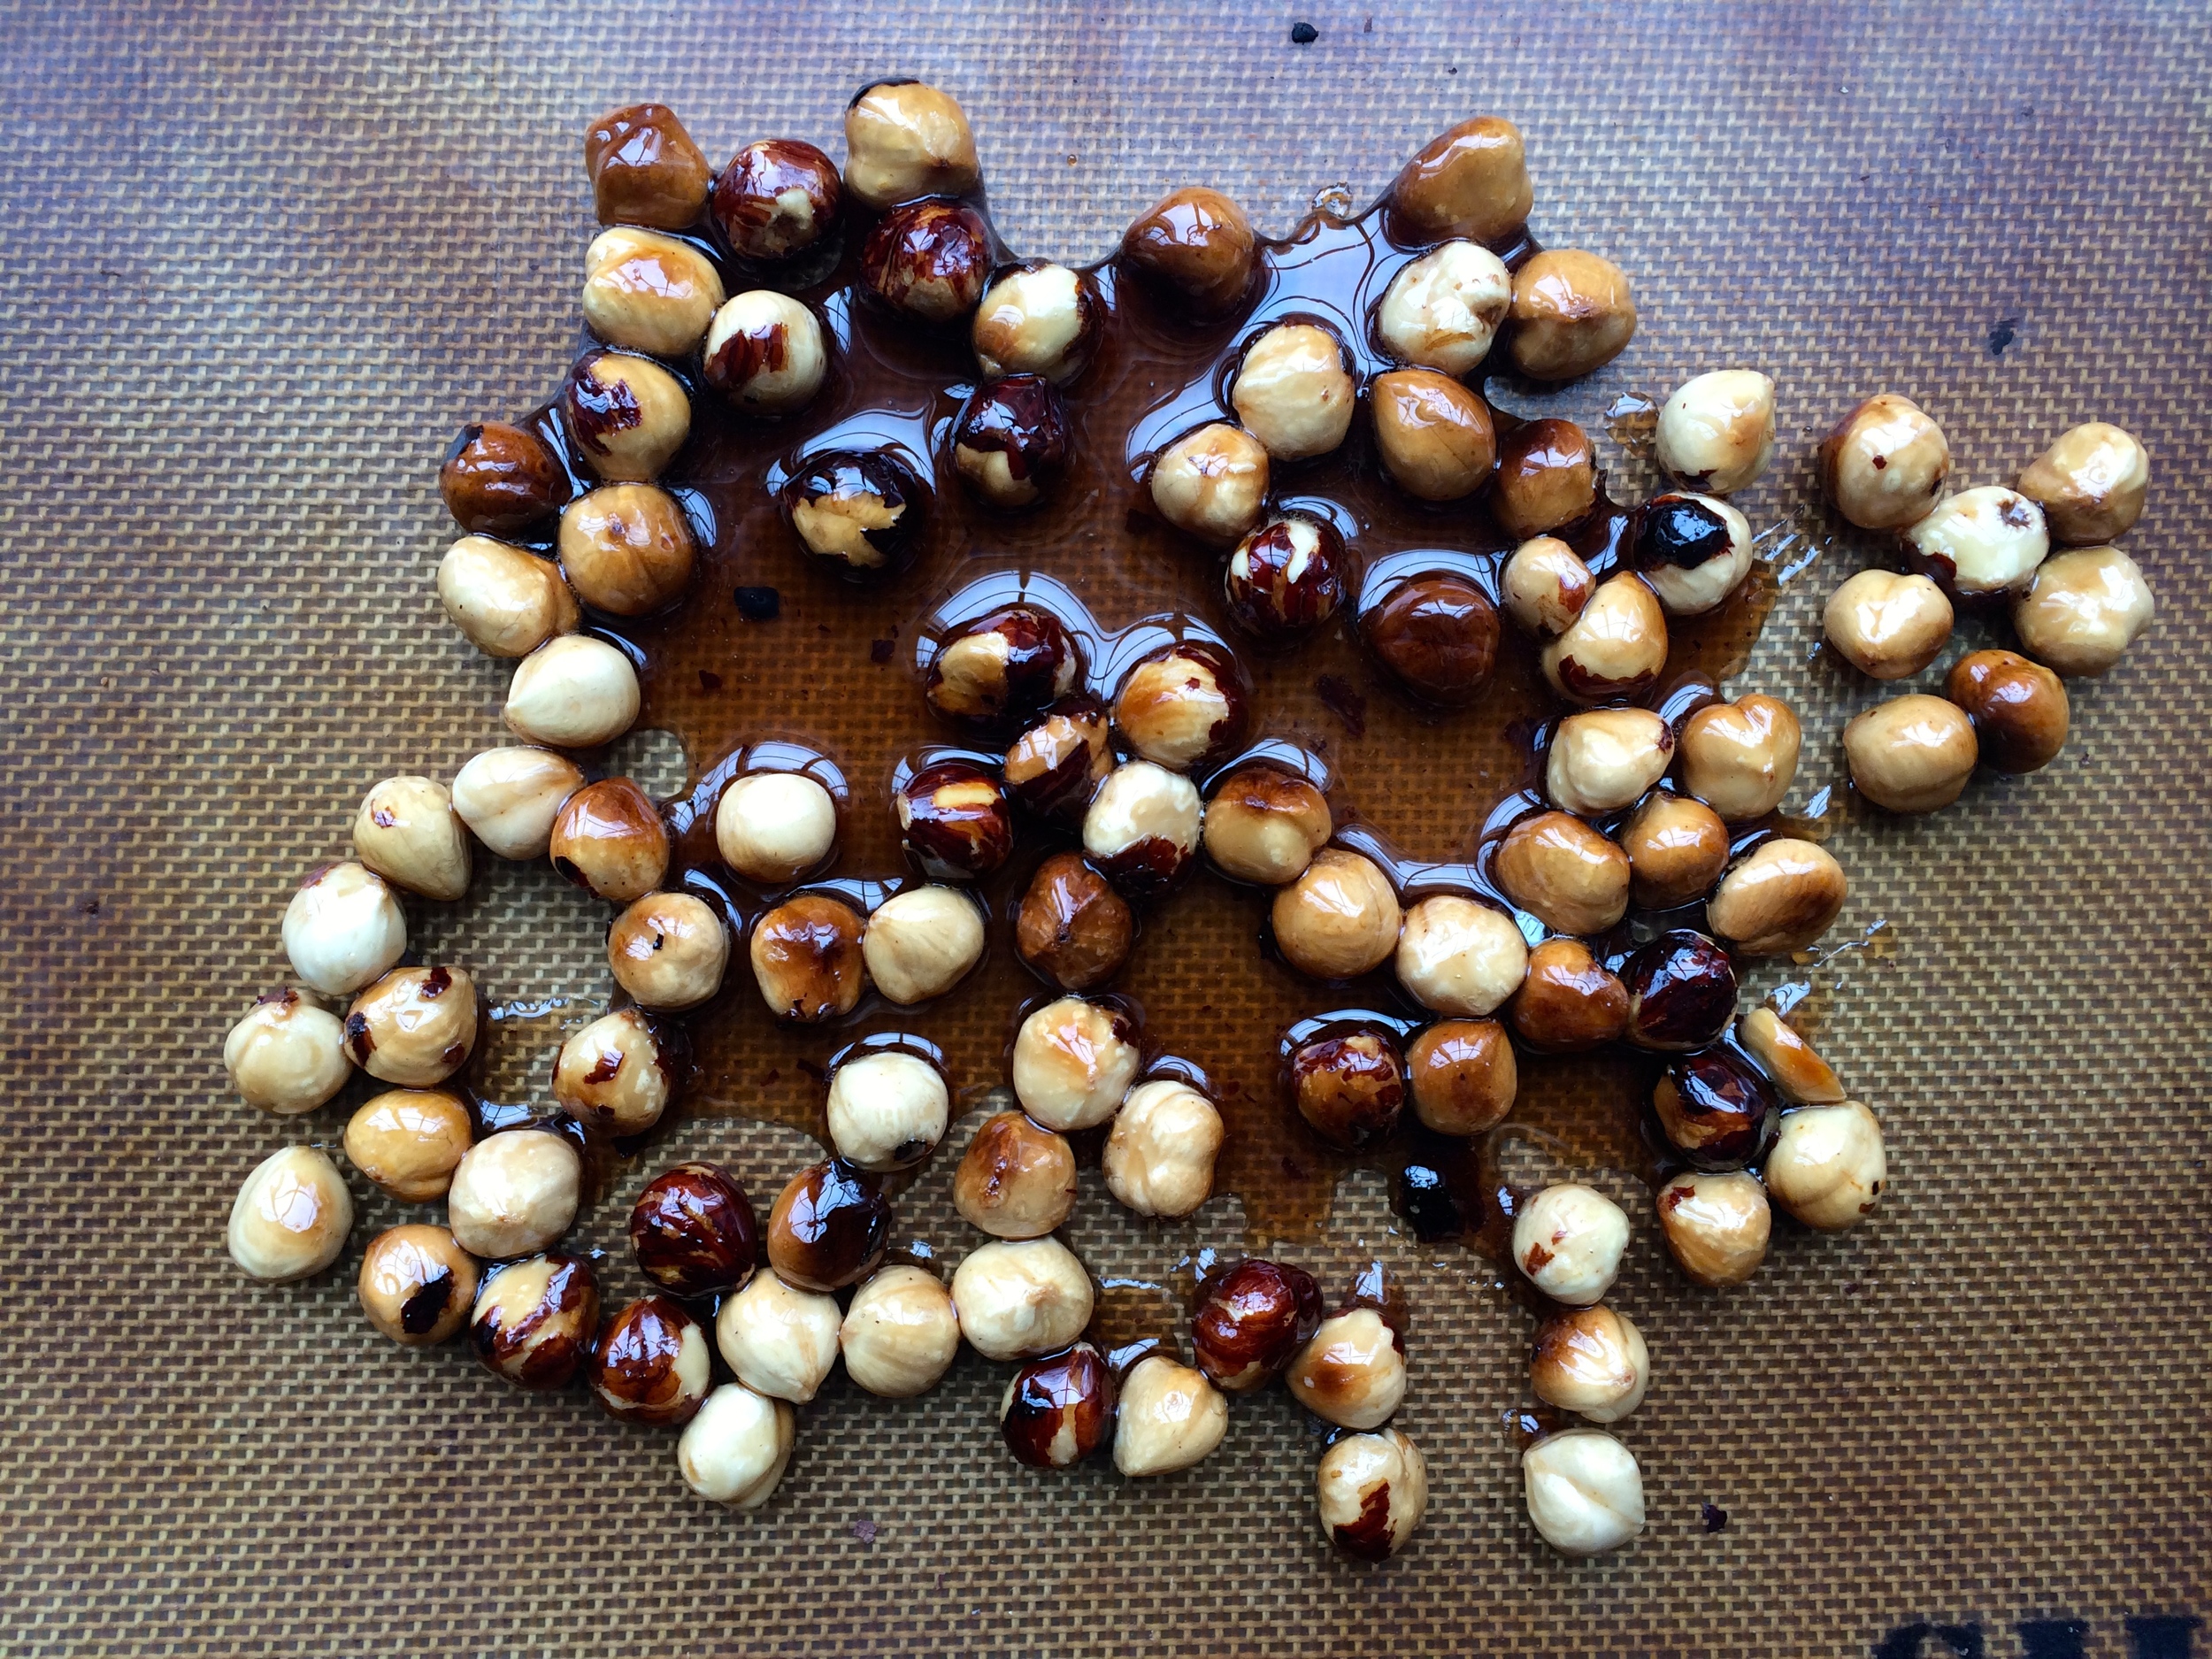
When most of the skins are removed, transfer 2/3 cup of the hazelnuts to a saucepan. Add the maple syrup, vanilla extract, and sea salt and stir to combine. Bring the mixture to a boil over medium-high heat for 10-12 minutes, stirring often. You want the maple syrup to darken and thicken. In the meantime, line a baking sheet with parchment or a Silpat. When the maple syrup mixture is ready, remove from heat and spread the mixture in an even layer on the lined baking sheet and allow to cool completely. I placed my mixture outside in the freezing winter cold, but you can place the baking sheet in the freezer or fridge to speed up the process. The mixture should harden and crystallize, but don't fret if it's still a little soft after 30 minutes or so, as the truffles will still come together in the end.
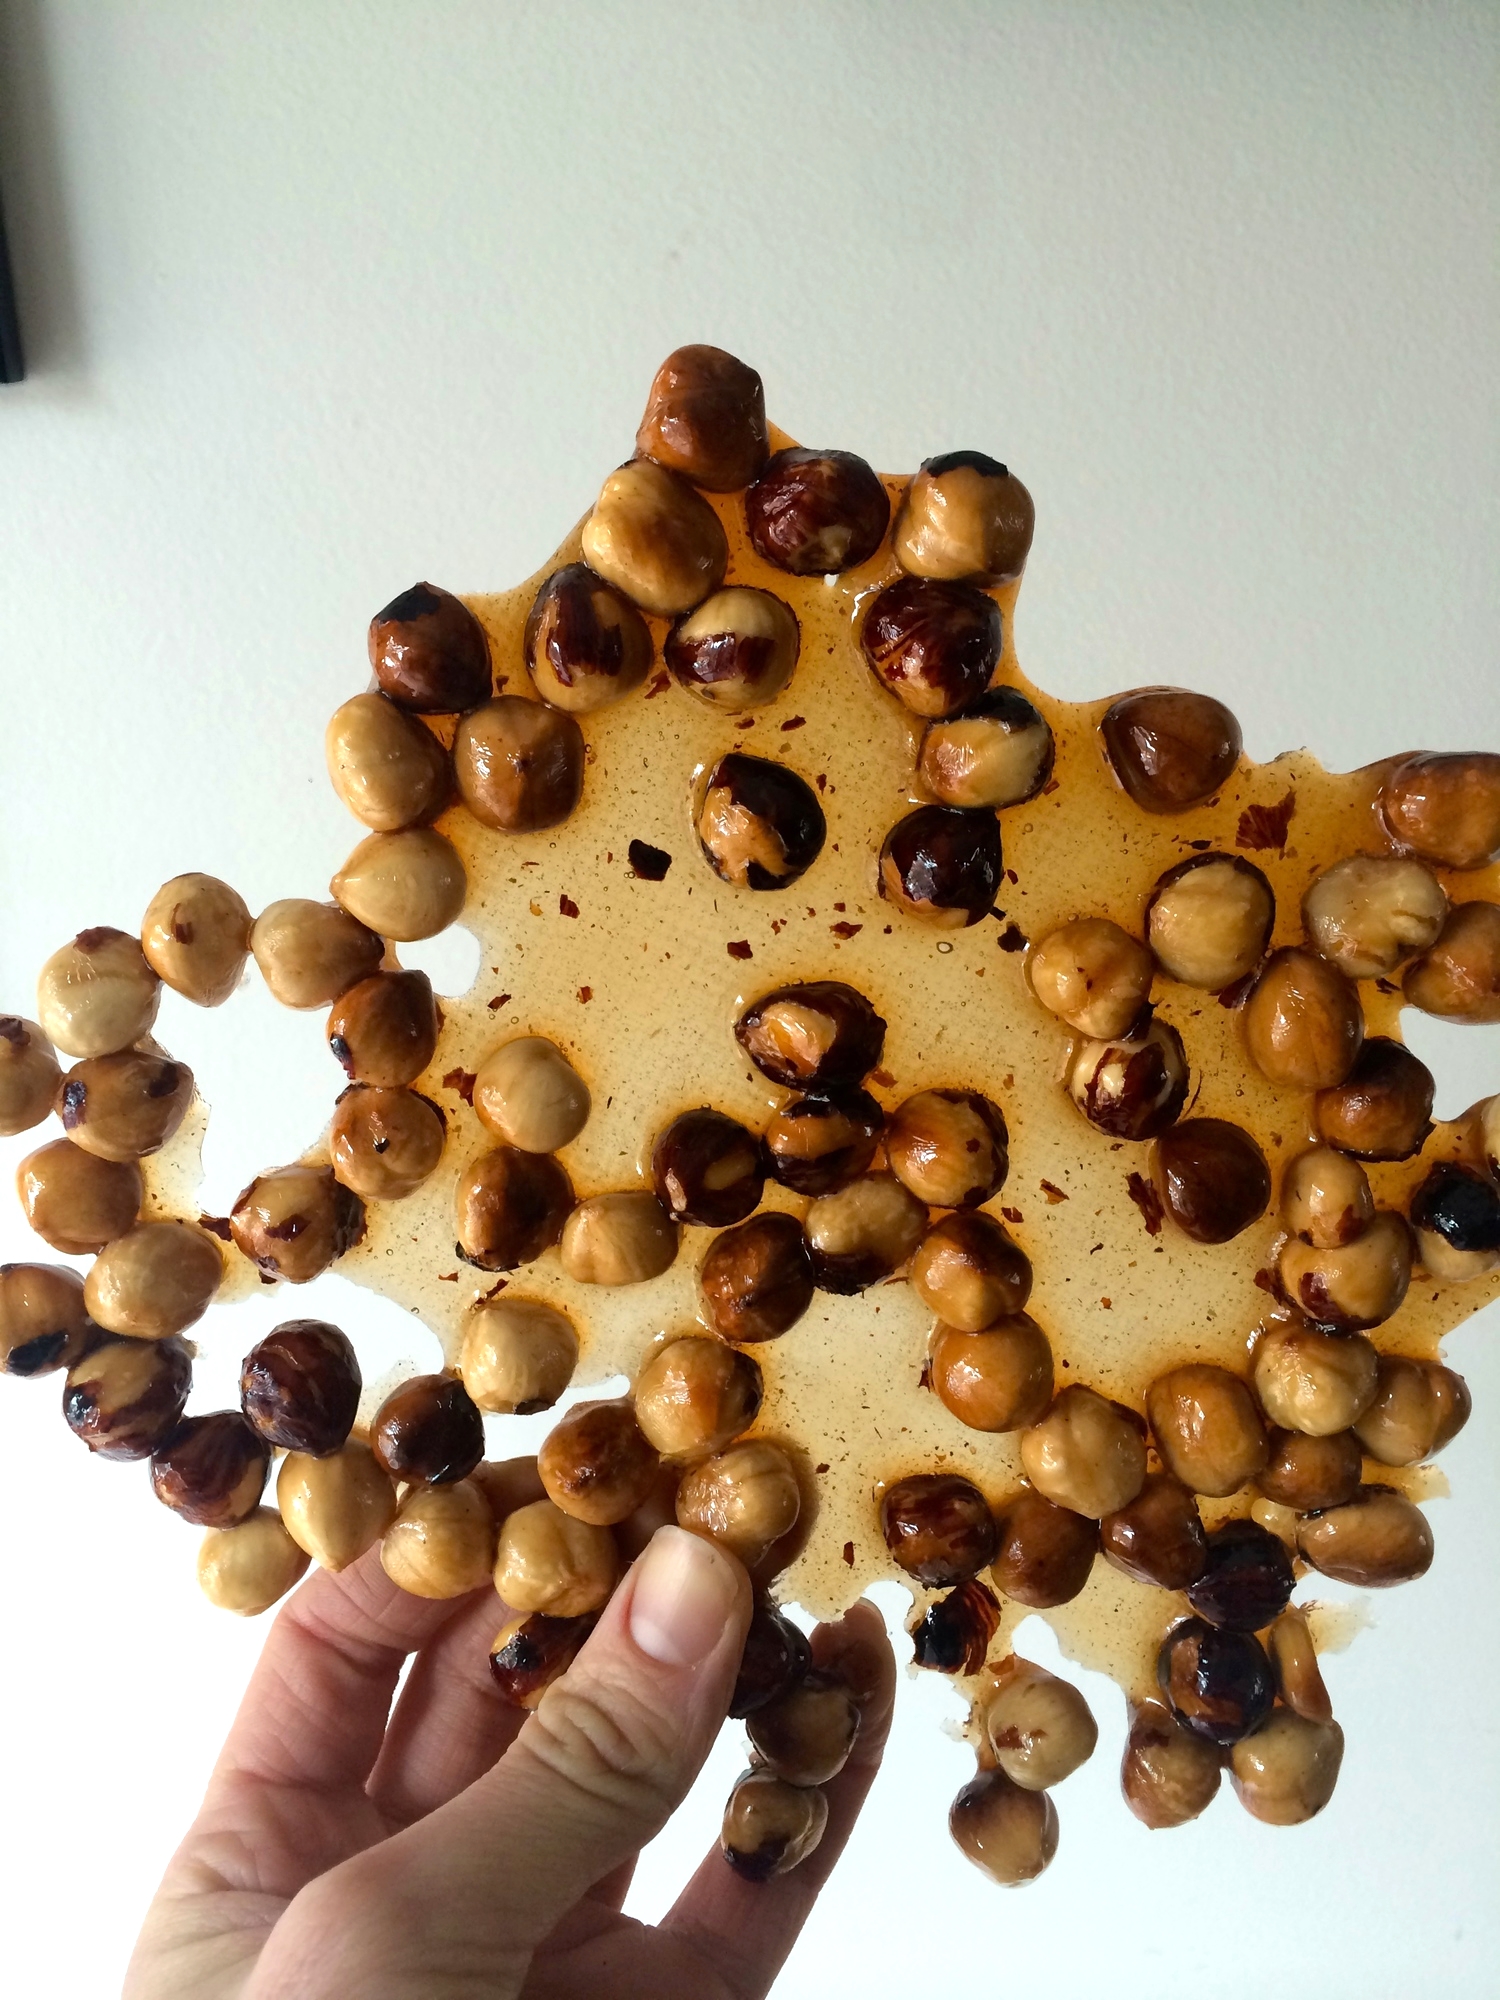
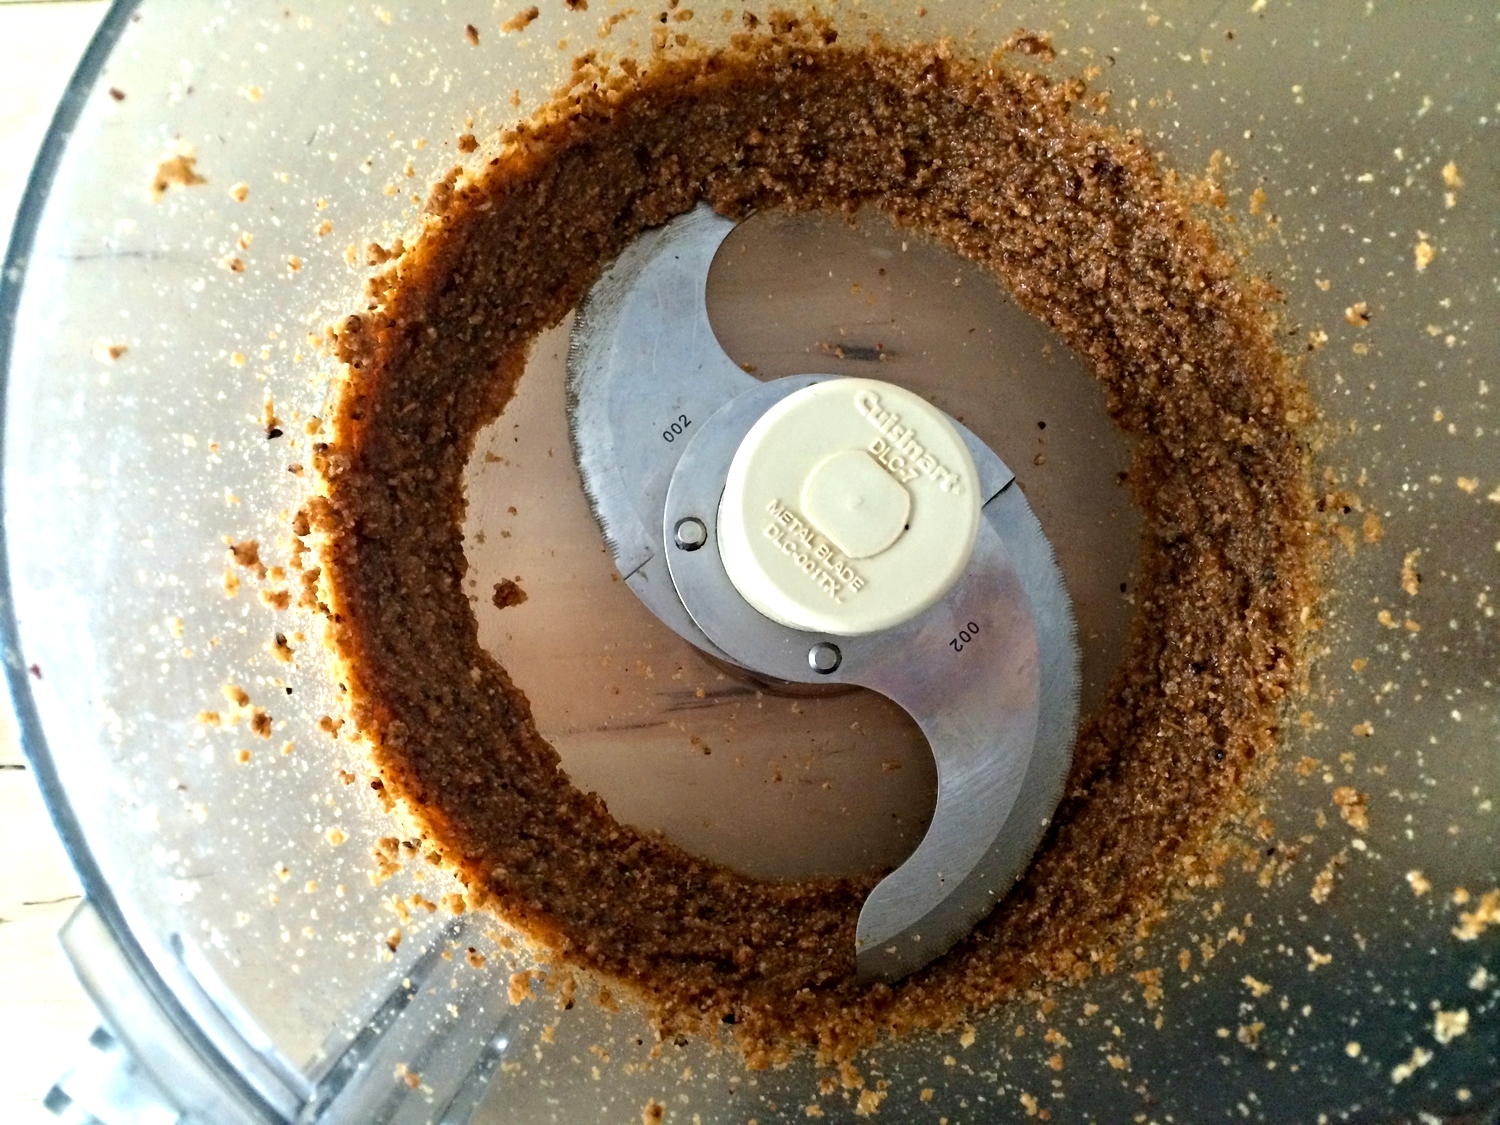
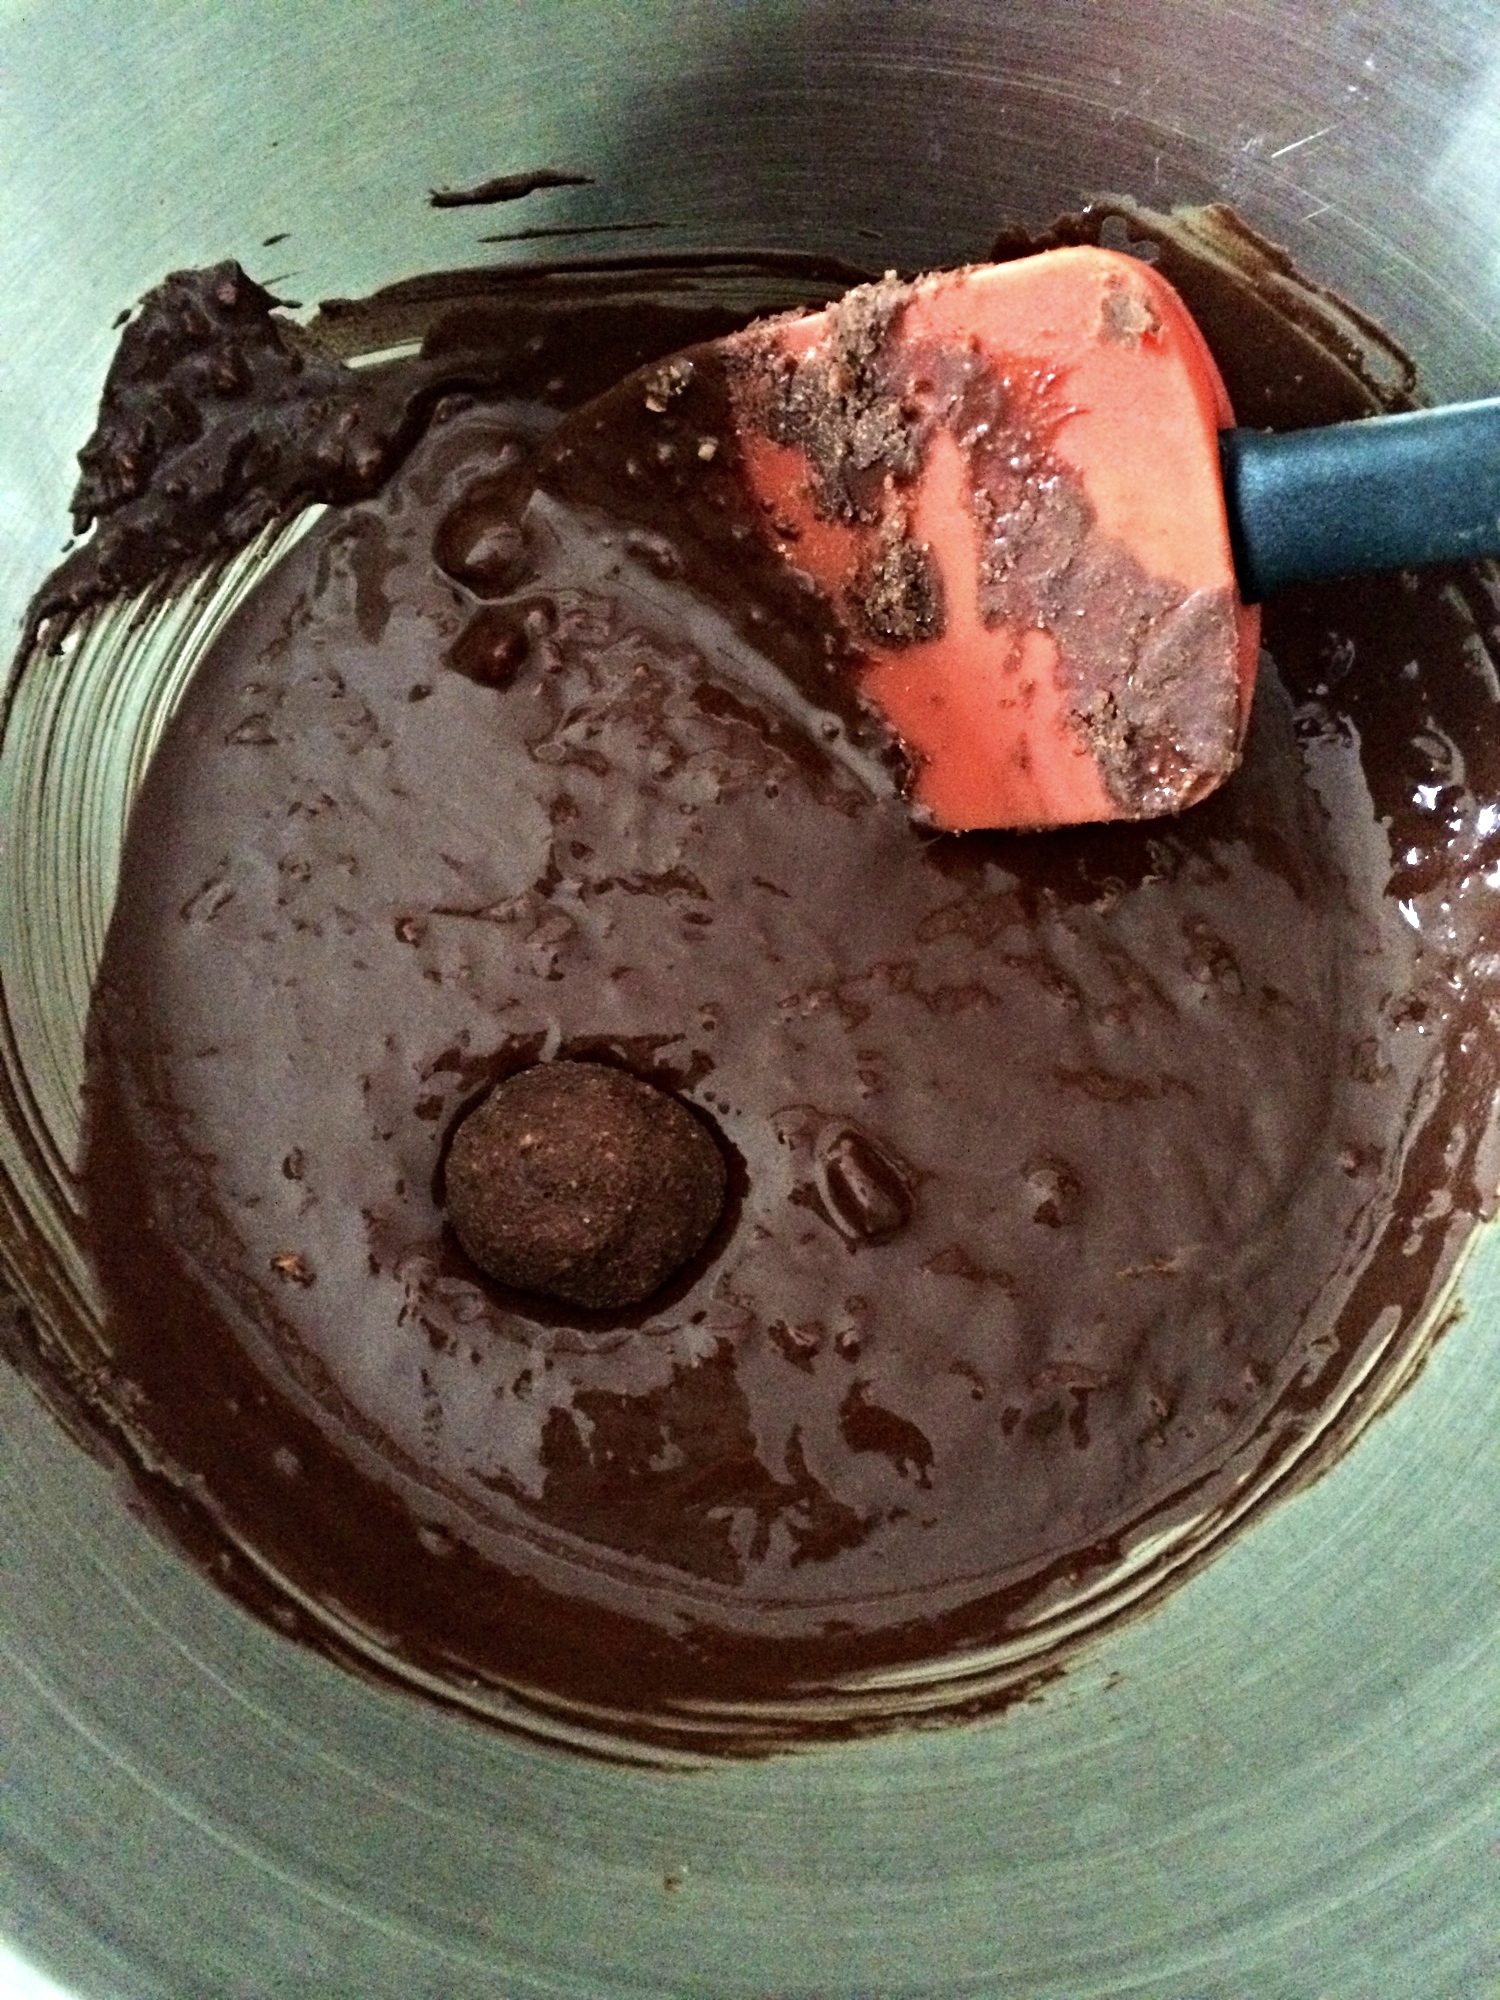
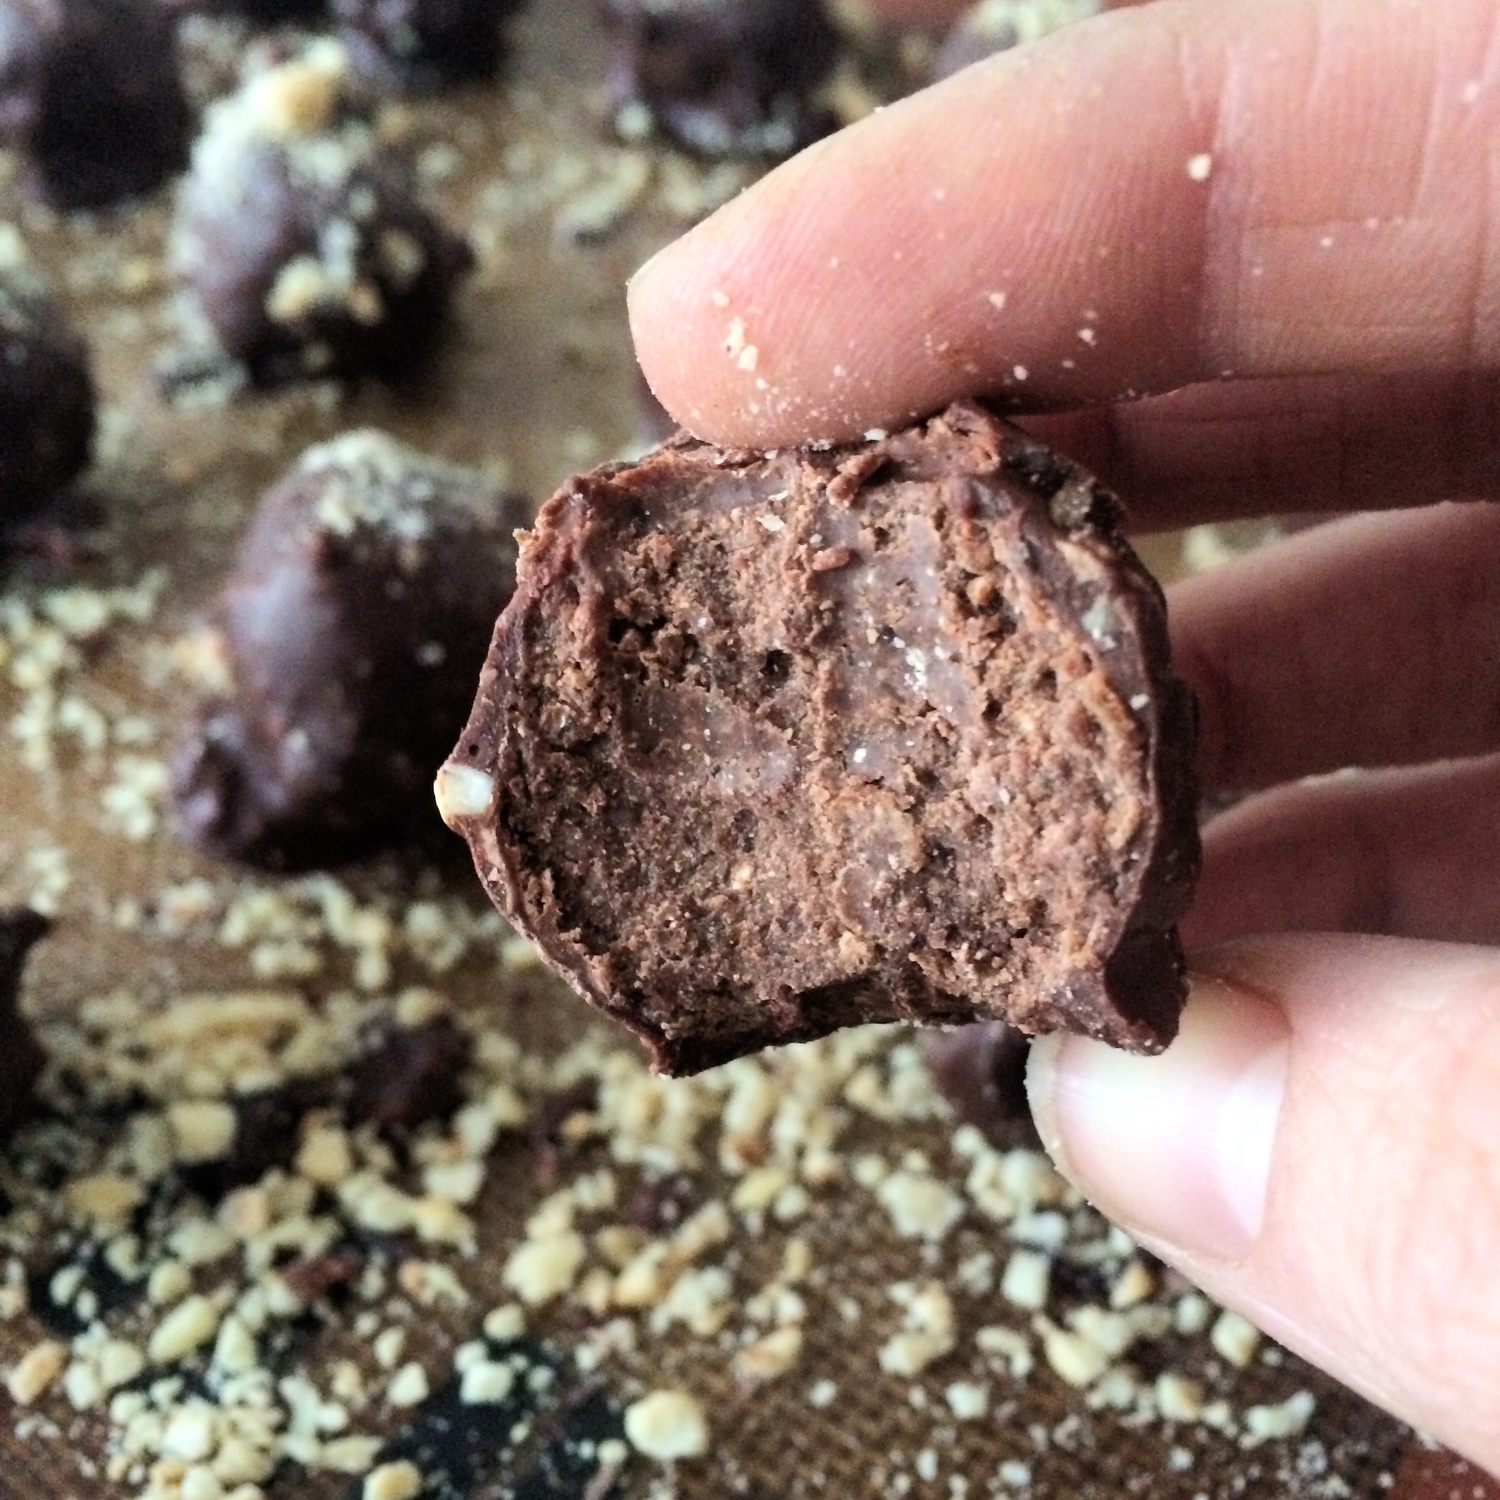
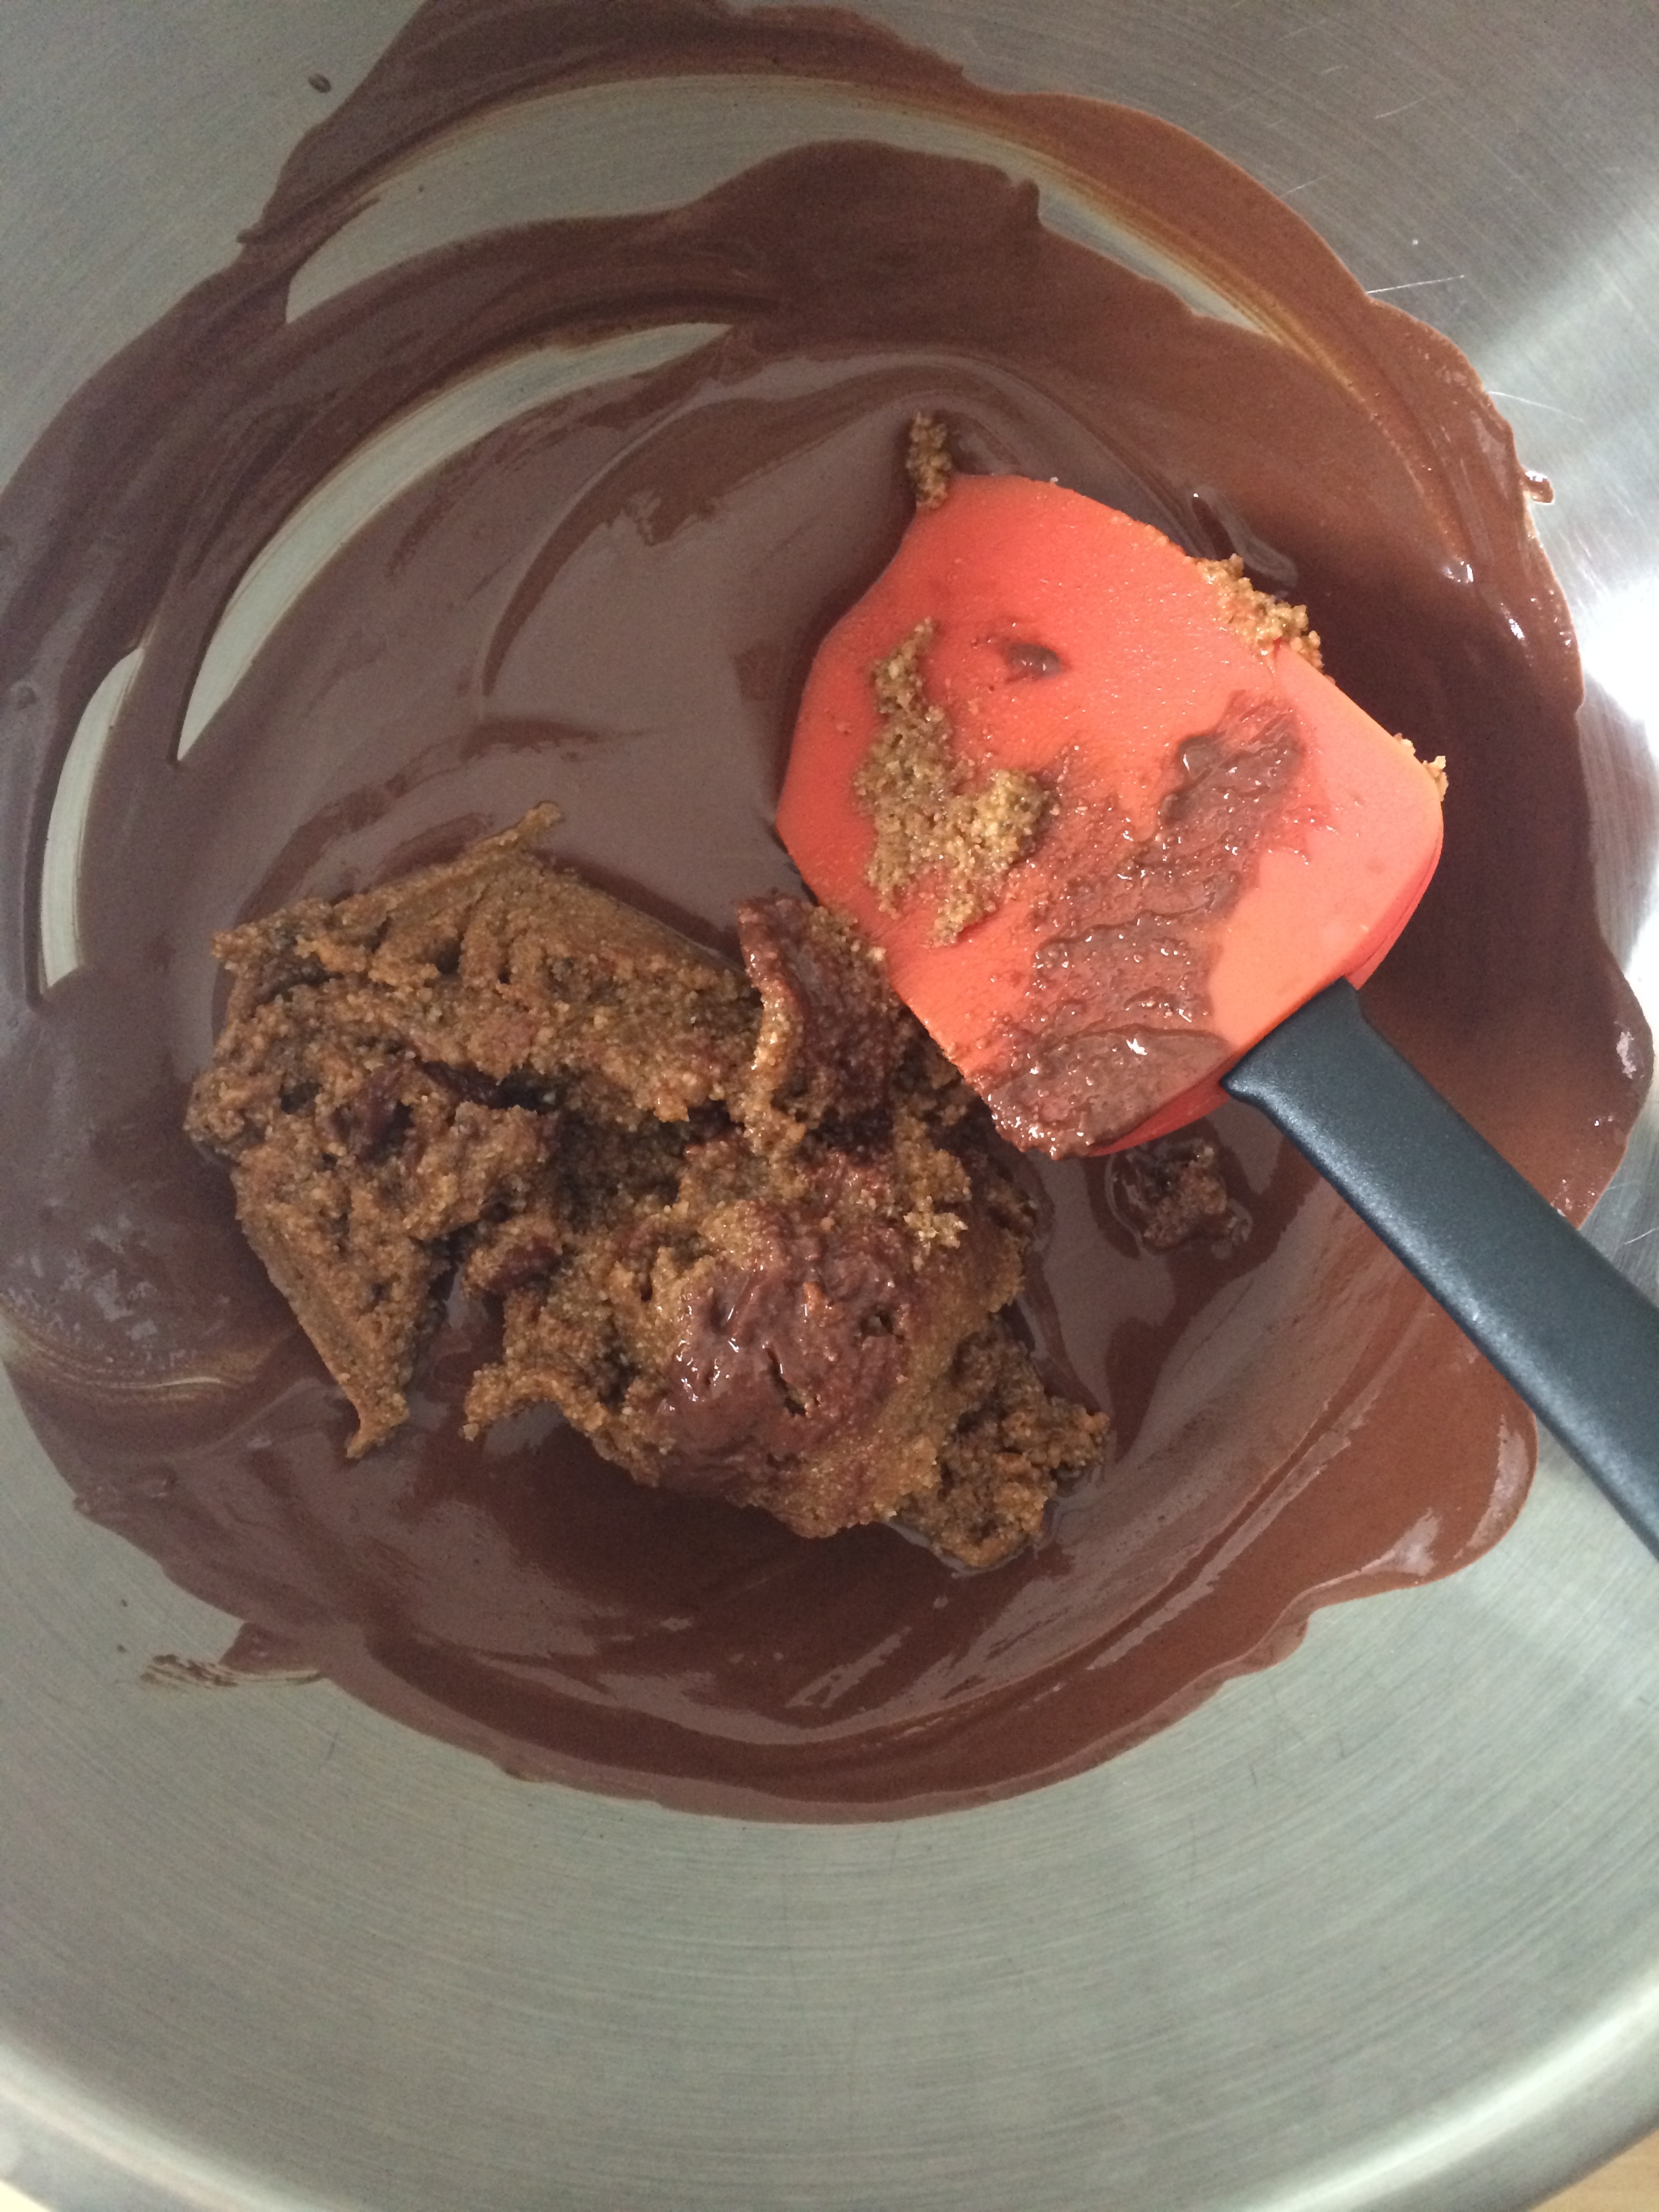
Break the hardened hazelnut praline into pieces and process in a food processor for 2-3 minutes or until the mixture resembles a chunky nut butter. Set aside.
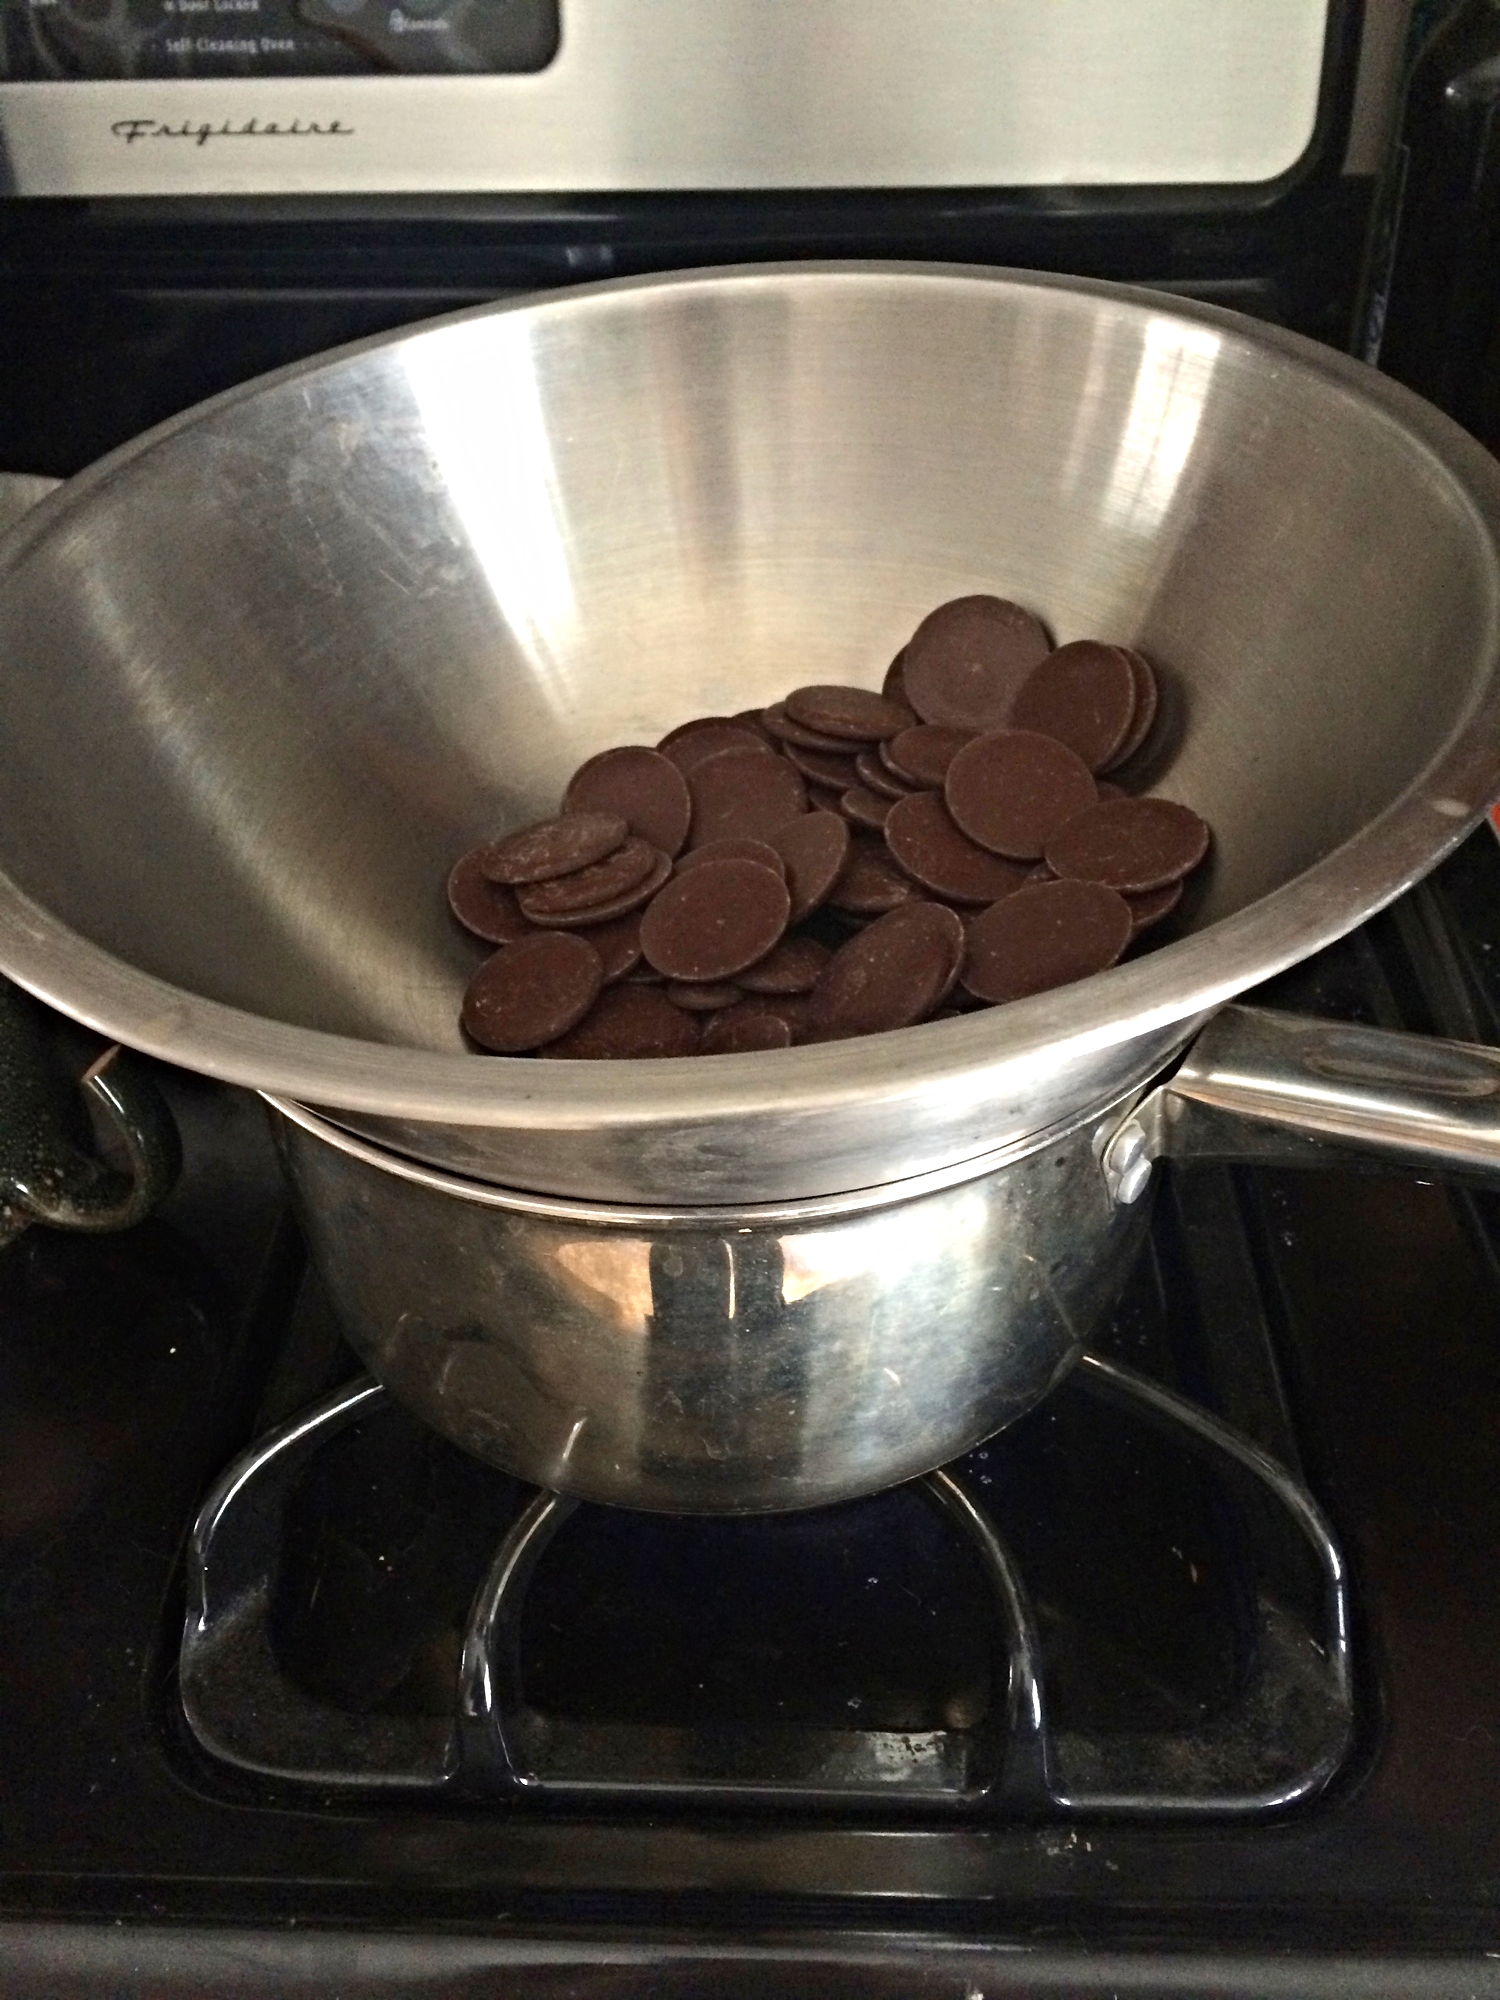
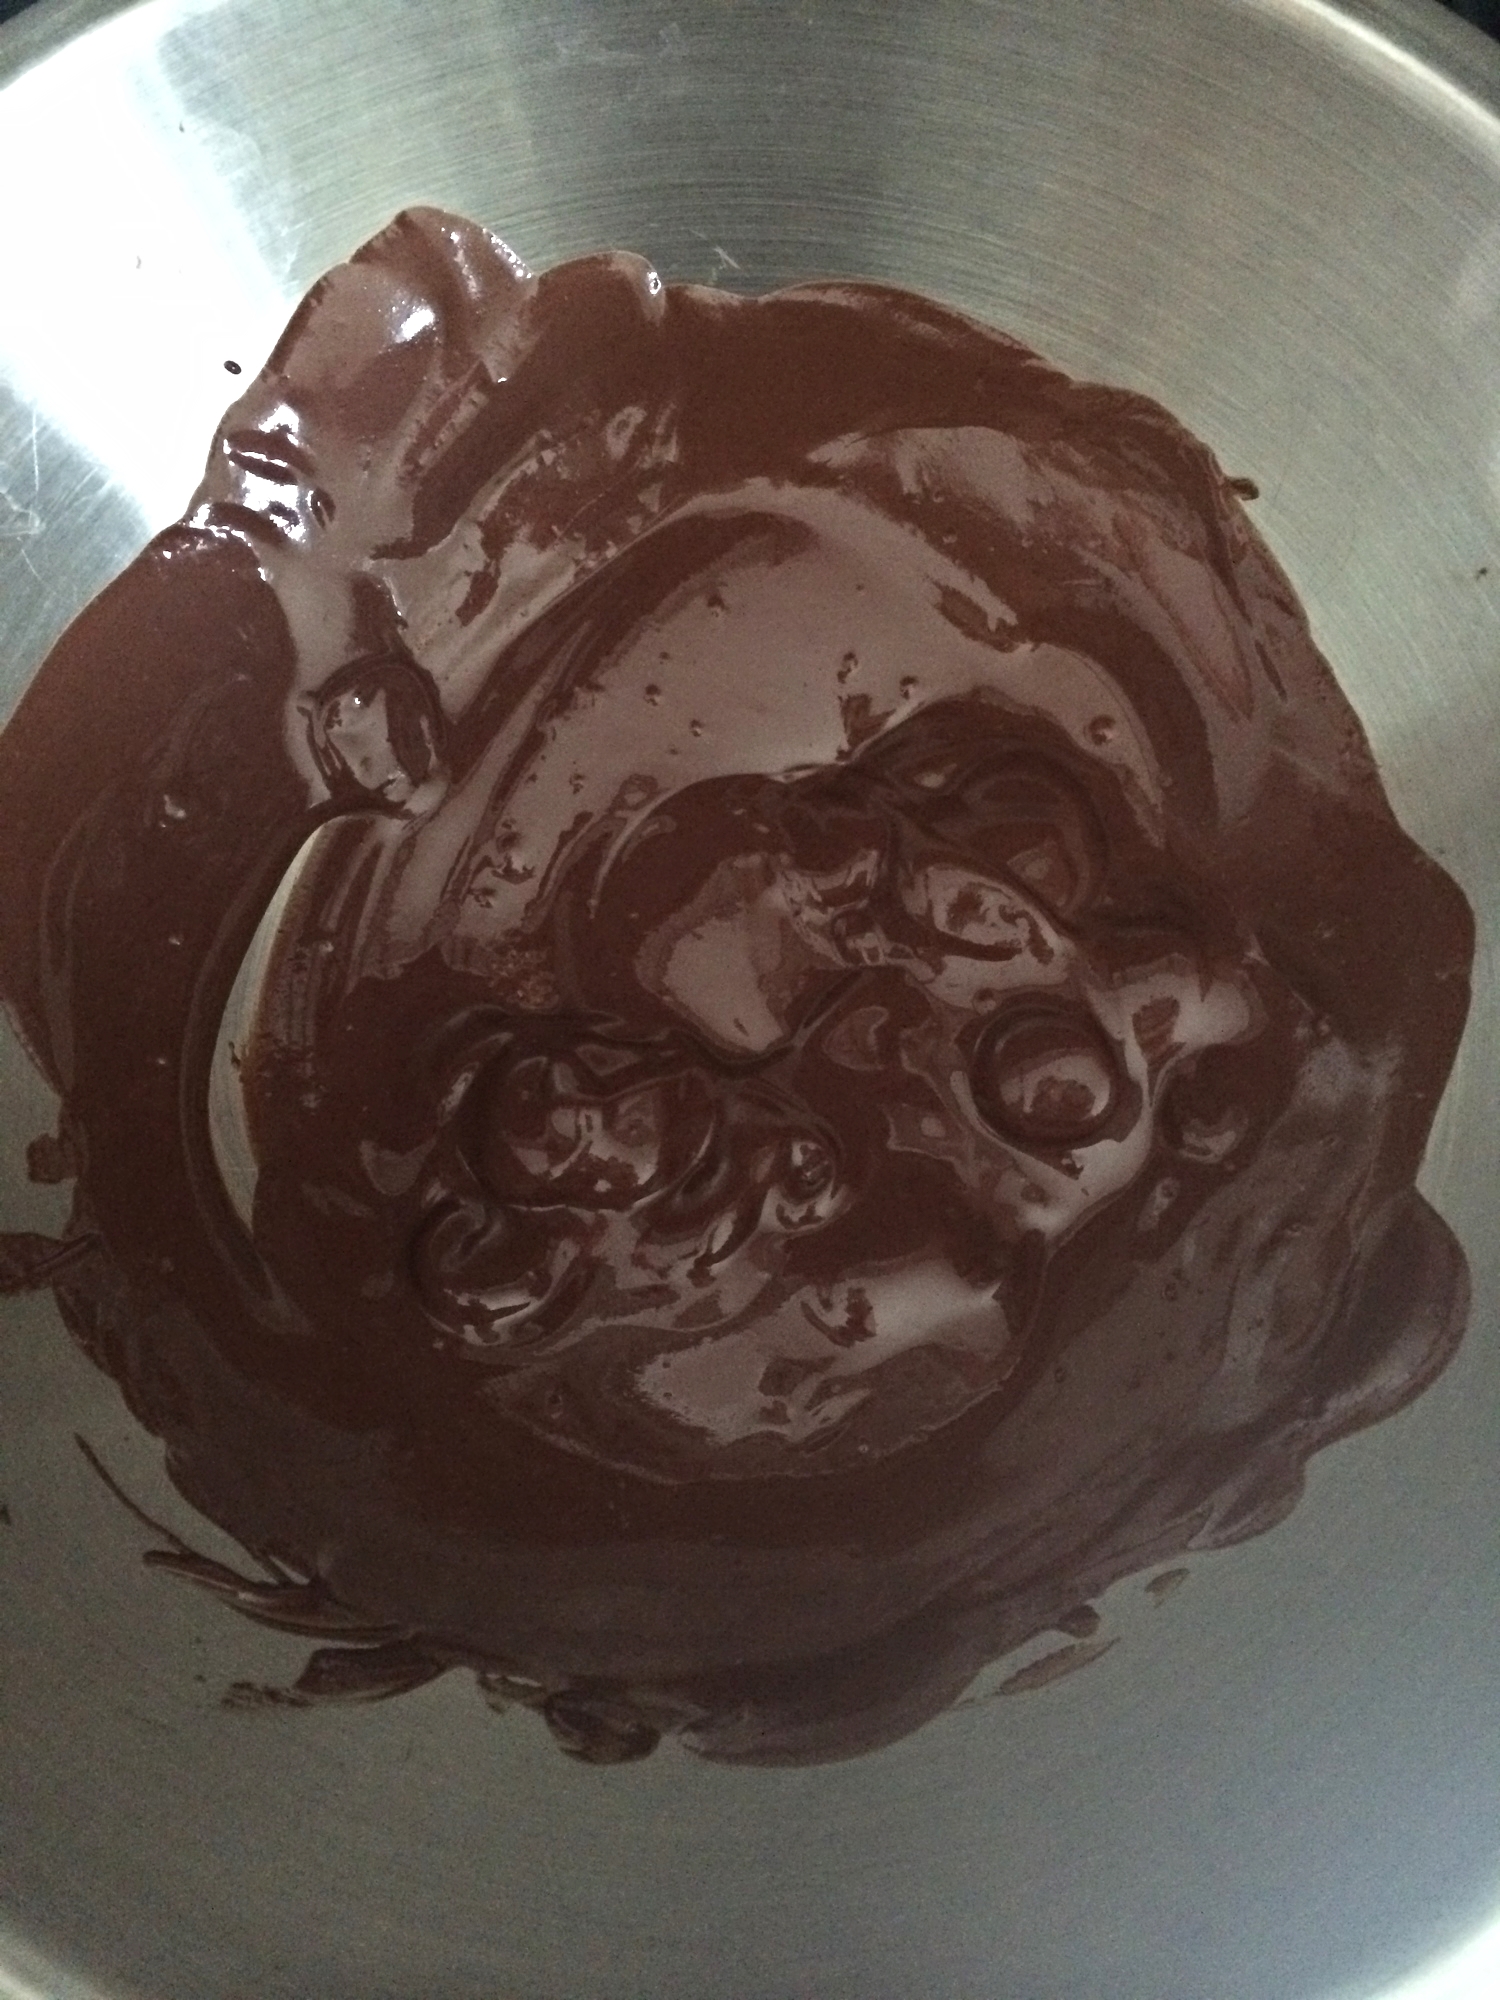
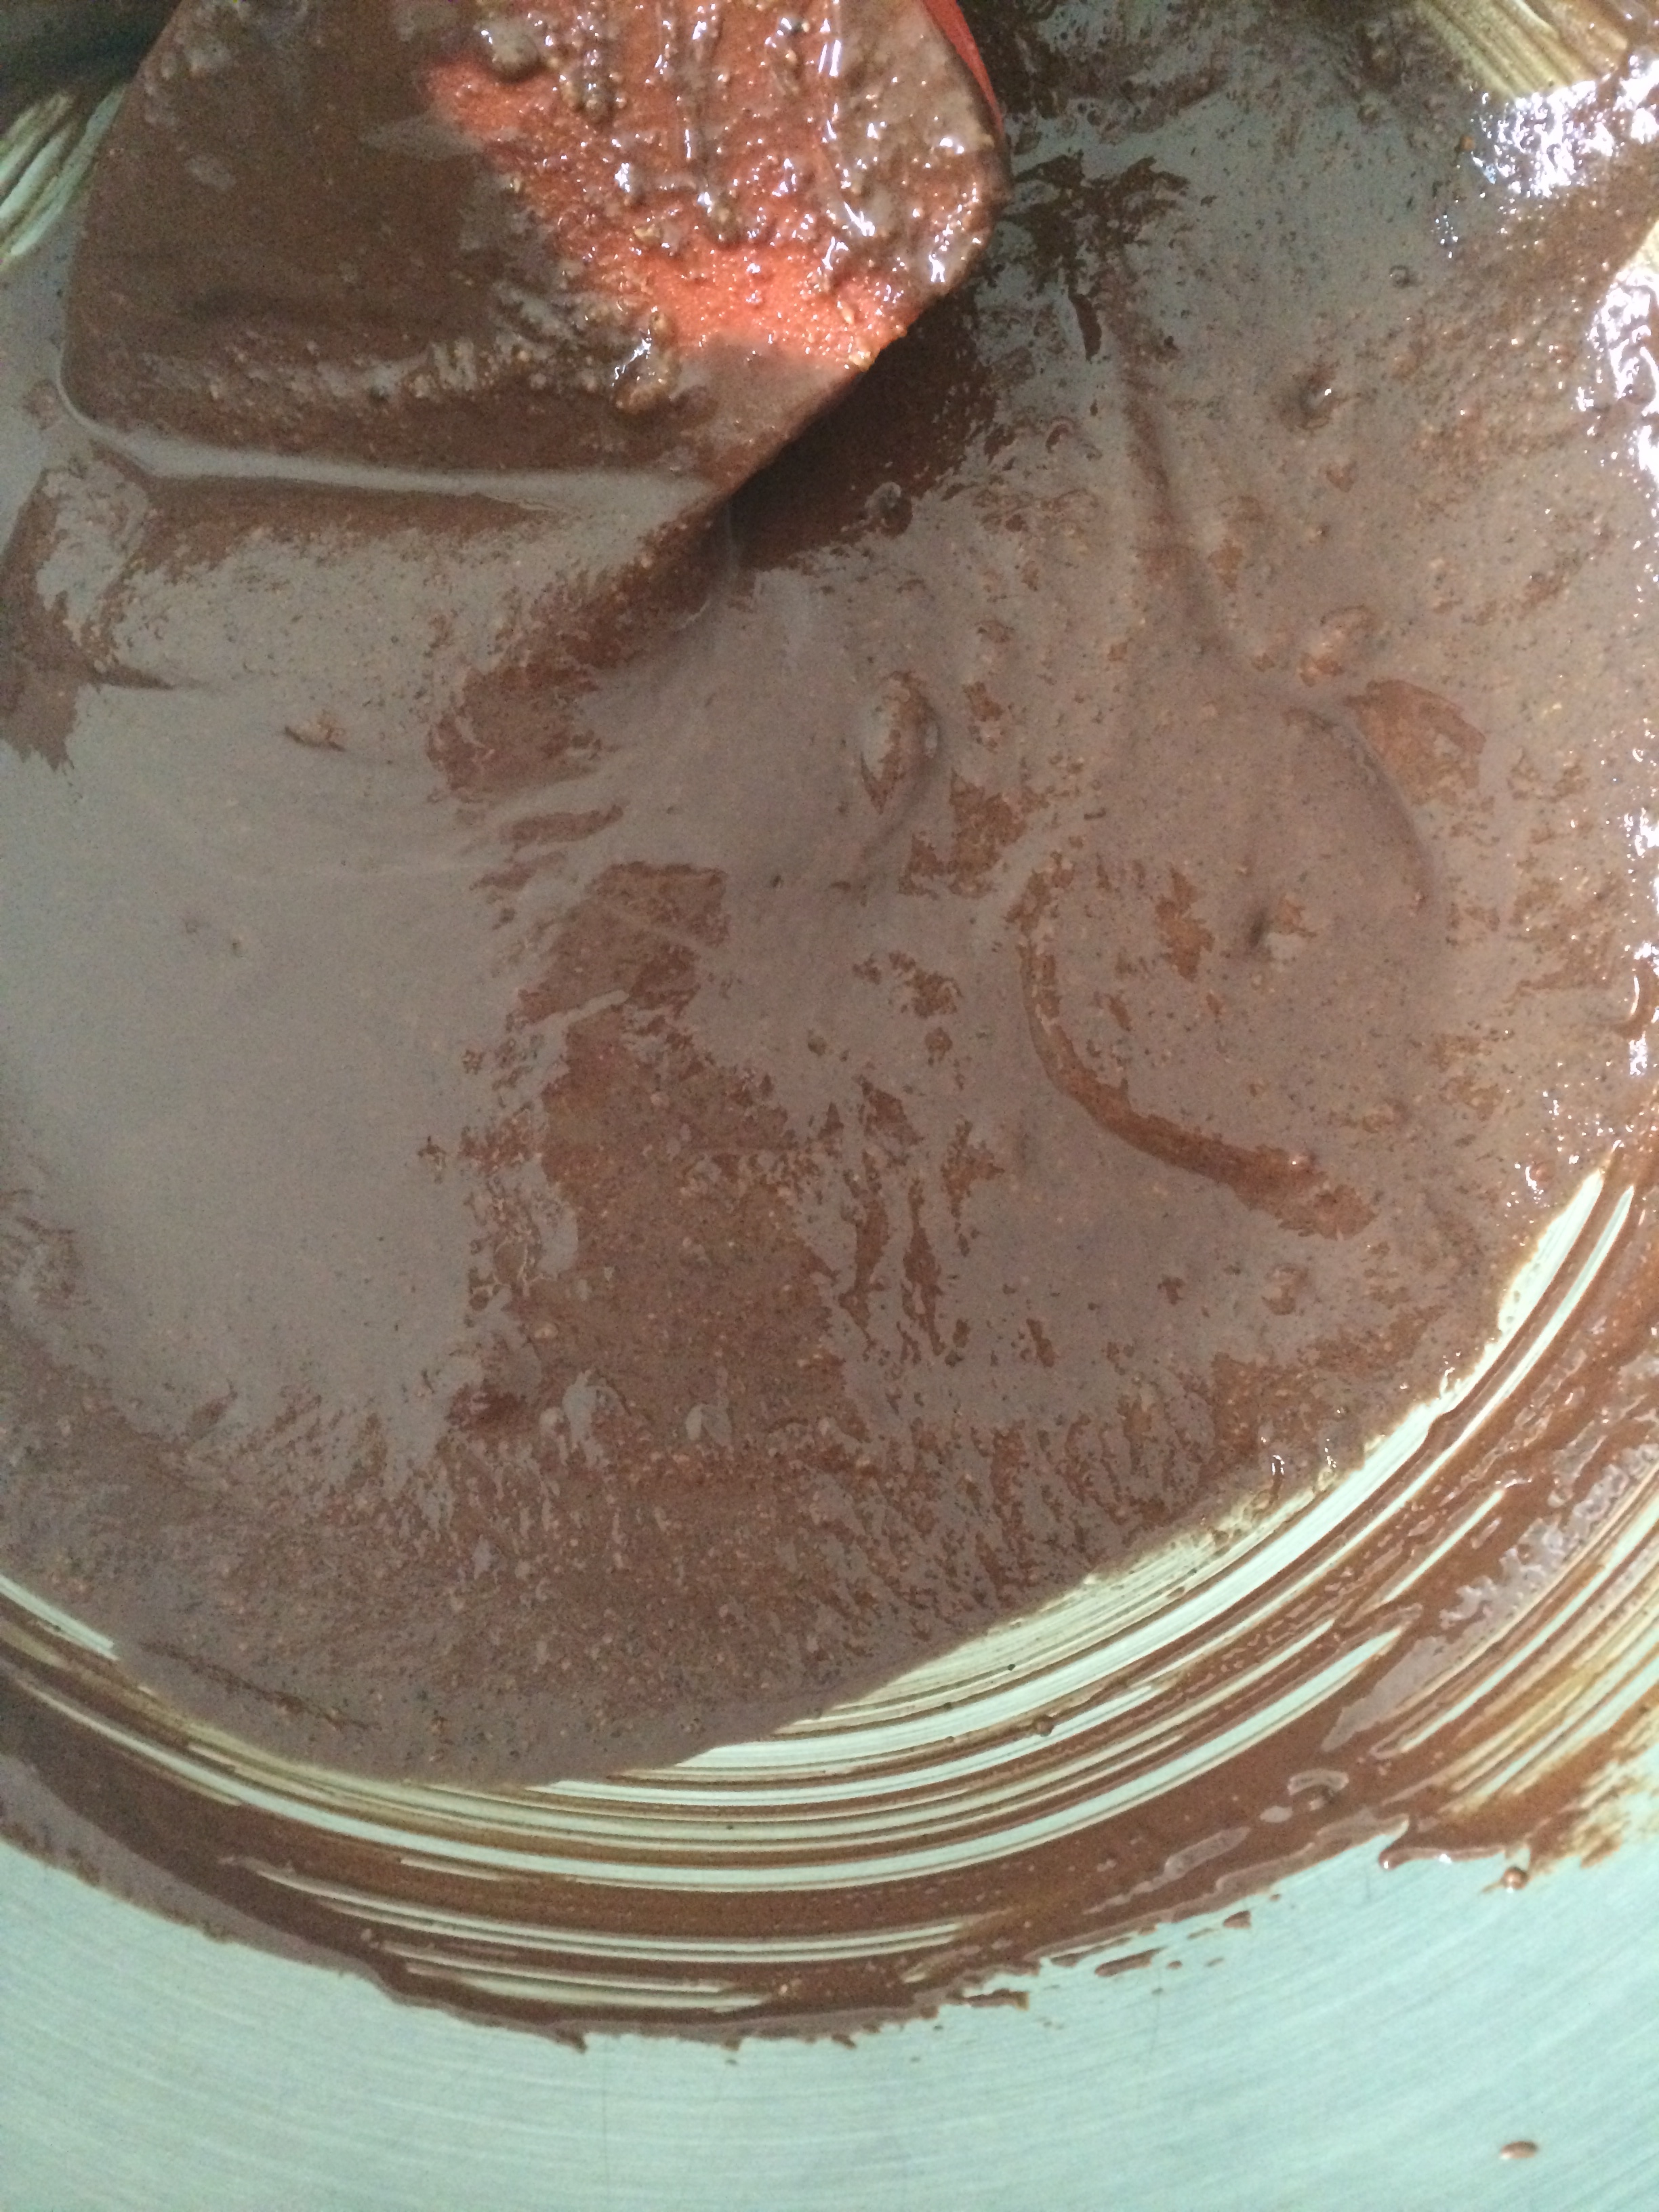
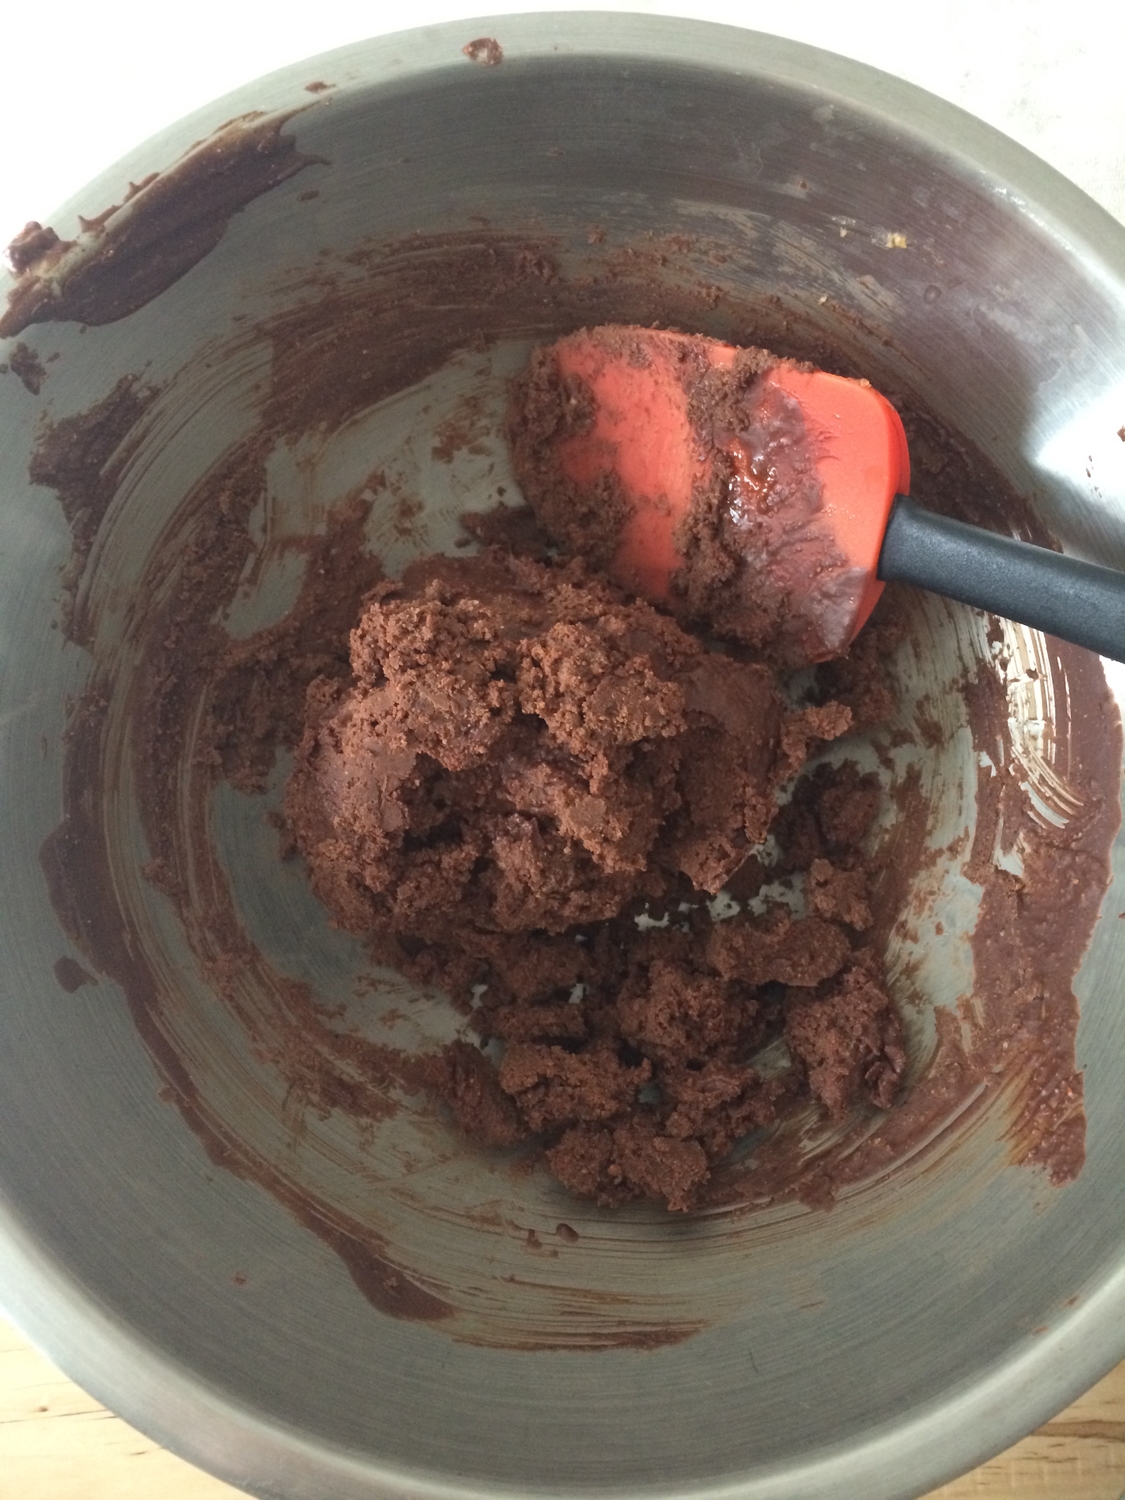
Begin to melt 1 cup of 70 % dark chocolate in a double boiler, stirring often. Just as the chocolate mixture is almost completely melted, remove the bowl from the heat and stir until smooth. Add the processed hazelnut praline mixture and mix thoroughly. Allow the chocolate hazelnut mixture to cool completely, about 30 minutes. You can place the mixture in the fridge, stirring every 10 minutes or so to speed up the cooling. This will make it easier to roll the truffles.
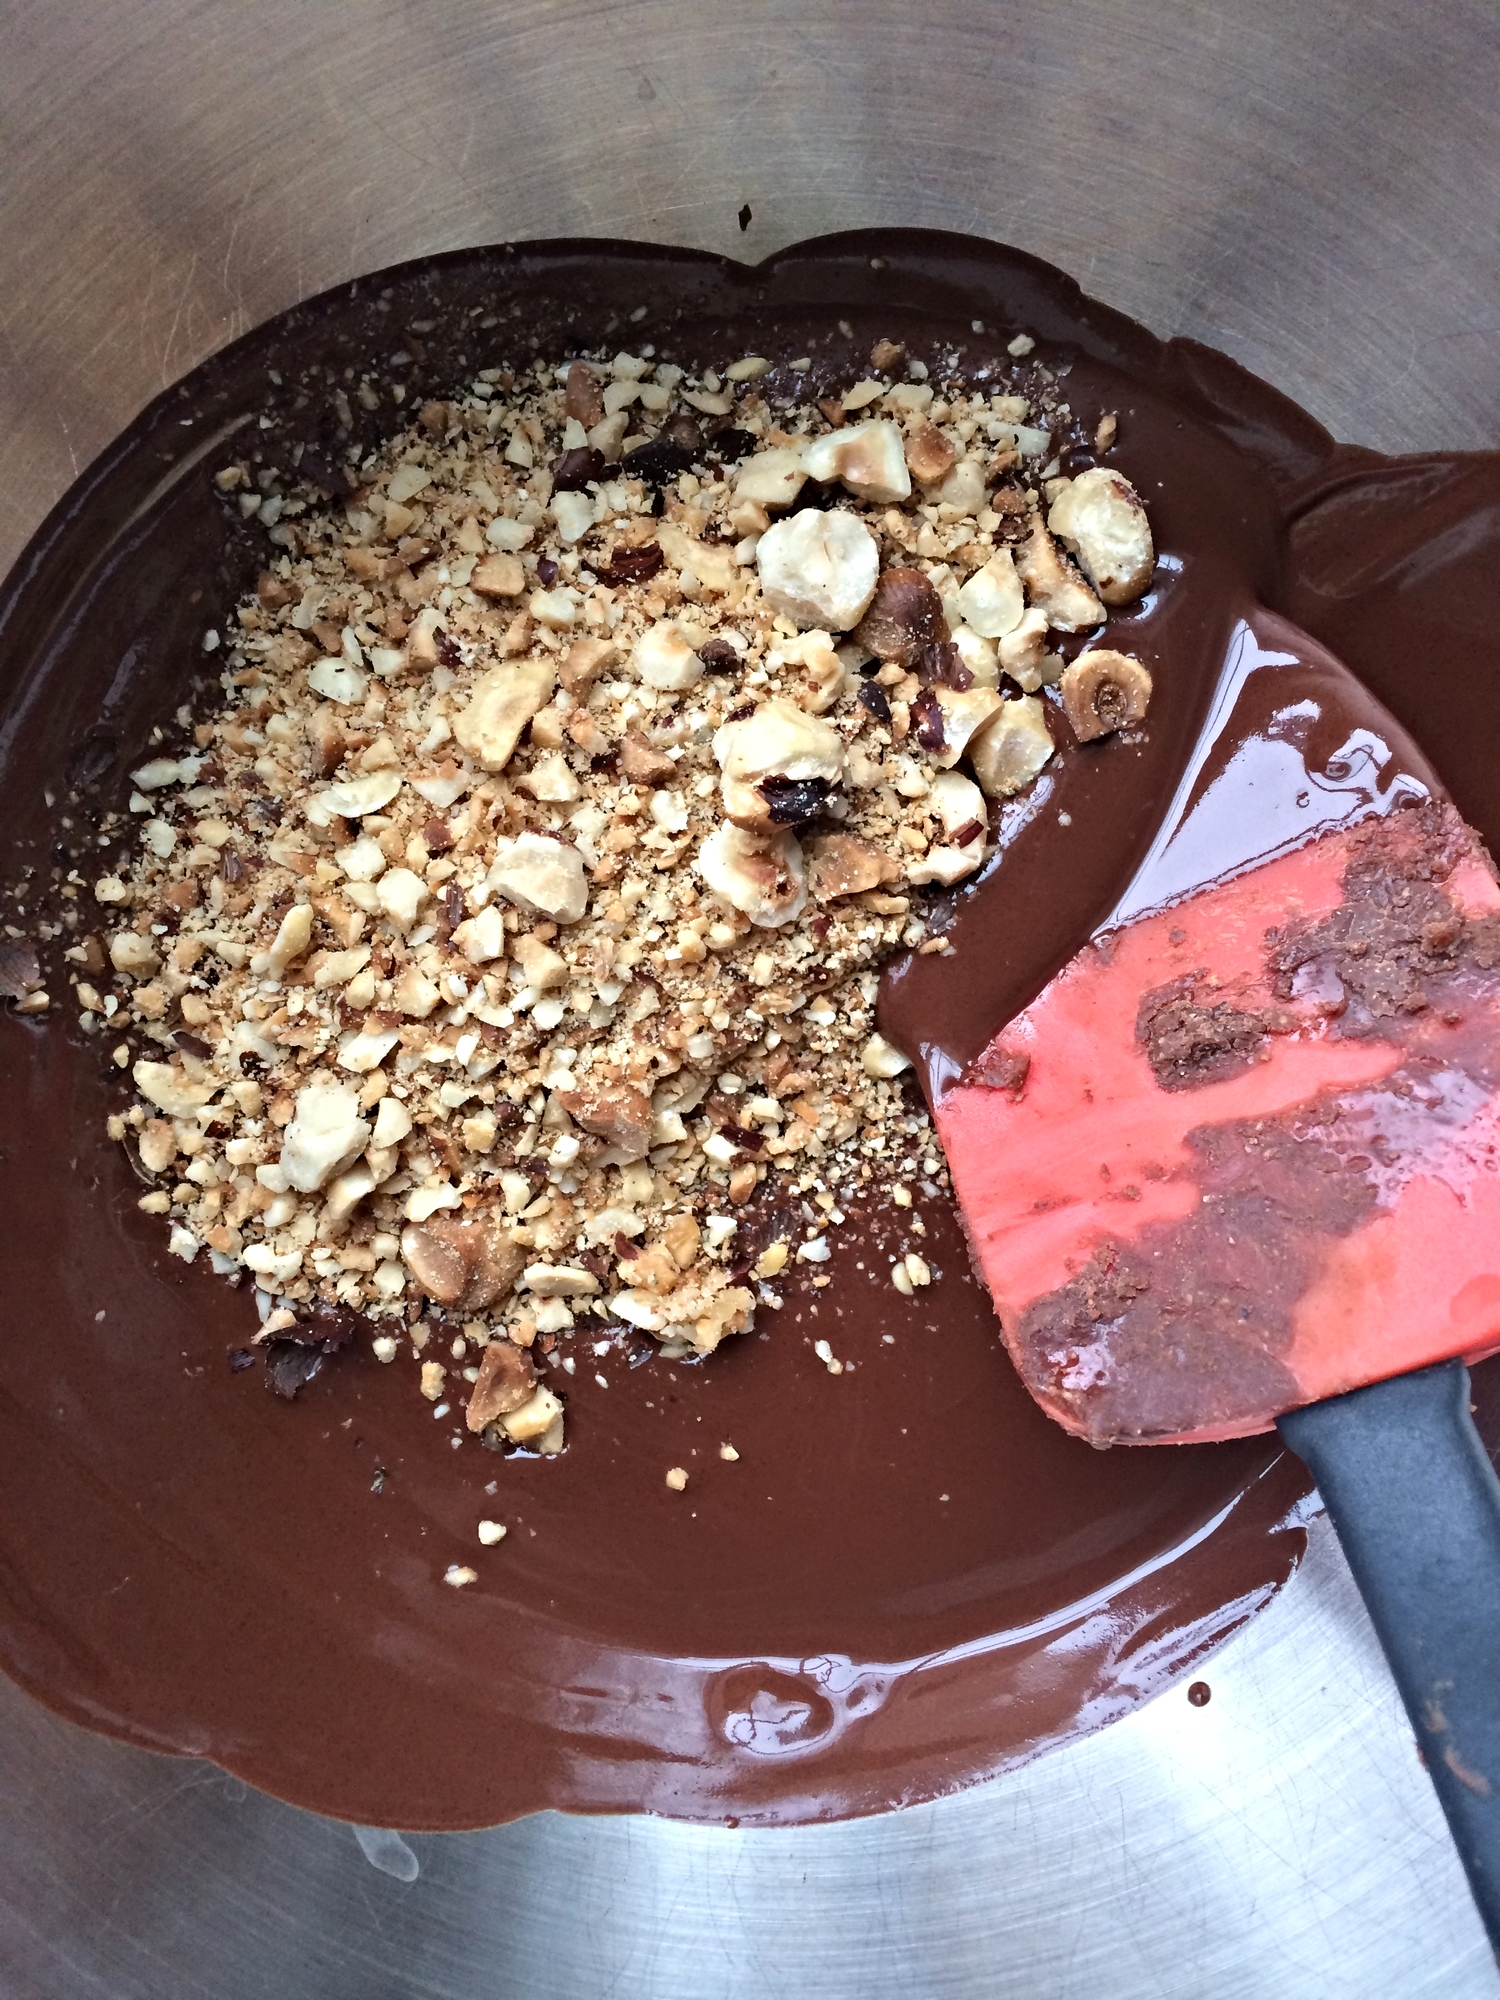
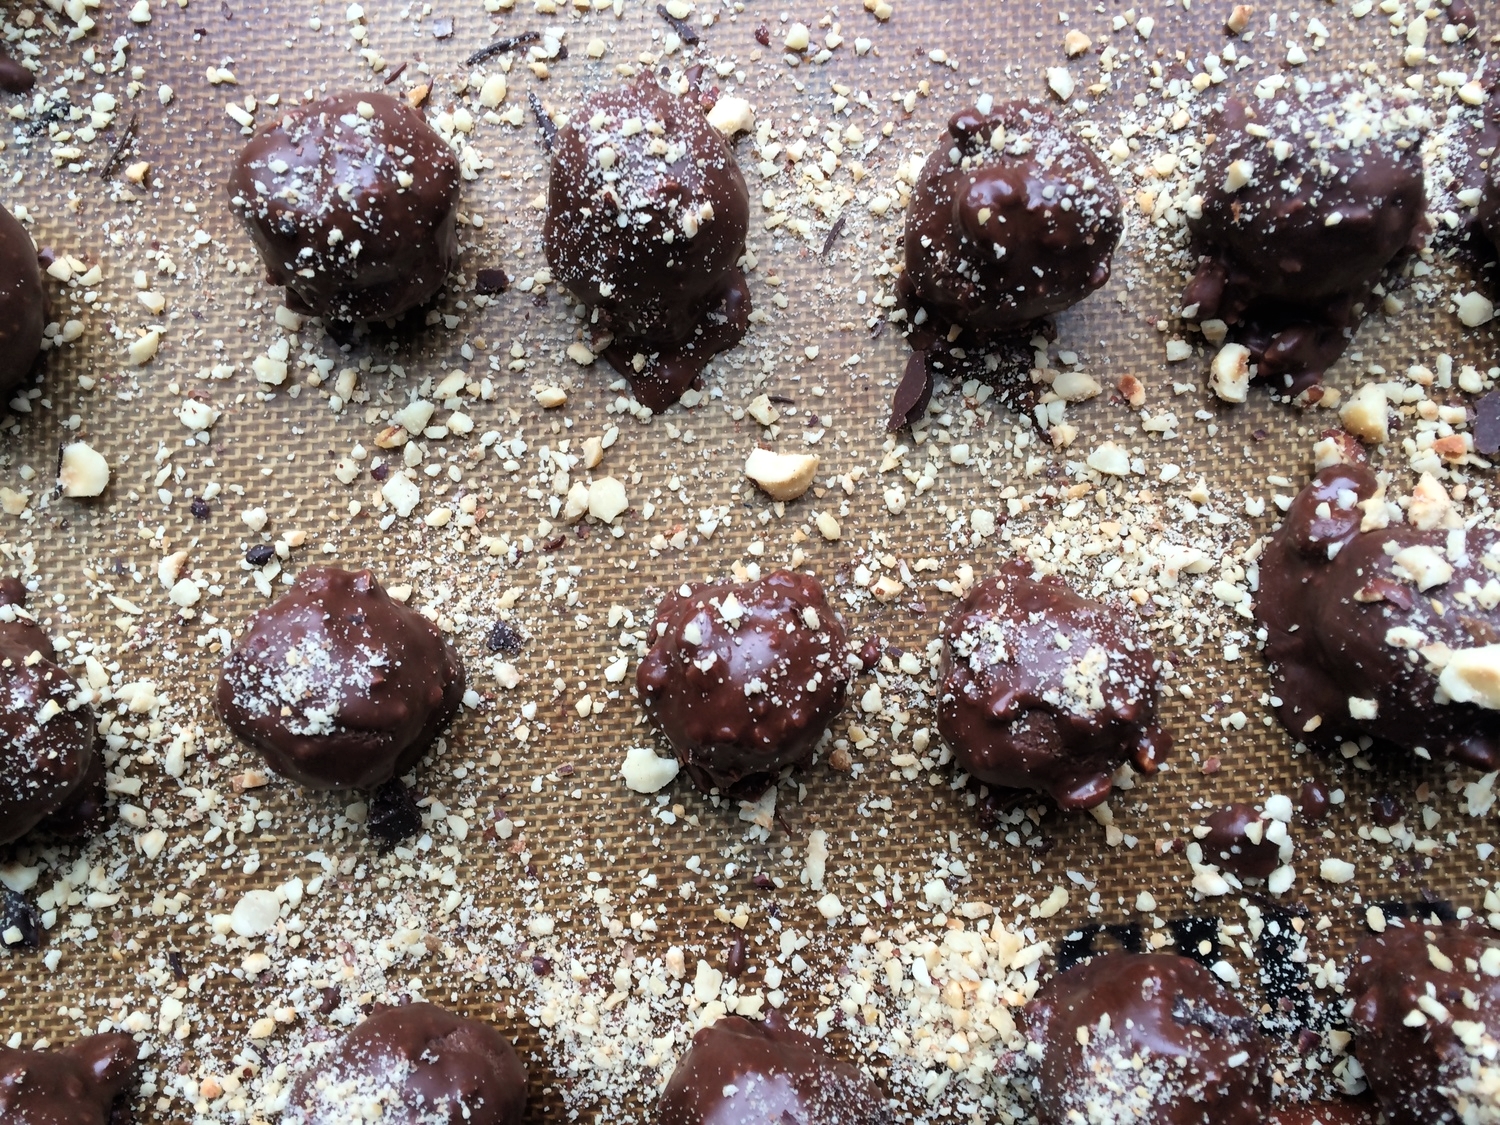
In the meantime, roughly chop the remaining 1/3 cup of hazelnuts either by hand or in the food processor. Set aside 2 tablespoons of these hazelnuts for decorating. Place the remaining 1 cup of dark chocolate in another bowl that can be used as a double boiler.
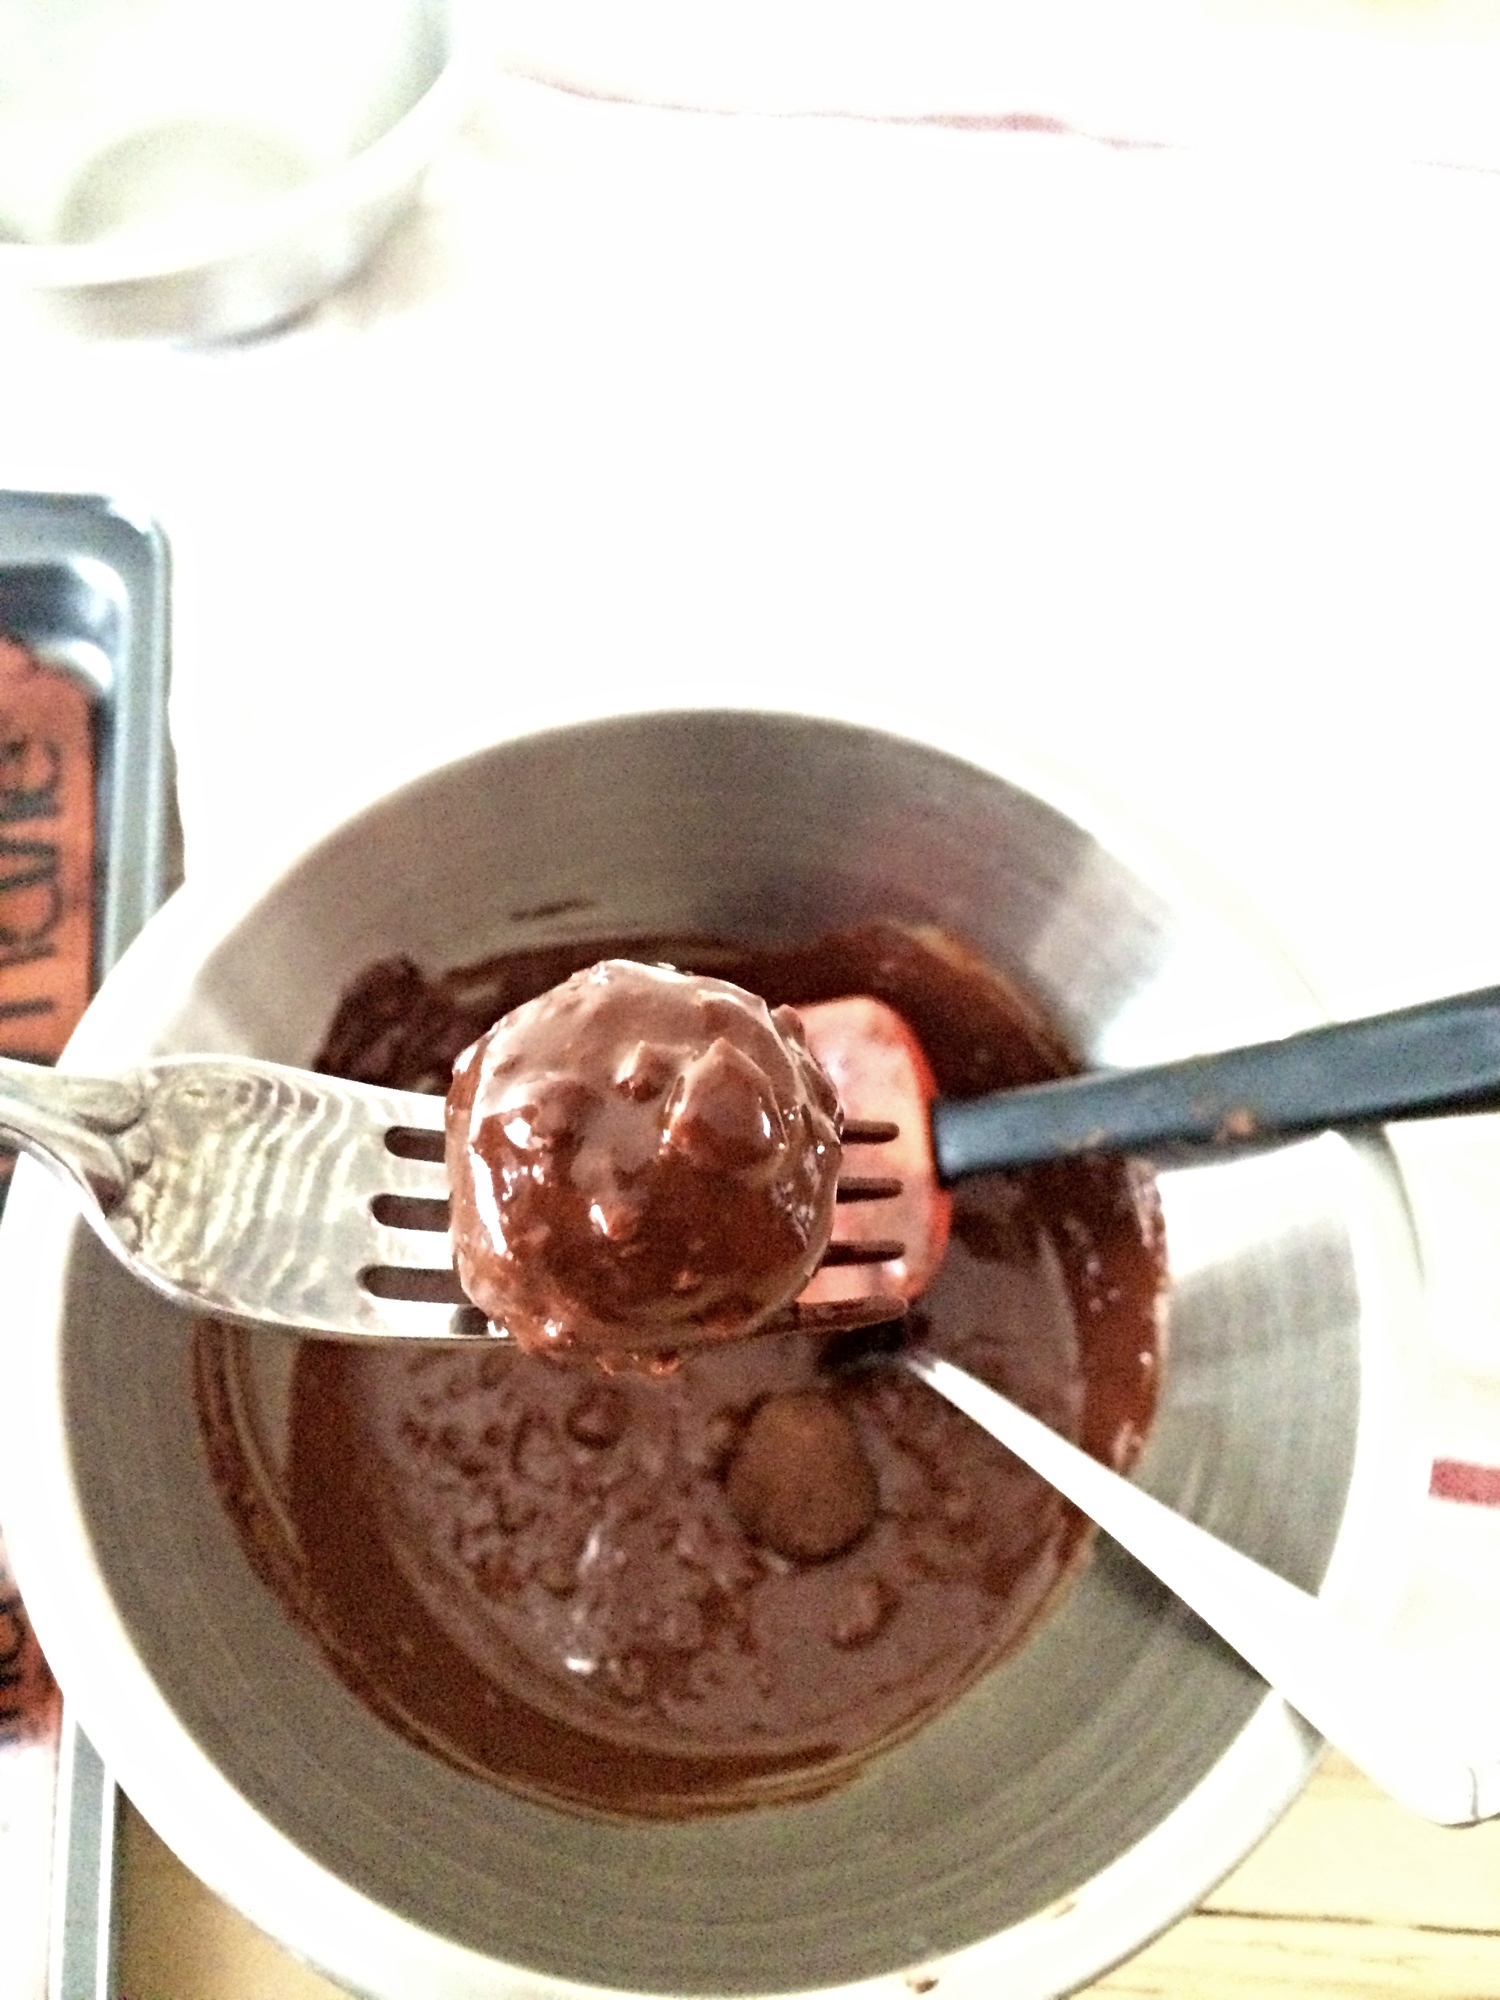
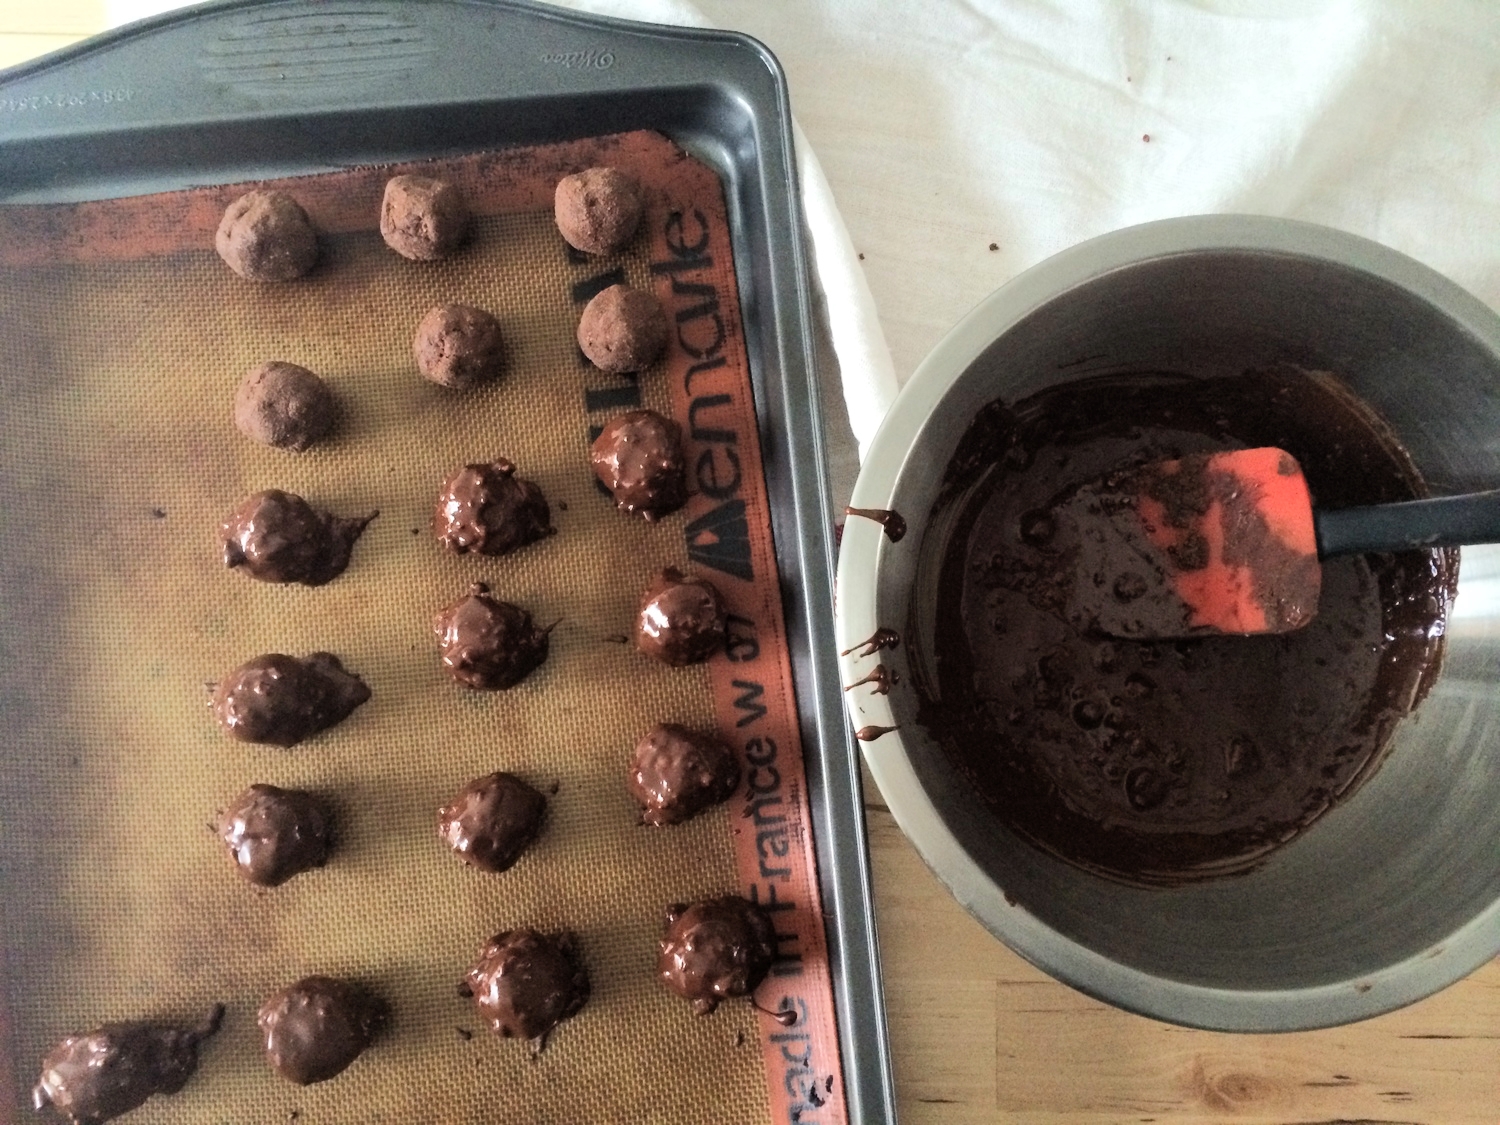
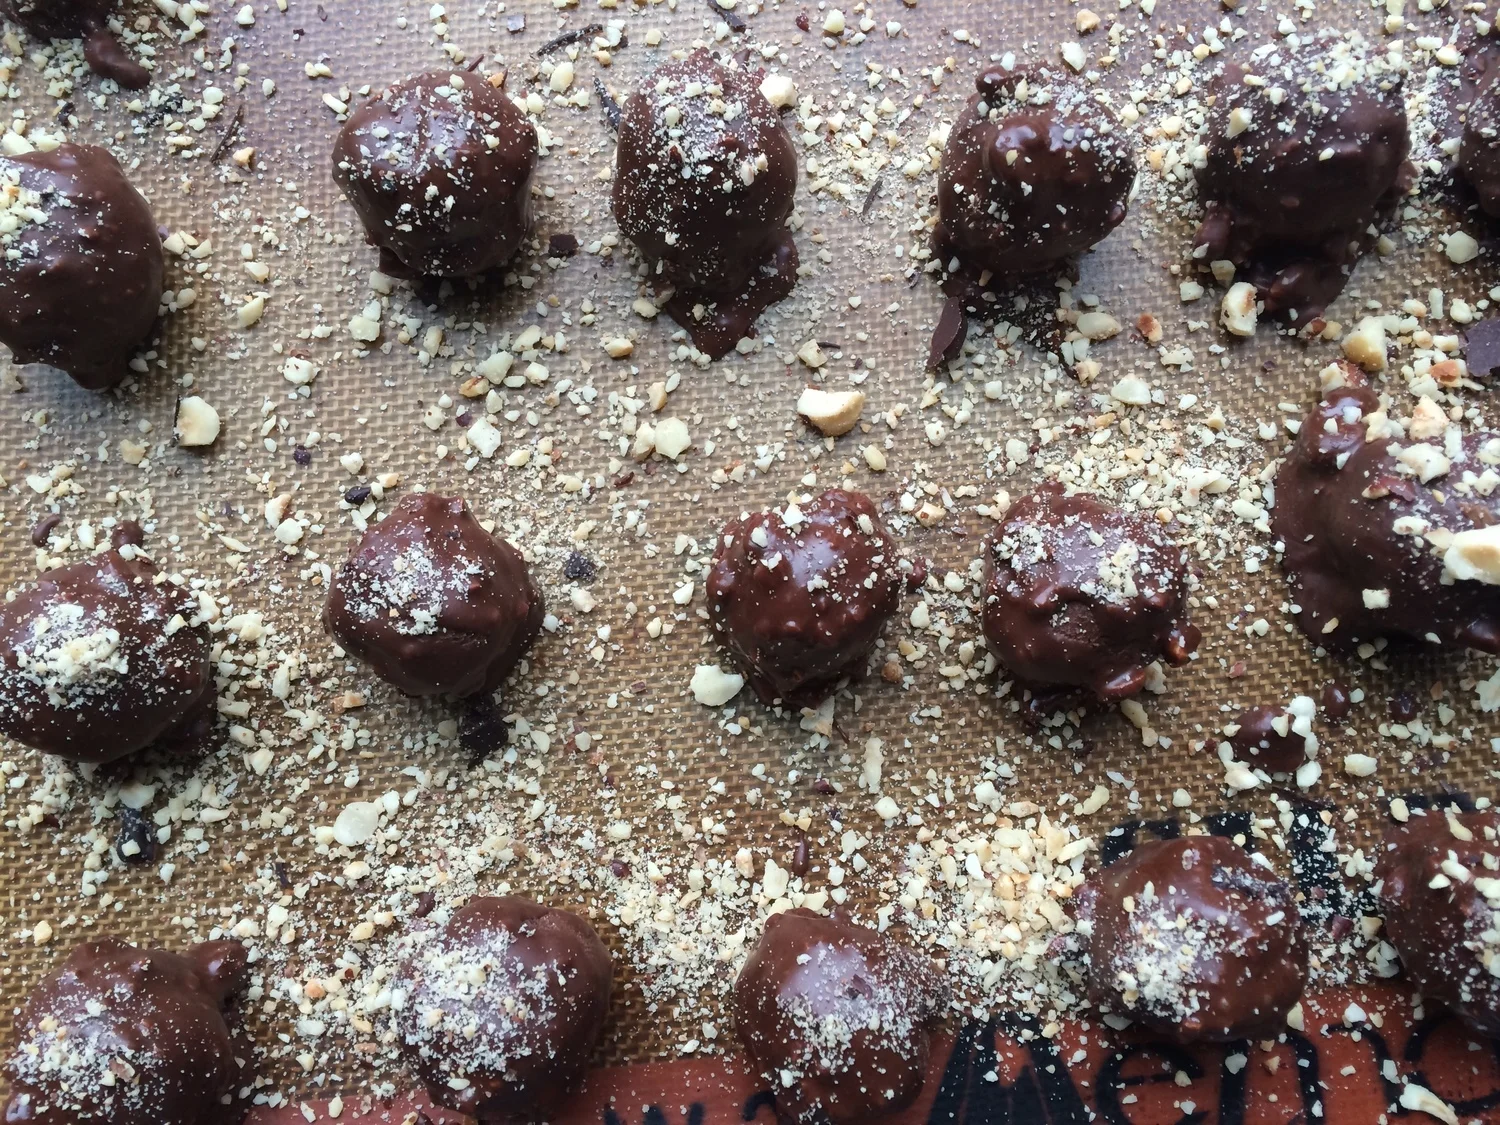
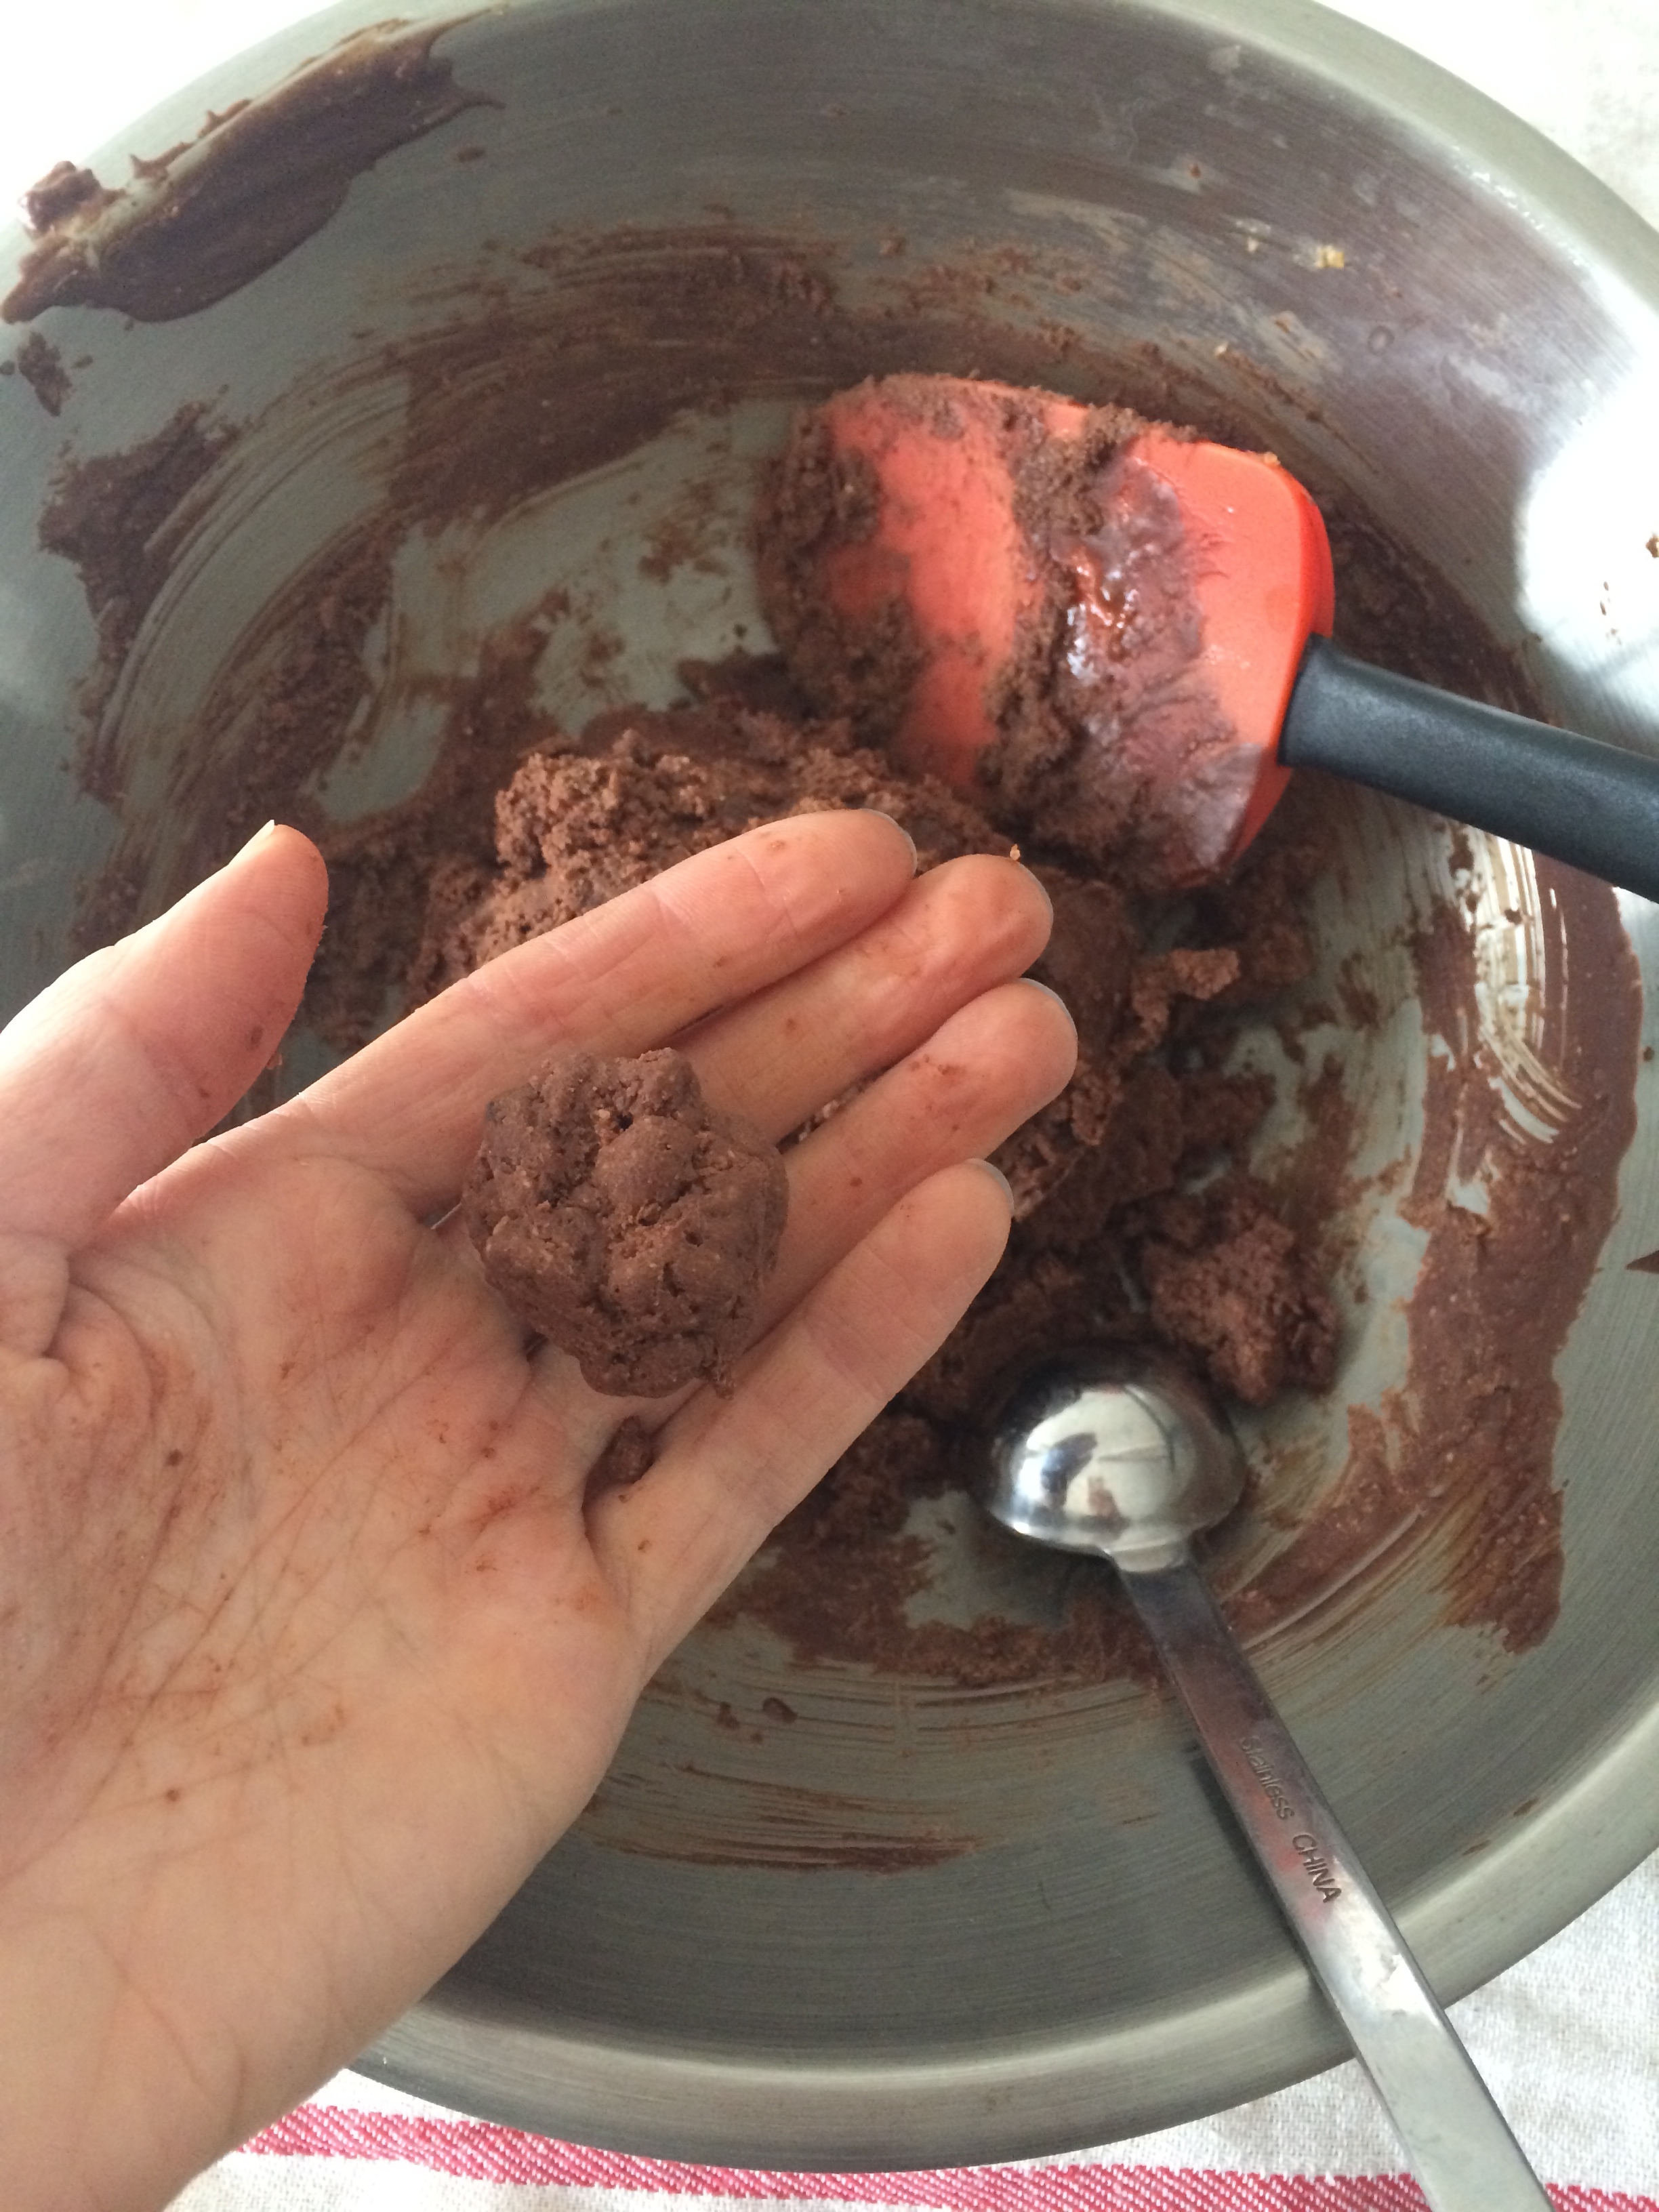
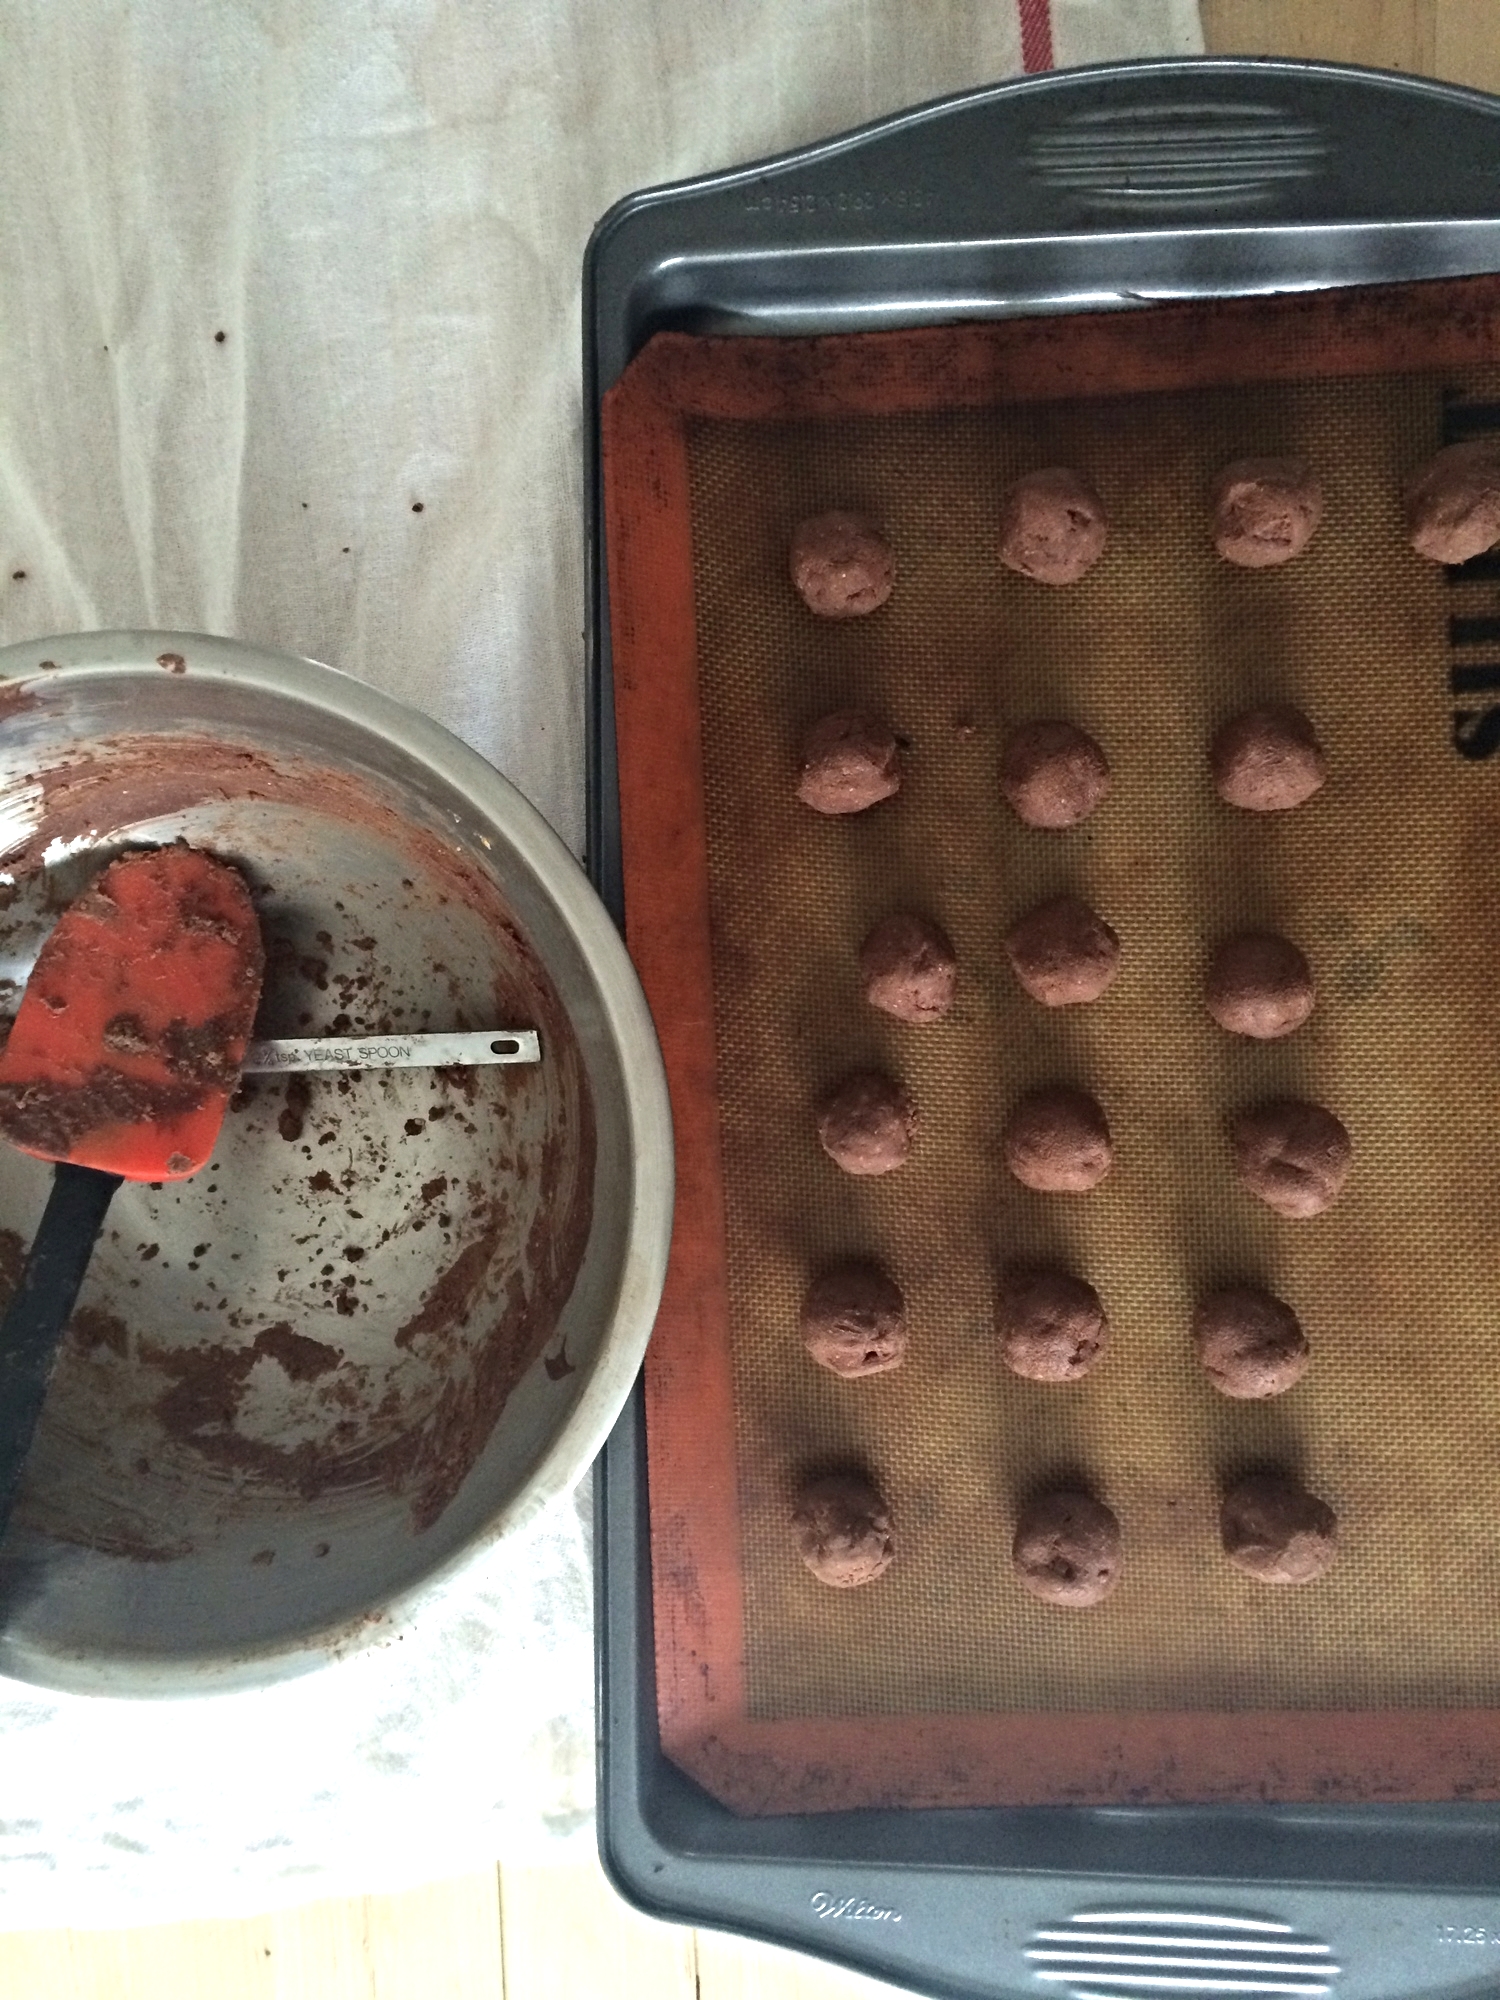
When the hazelnut mixture has become stiffer and colder, you can begin to form the truffles. Line a baking sheet with parchment or a Silpat. Using a measuring spoon, scoop a scant tablespoon of the mixture into your hands and roll it into balls. I happen to have a 2 1/4 teaspoon measuring spoon for measuring yeast for bread making so I used that, but use whatever you have on hand. The mixture may seem stiff or crumbly at first, but it's easy to press the pieces back together if that happens. You should have about 18-20 truffles by the time you are done. Place these truffles in the fridge or freezer for a few minutes as you prepare the crunchy chocolate coating.
Over a double boiler, melt the 1 cup of dark chocolate. Just as the chocolate mixture is almost completely melted, remove the bowl from the heat and stir until smooth. Add the reserved roughly chopped hazelnuts (not the 2 tablespoons set aside for decorating), and stir to combine. Remove the truffles from the fridge or freezer and using two forks, dip each truffle into the melted chocolate until evenly coated. Allow any excess to drip off and return the coated truffle to the lined baking sheet. After all truffles have been dipped, carefully sprinkle the remaining 2 tablespoons of reserved chopped hazelnuts over the top of the truffles. Allow the truffles to cool completely in the fridge. These truffles can be served at room temperature, but it is best to store them in the refrigerator. They should last about 7-10 days if properly stored. Makes 18-20 truffles.