• Home
    • About Nourishing Matters
    • About Emily
    • Frequently Asked Questions
  • Recipes
    • Offerings
    • Past Programs and Events
    • Experience and Teaching Style
    • Articles and Features
    • Travel
Menu

nourishing matters

Street Address
City, State, Zip
Phone Number
where wholesome meets delicious

Your Custom Text Here

nourishing matters

  • Home
  • About
    • About Nourishing Matters
    • About Emily
    • Frequently Asked Questions
  • Recipes
  • Work with Me
    • Offerings
    • Past Programs and Events
  • Yoga
    • Experience and Teaching Style
  • Press
    • Articles and Features
  • Adventures
    • Travel

Persimmon Almond Bars

December 2, 2016 Emily Watson

My birthday was yesterday. Another year wiser, so they say, and I think it's true. Last birthday, I was feeling a bit panicky, unsure of the future, unsure of myself. I was happy, but unsettled, and I could feel all of the energy inside of me spinning in a circle. This year, that fog seemed to lift as I gained clarity, and I'm more excited about what's to come. All of that energy is now being channeled into things I feel good about, things I feel proud of. I'm still a work in progress (aren't we all?), but I really feel that progress. Some days it's the teeniest tiniest of baby steps, like when I choose not to get angry at the person who cuts me off in traffic, and other days, it's amazing shifts, like when I realize that the person who I was envious of is actually a sweetheart who I should get to know more.

I'm learning to recognize when I've done something better than I may have done in the past, and acknowledge it. I take that small victory, celebrate it, and then move on to the next thing with even more vigor, more confidence, and more presence. The future is still looking a little bit up in the air, but rather than leaving it to chance or being shy about what I really want, I am embracing opportunities and paving my way. Only then can I make the positive impact I want to make on those around me. Only then can I live with no regrets. If I didn't take control, who would? 

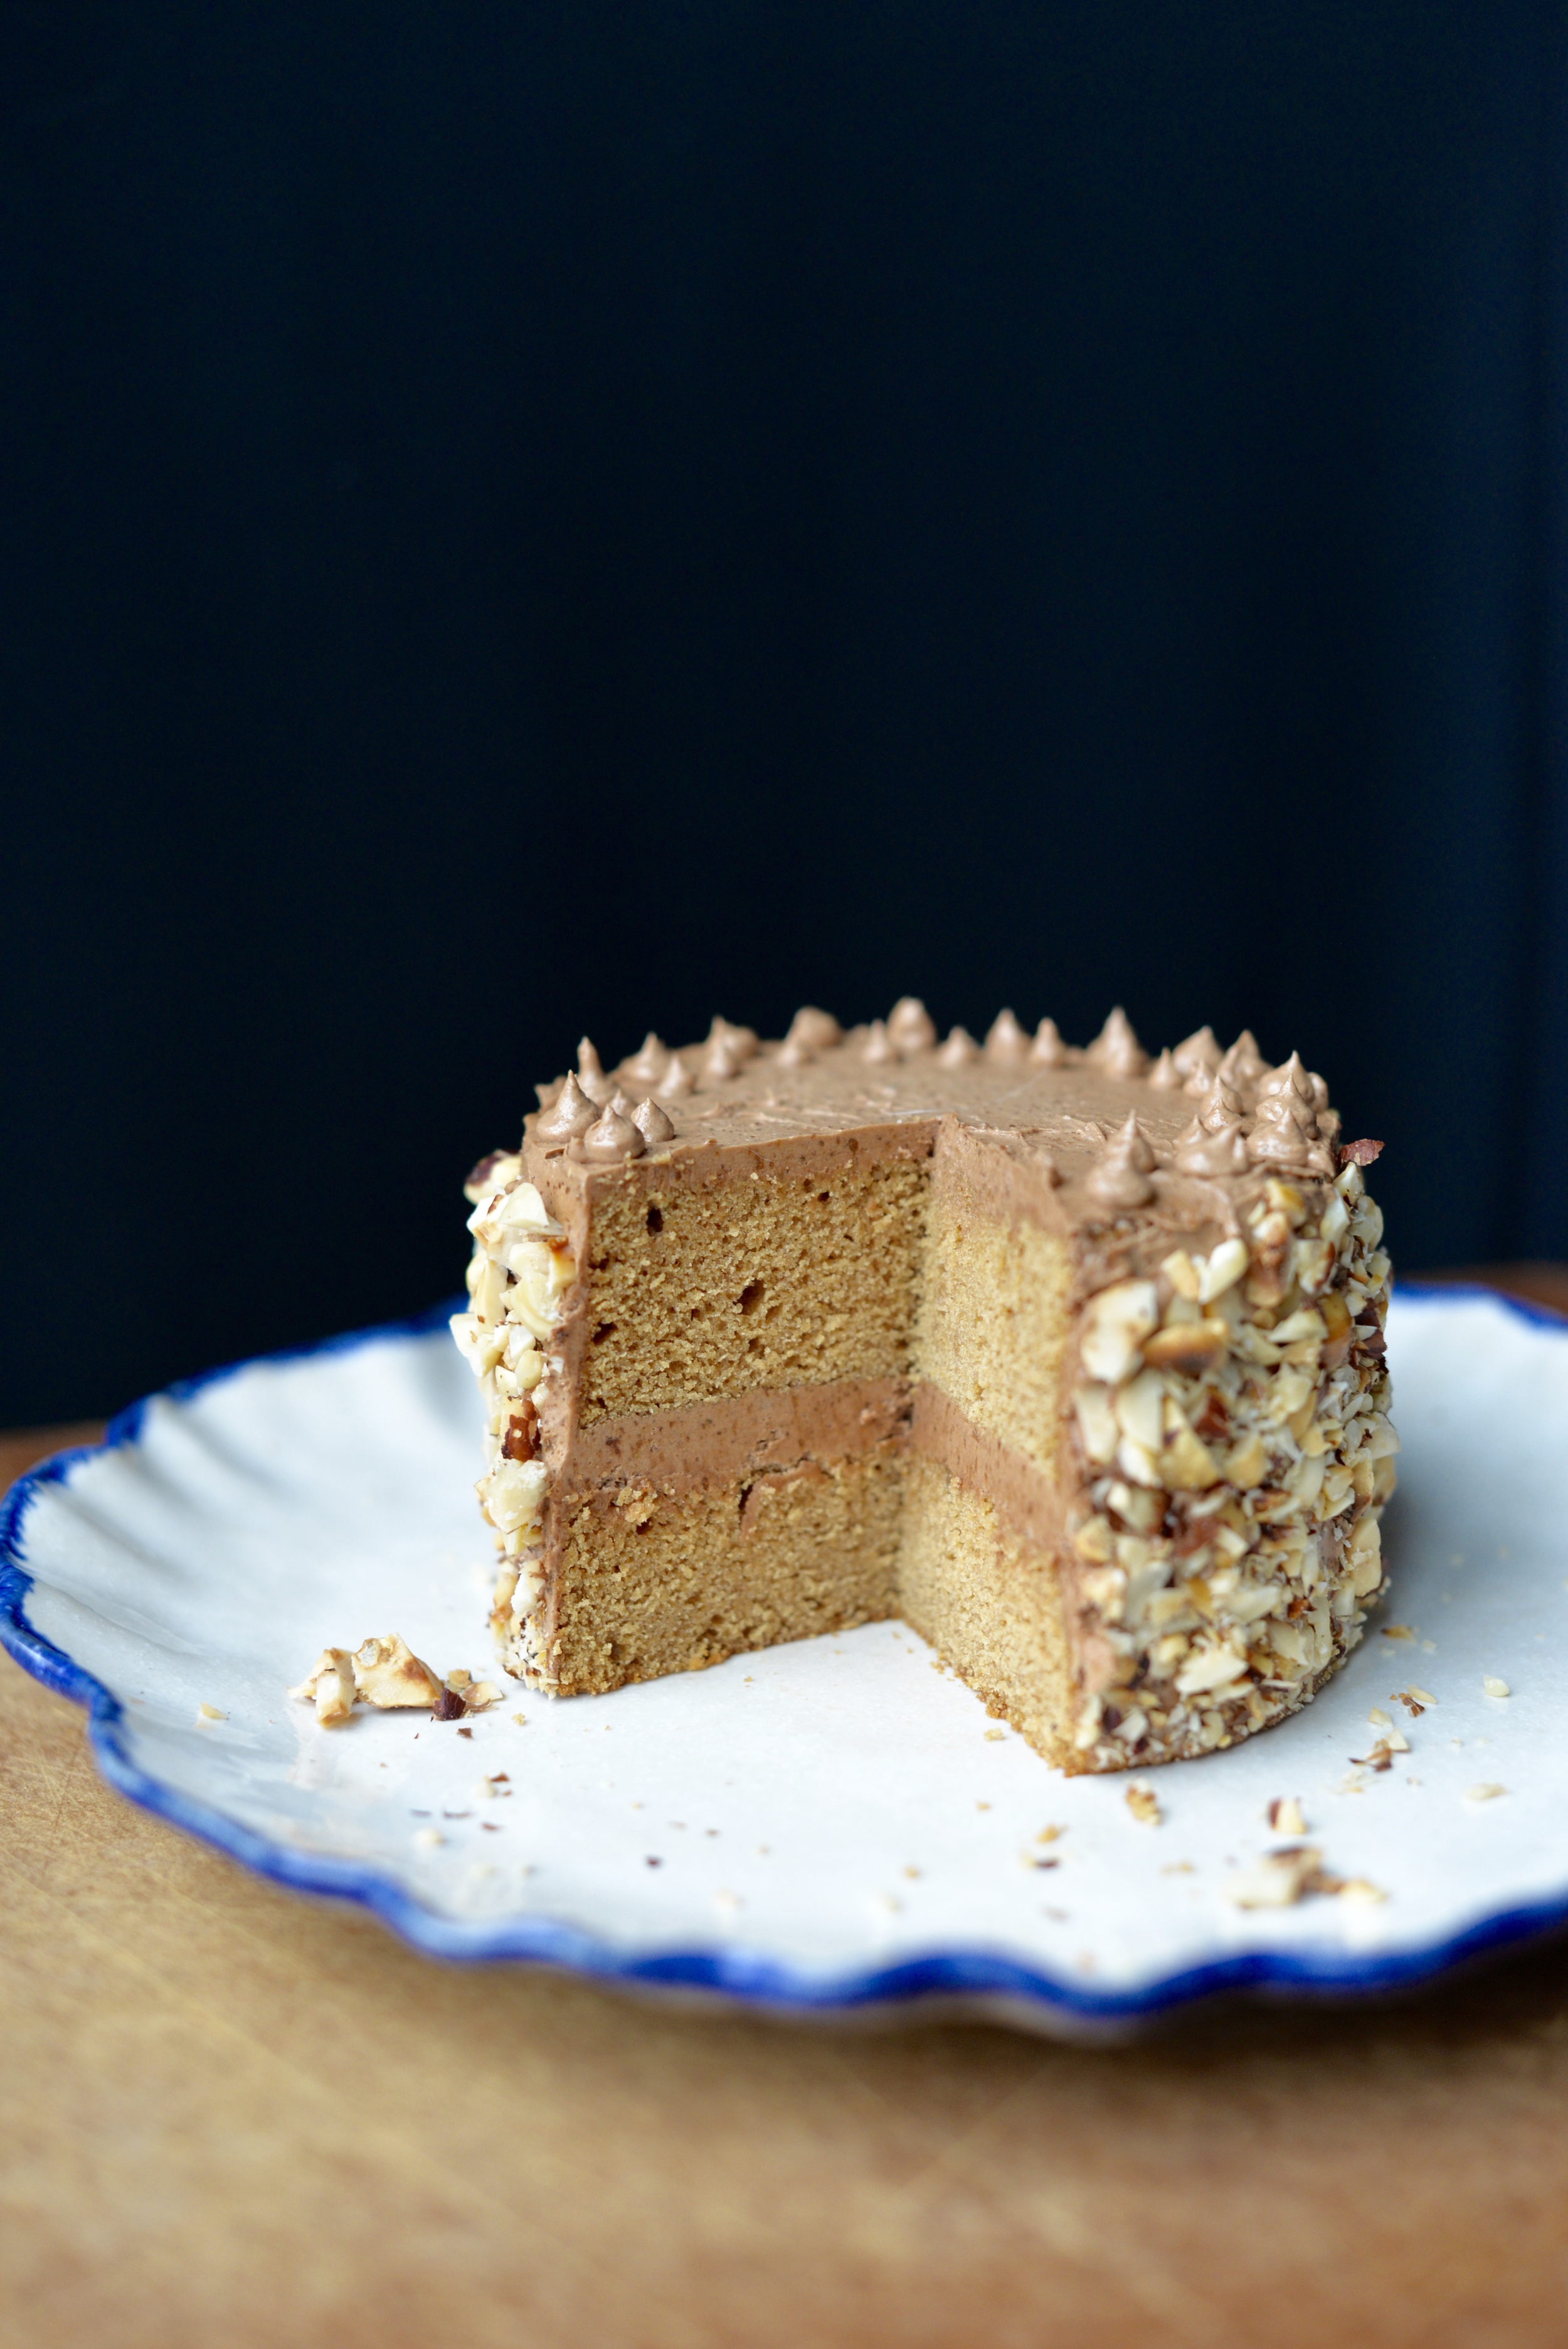
What do these bars have to do with any of that? Nothing really, except that they served as my birthday cake until my husband came home and we celebrated with real cake. If you know me, I'm not much of a baker. I prefer savory over sweet at home, but I always make room for a good dessert when we go out. So where did I get it in me to finally bake something? I bought too many persimmons. I got excited at the store when I saw they were on sale, and I couldn't contain my greedy little fingers from filling my basket. I didn't even know what I was going to do with them, but I knew their season isn't long. So I bought them, and then had to figure out what to do with them other than just eat them plain. As delicious as they are plain, I knew they would look beautiful baked into something. I consulted my cookbooks and blogs for ideas and found Amy Chaplin's beautiful Apple Almond Slice in her book, At Home in the Whole Foods Kitchen.

I love her book- for it's pictures, it's recipe inspiration, and her wealth of knowledge. I also trust her cooking. I decided to give her recipe a try, modifying it with ingreidnets I had on hand and what I thought would go wel with persimmons. The almond flavor is robust, so for all of those marzipan lovers, you'll love this. I subbed cornmeal because I love the almost savory flavor it lends and how it marries with the maple and persimmon so beautifully. The texture is bit crumbly due to the almond meal and cornmeal, but I love it against the sillky smooth fruit. Coconut oil and slight floral essence of the persimmons creates a magical flavor that I find addicting but light. A dollop of whipped coconut cream and you're all set.

These make lovely treats for the holidays, especially since they showcase a unique winter fruit. Plus, they're super easy. The beginner baker in me wouldn't have it any other way.

DSC_4898.jpg
DSC_4906.jpg

Persimmon Almond Bars

¾ cup rolled oats
1 cup almond meal
¼ cup finely ground cornmeal
¾ teaspoons baking powder
Pinch of salt
1 egg, beaten (or 1 flax egg if vegan**)
¼ cup coconut oil, melted
¼ teaspoon pure almond extract
1 teaspoon pure vanilla extract
⅓ cup pure maple syrup + ½ tablespoon, divided
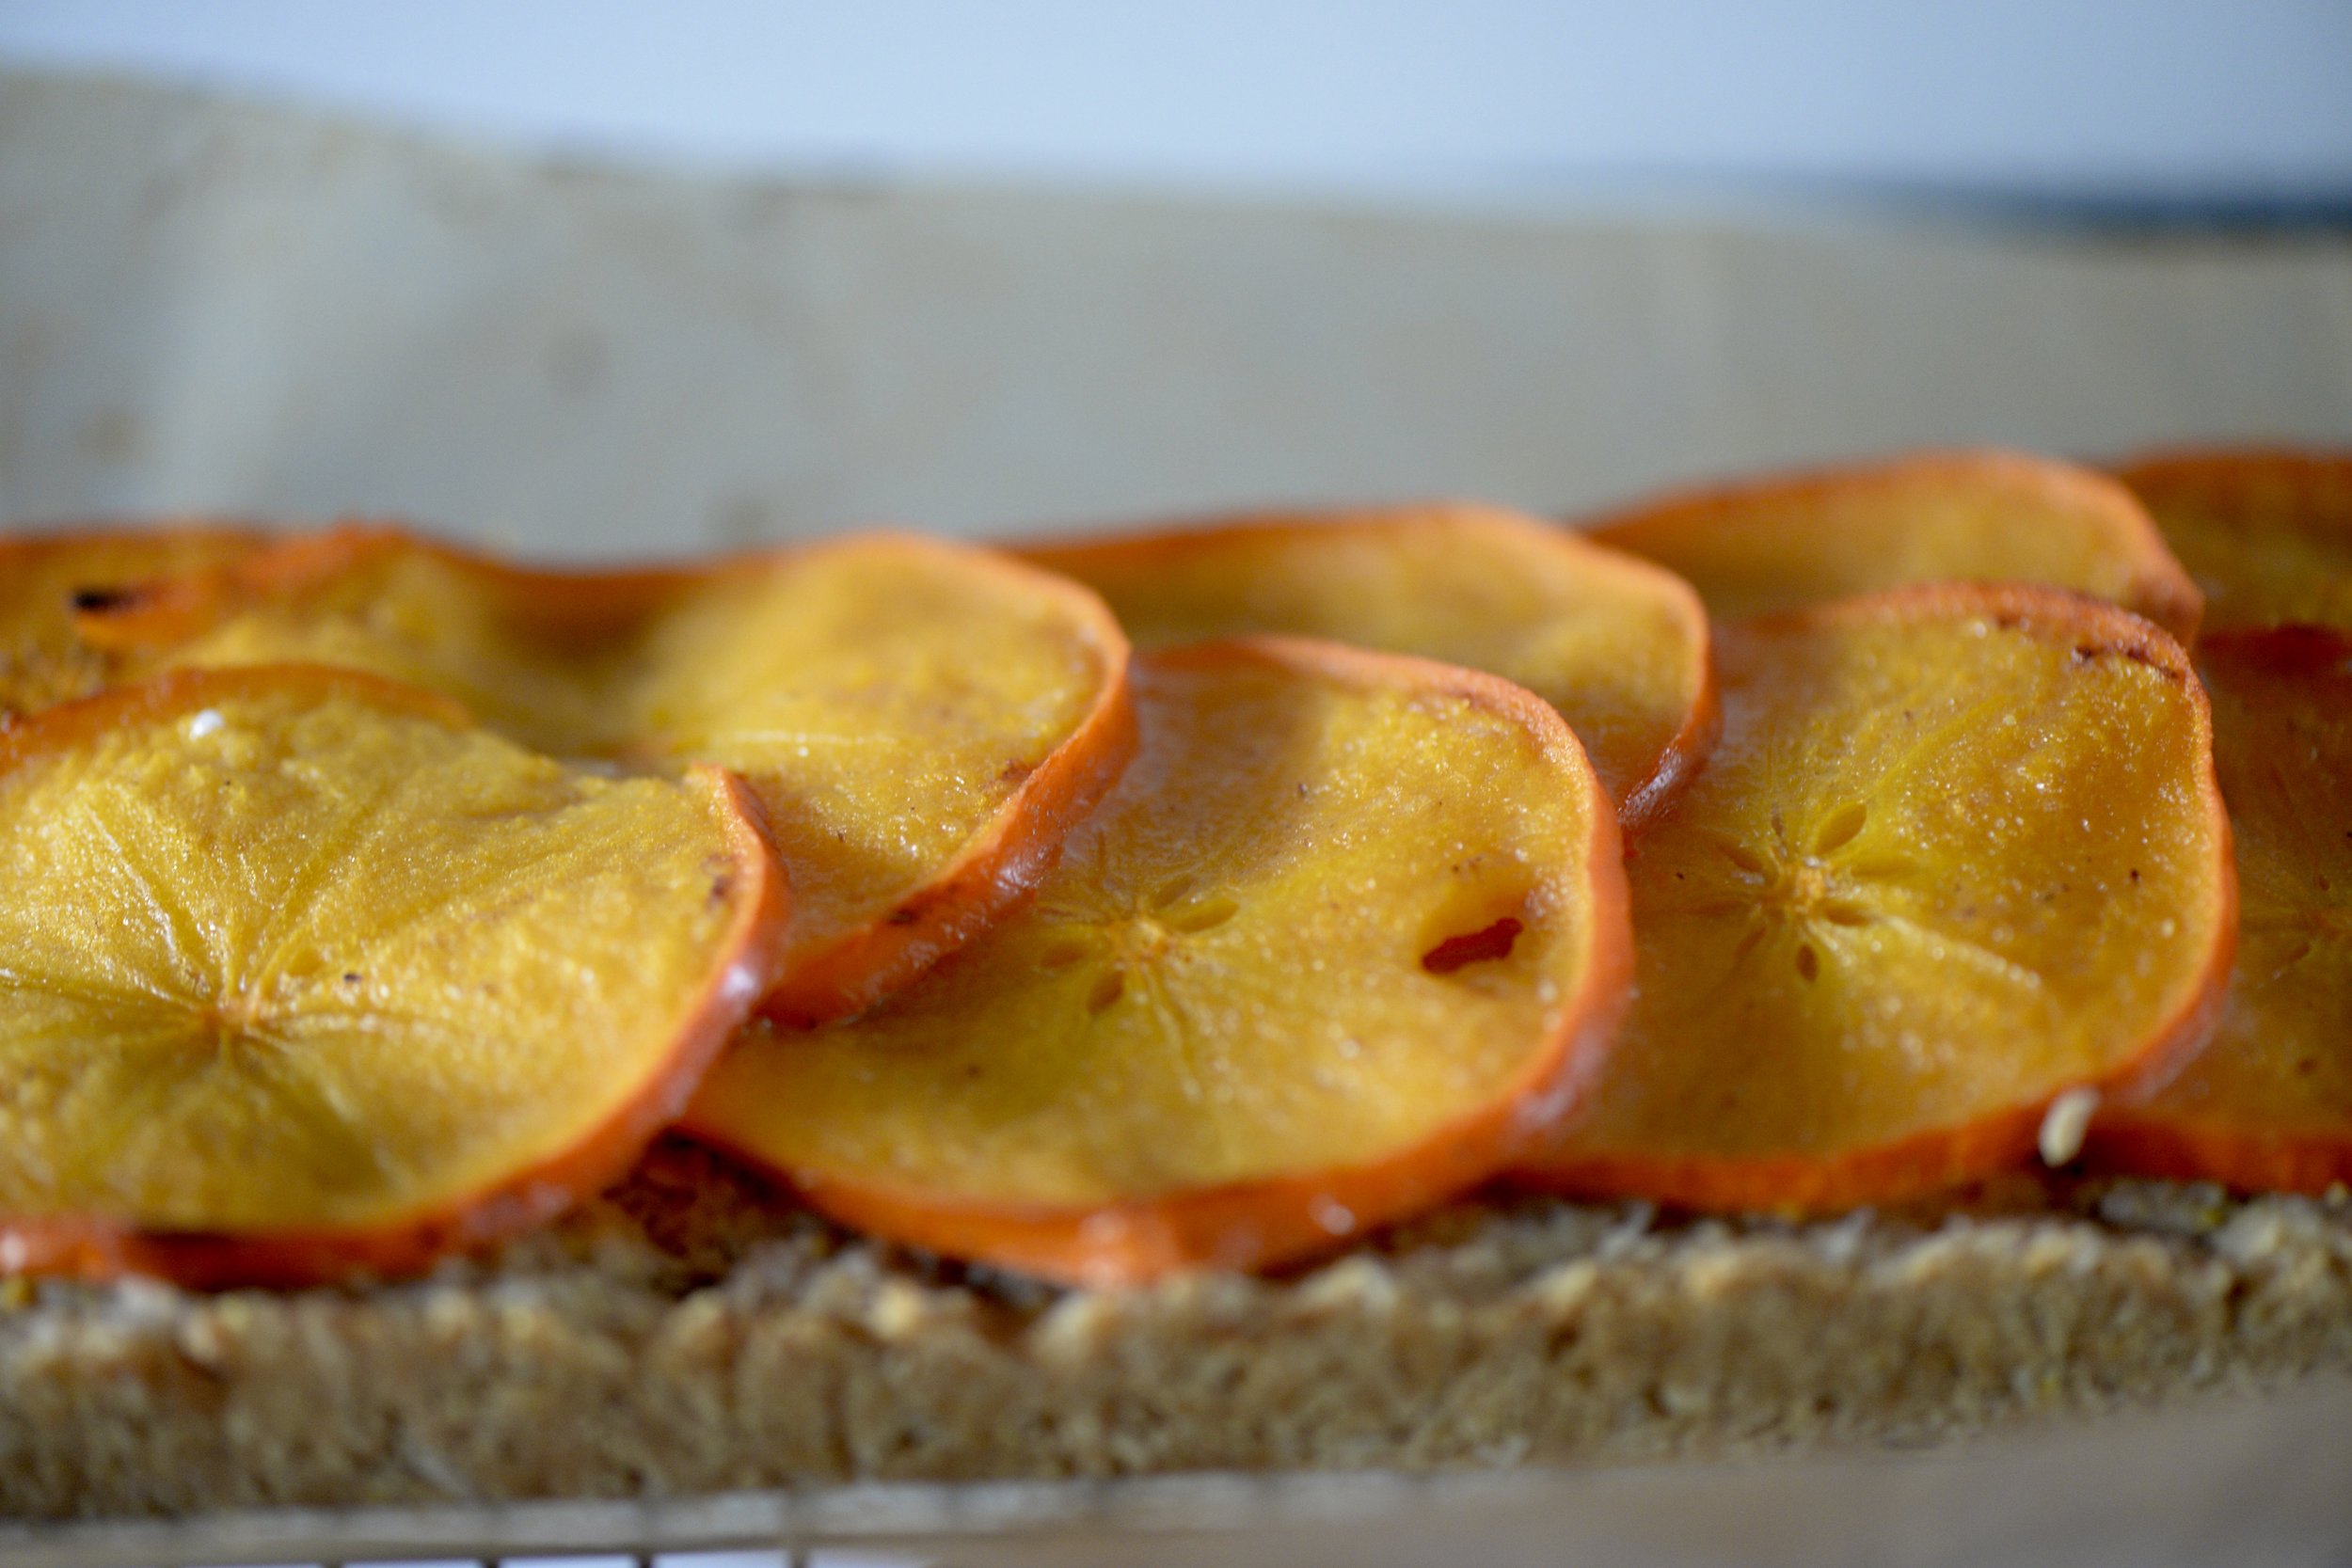
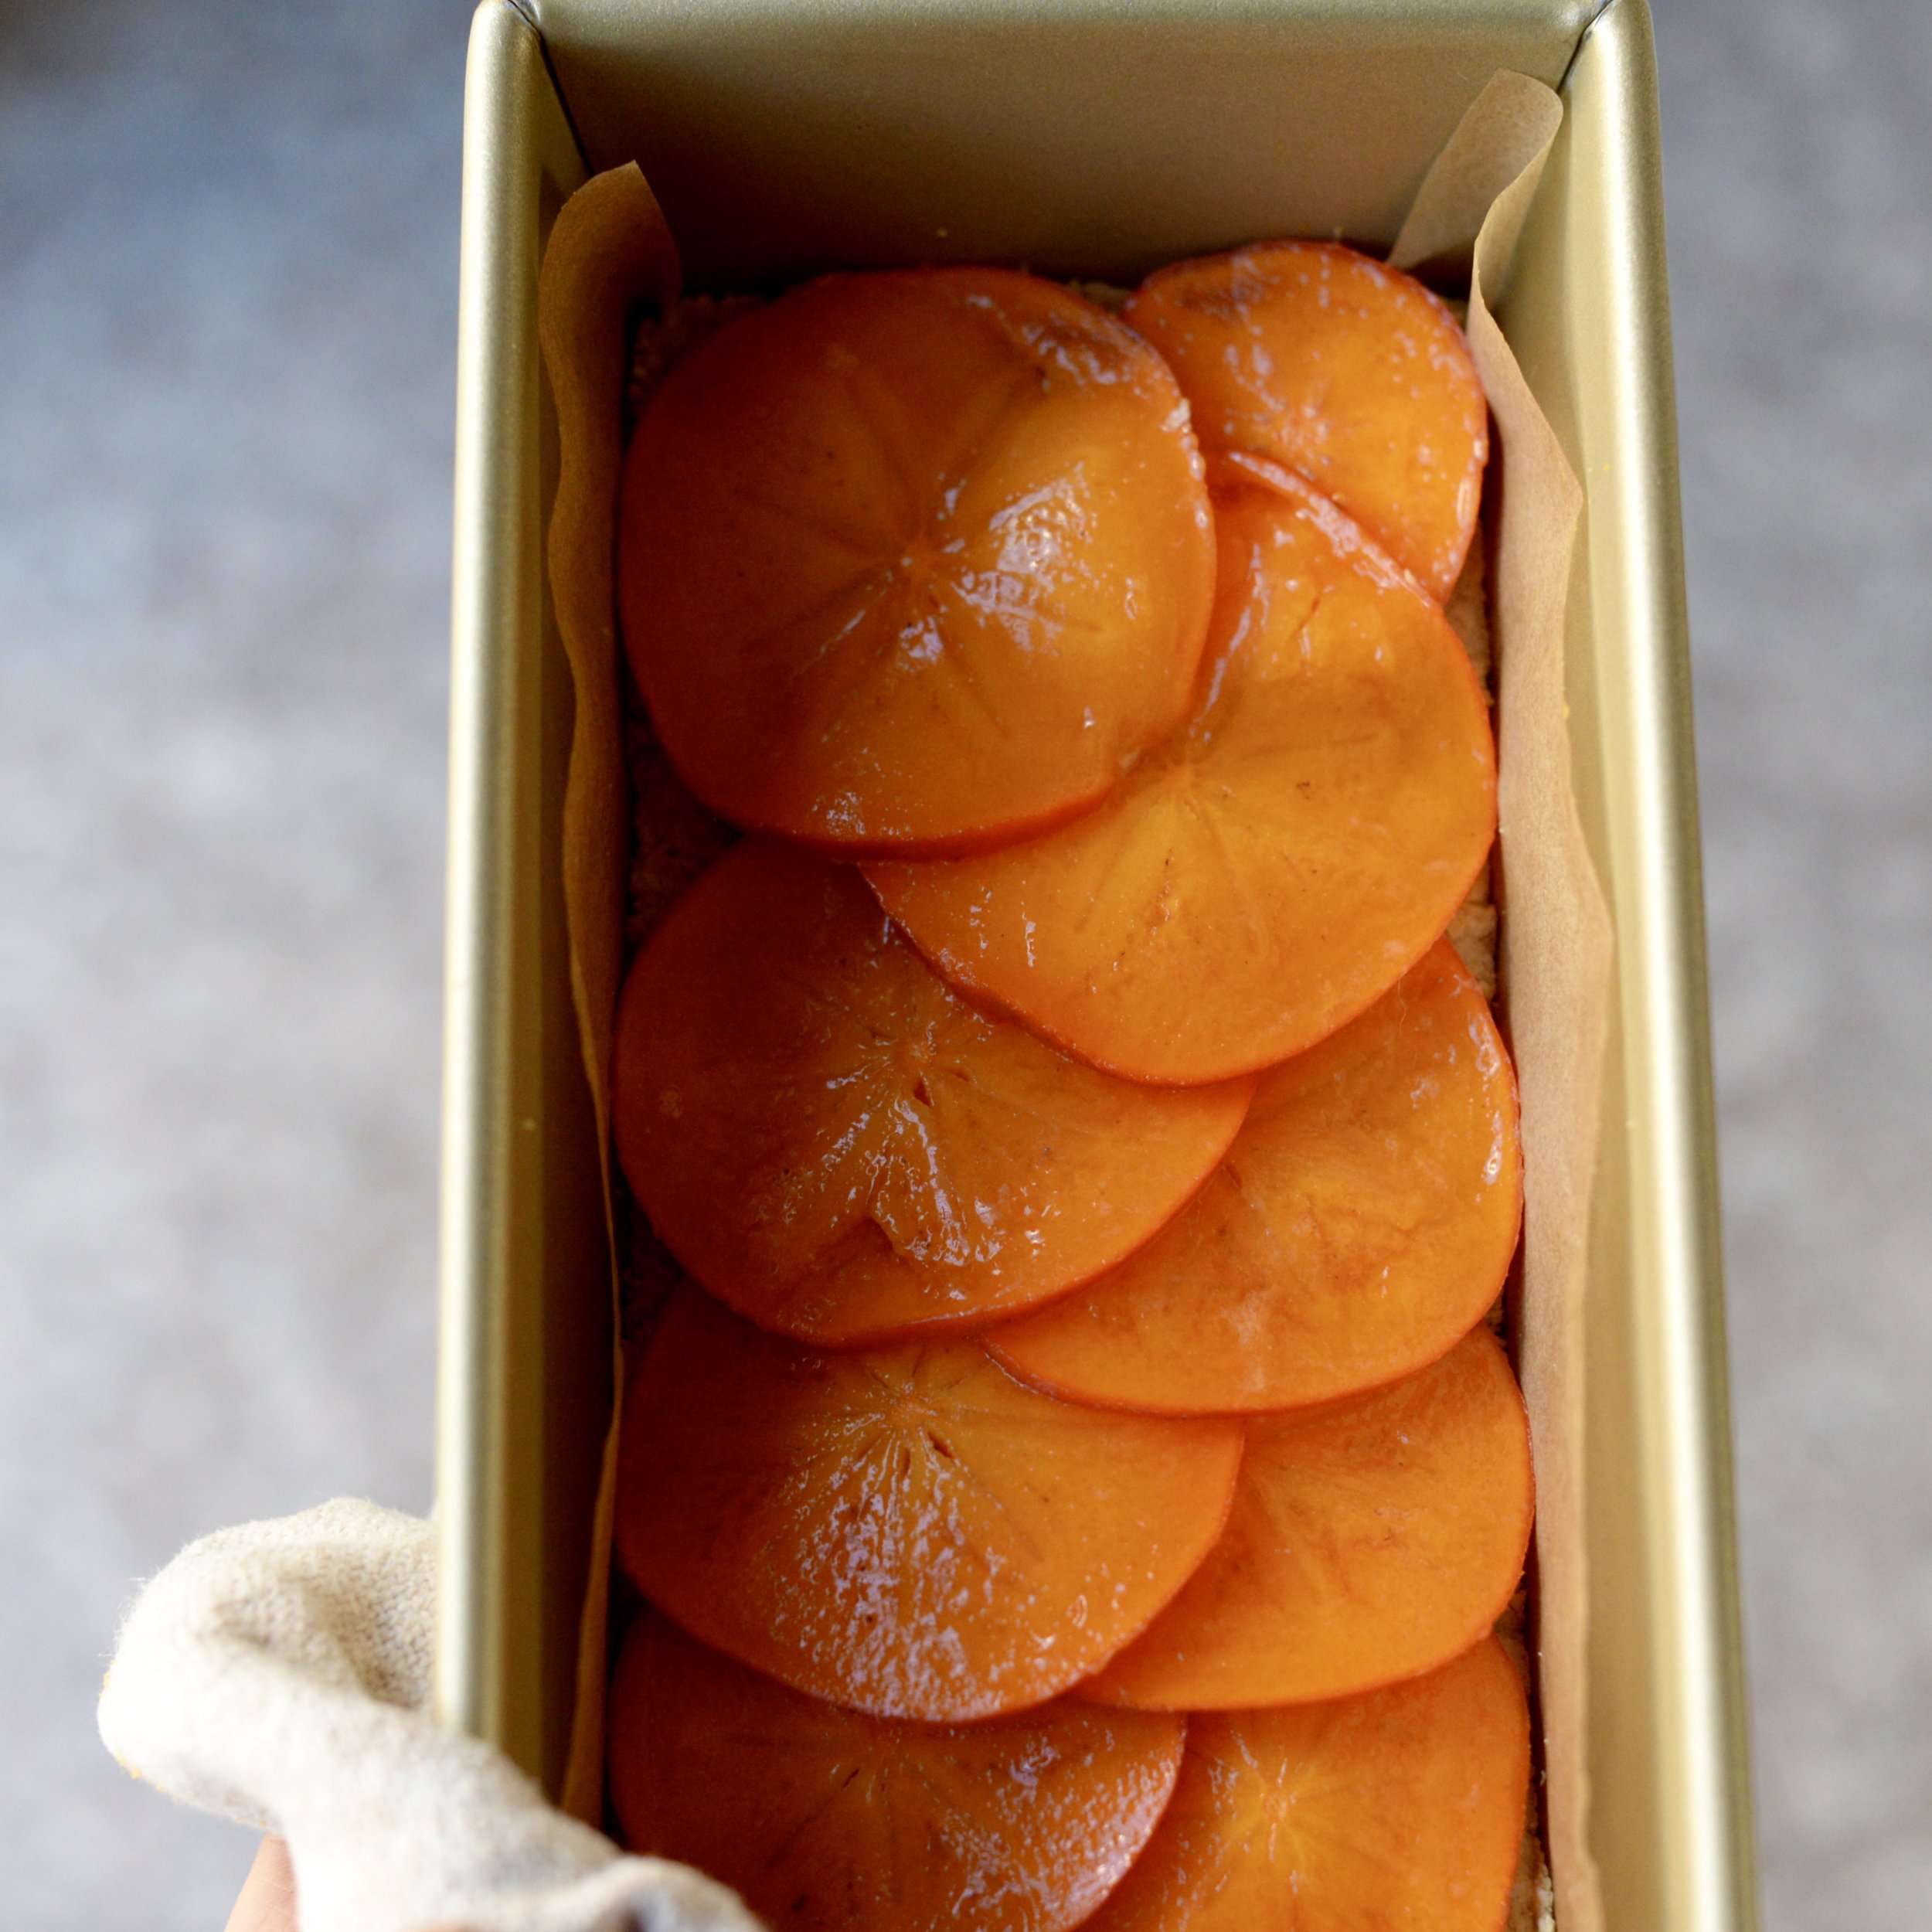
1 medium Hachiya (more oblong) or 2 Fuyu (more squat) persimmons, sliced in ¼ inch rounds.
Coconut whipped cream, for serving (optional)

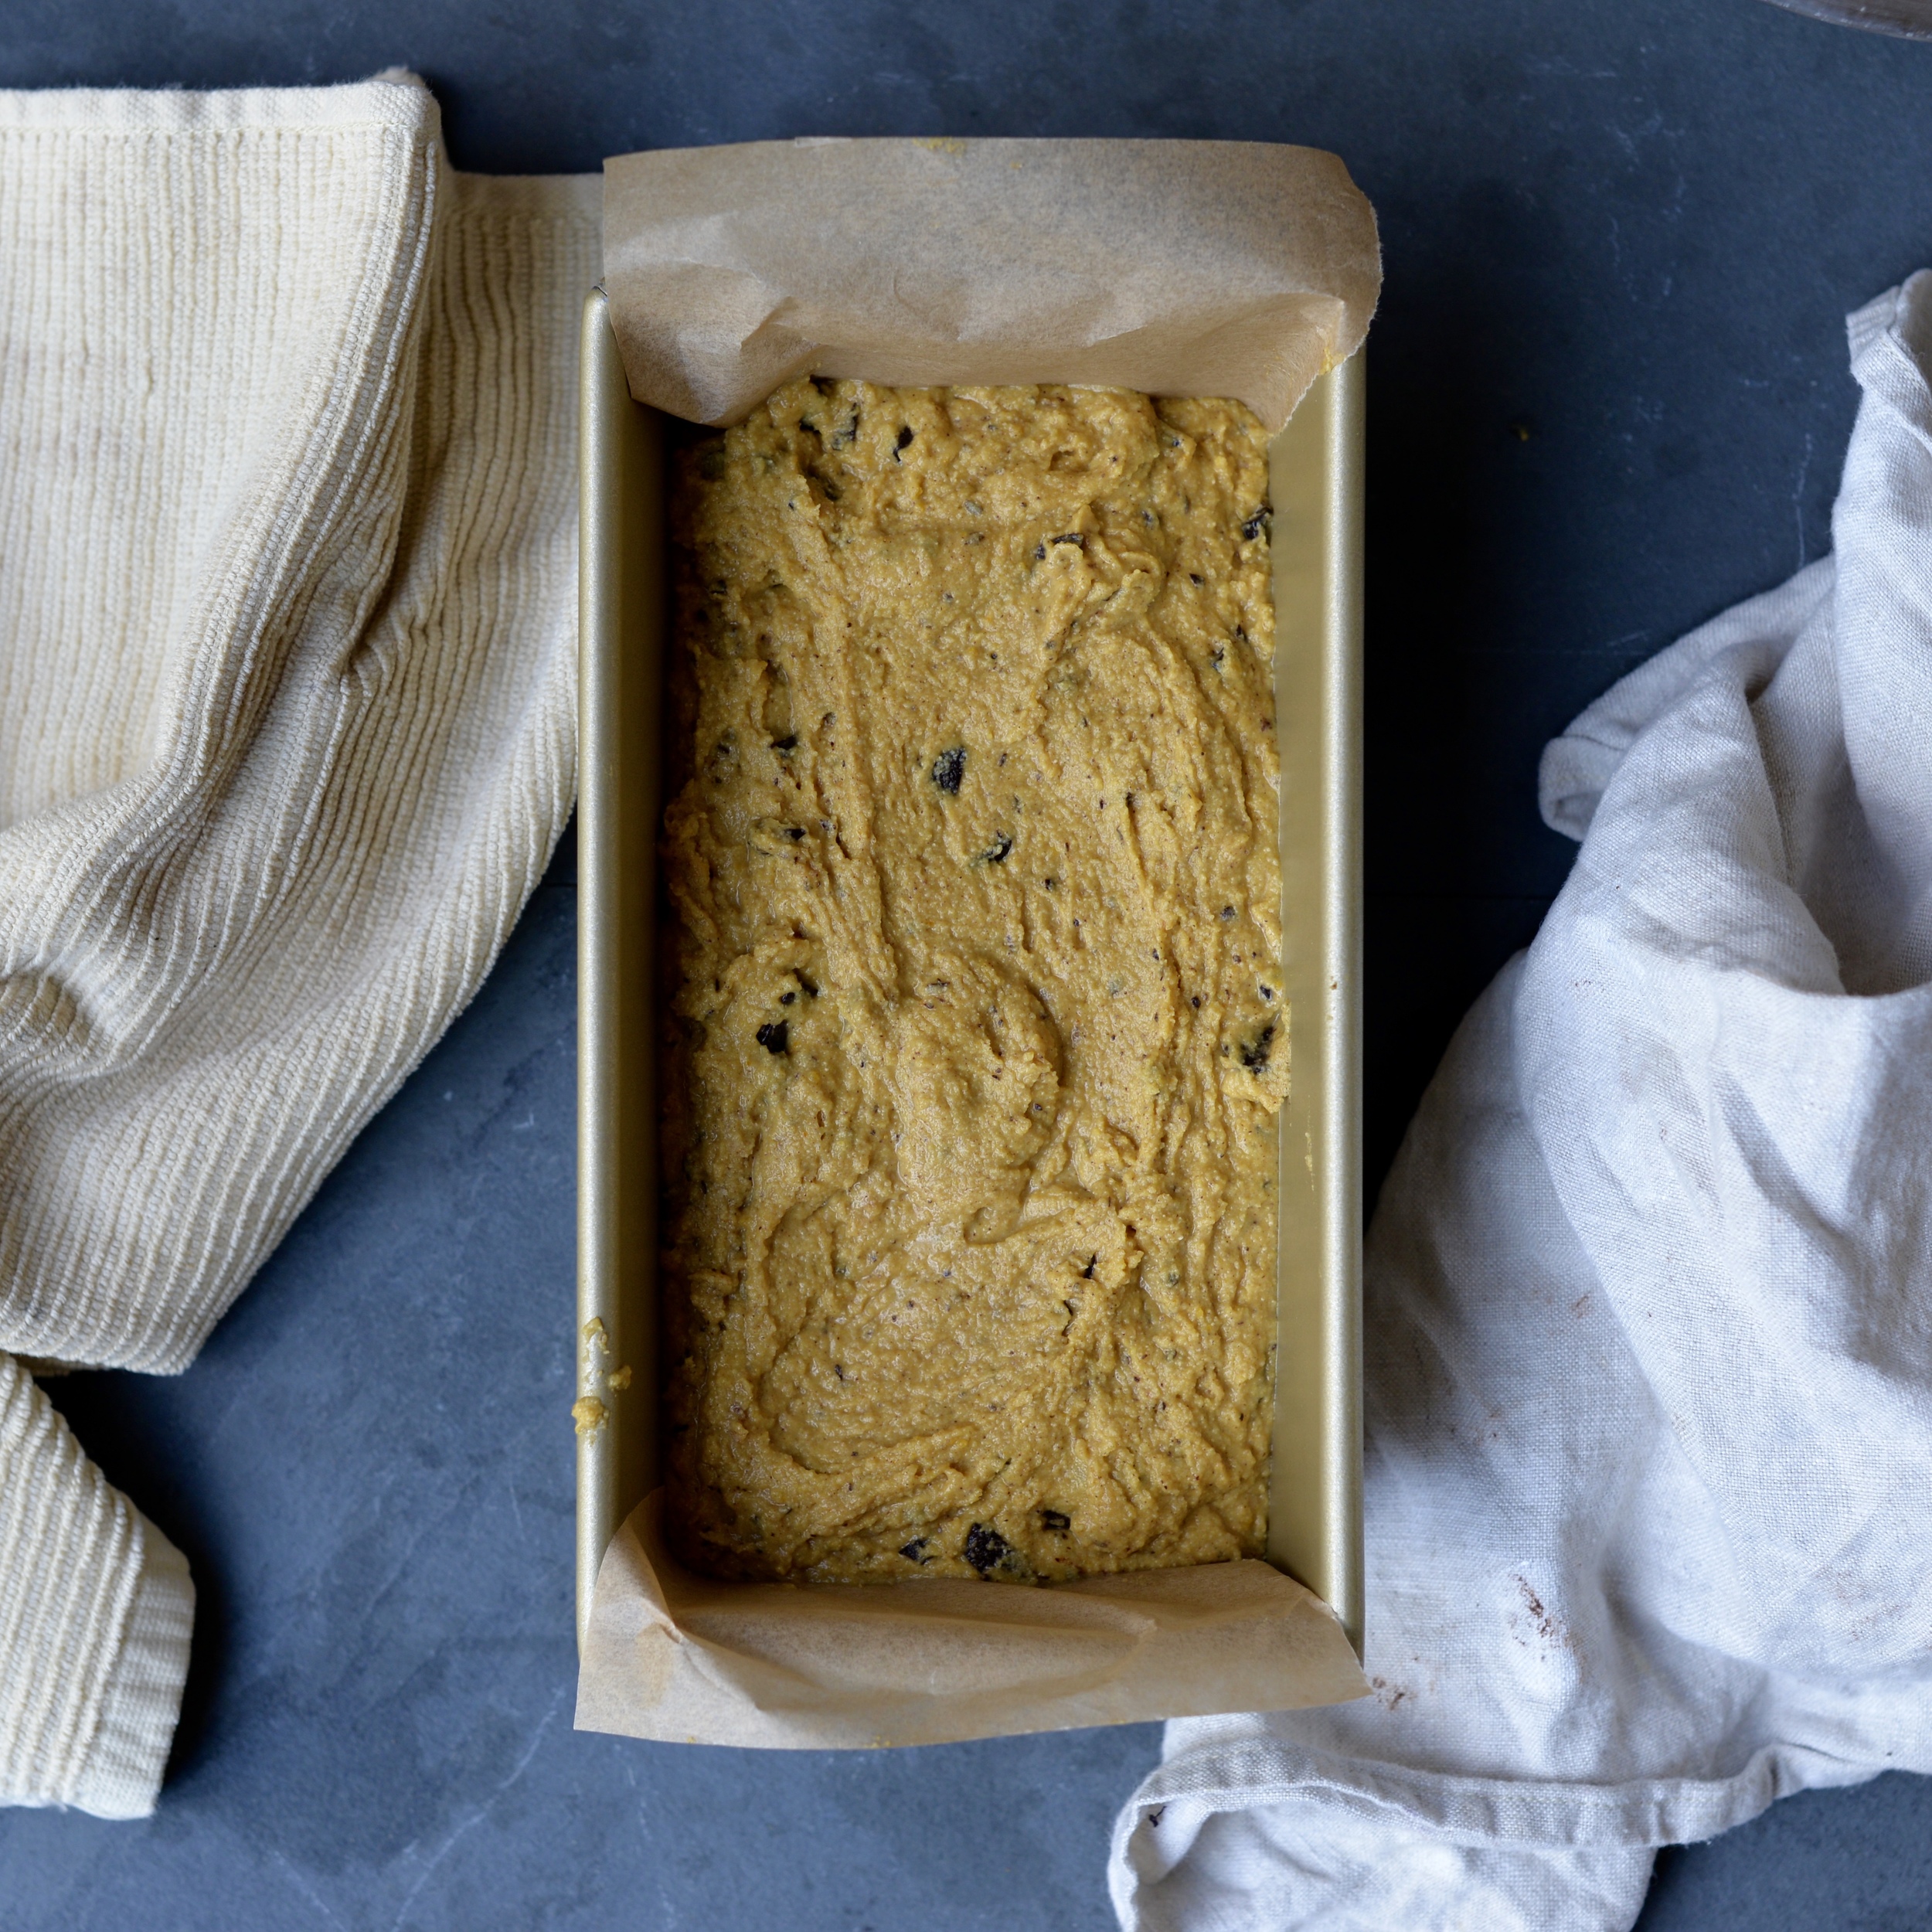
Preheat oven to 350 degrees Fahrenheit. Lightly oil a 9x5-inch loaf pan with coconut oil and line with parchment paper so that it overhangs on the shorter ends (you’ll use this to help lift it out of the pan later).
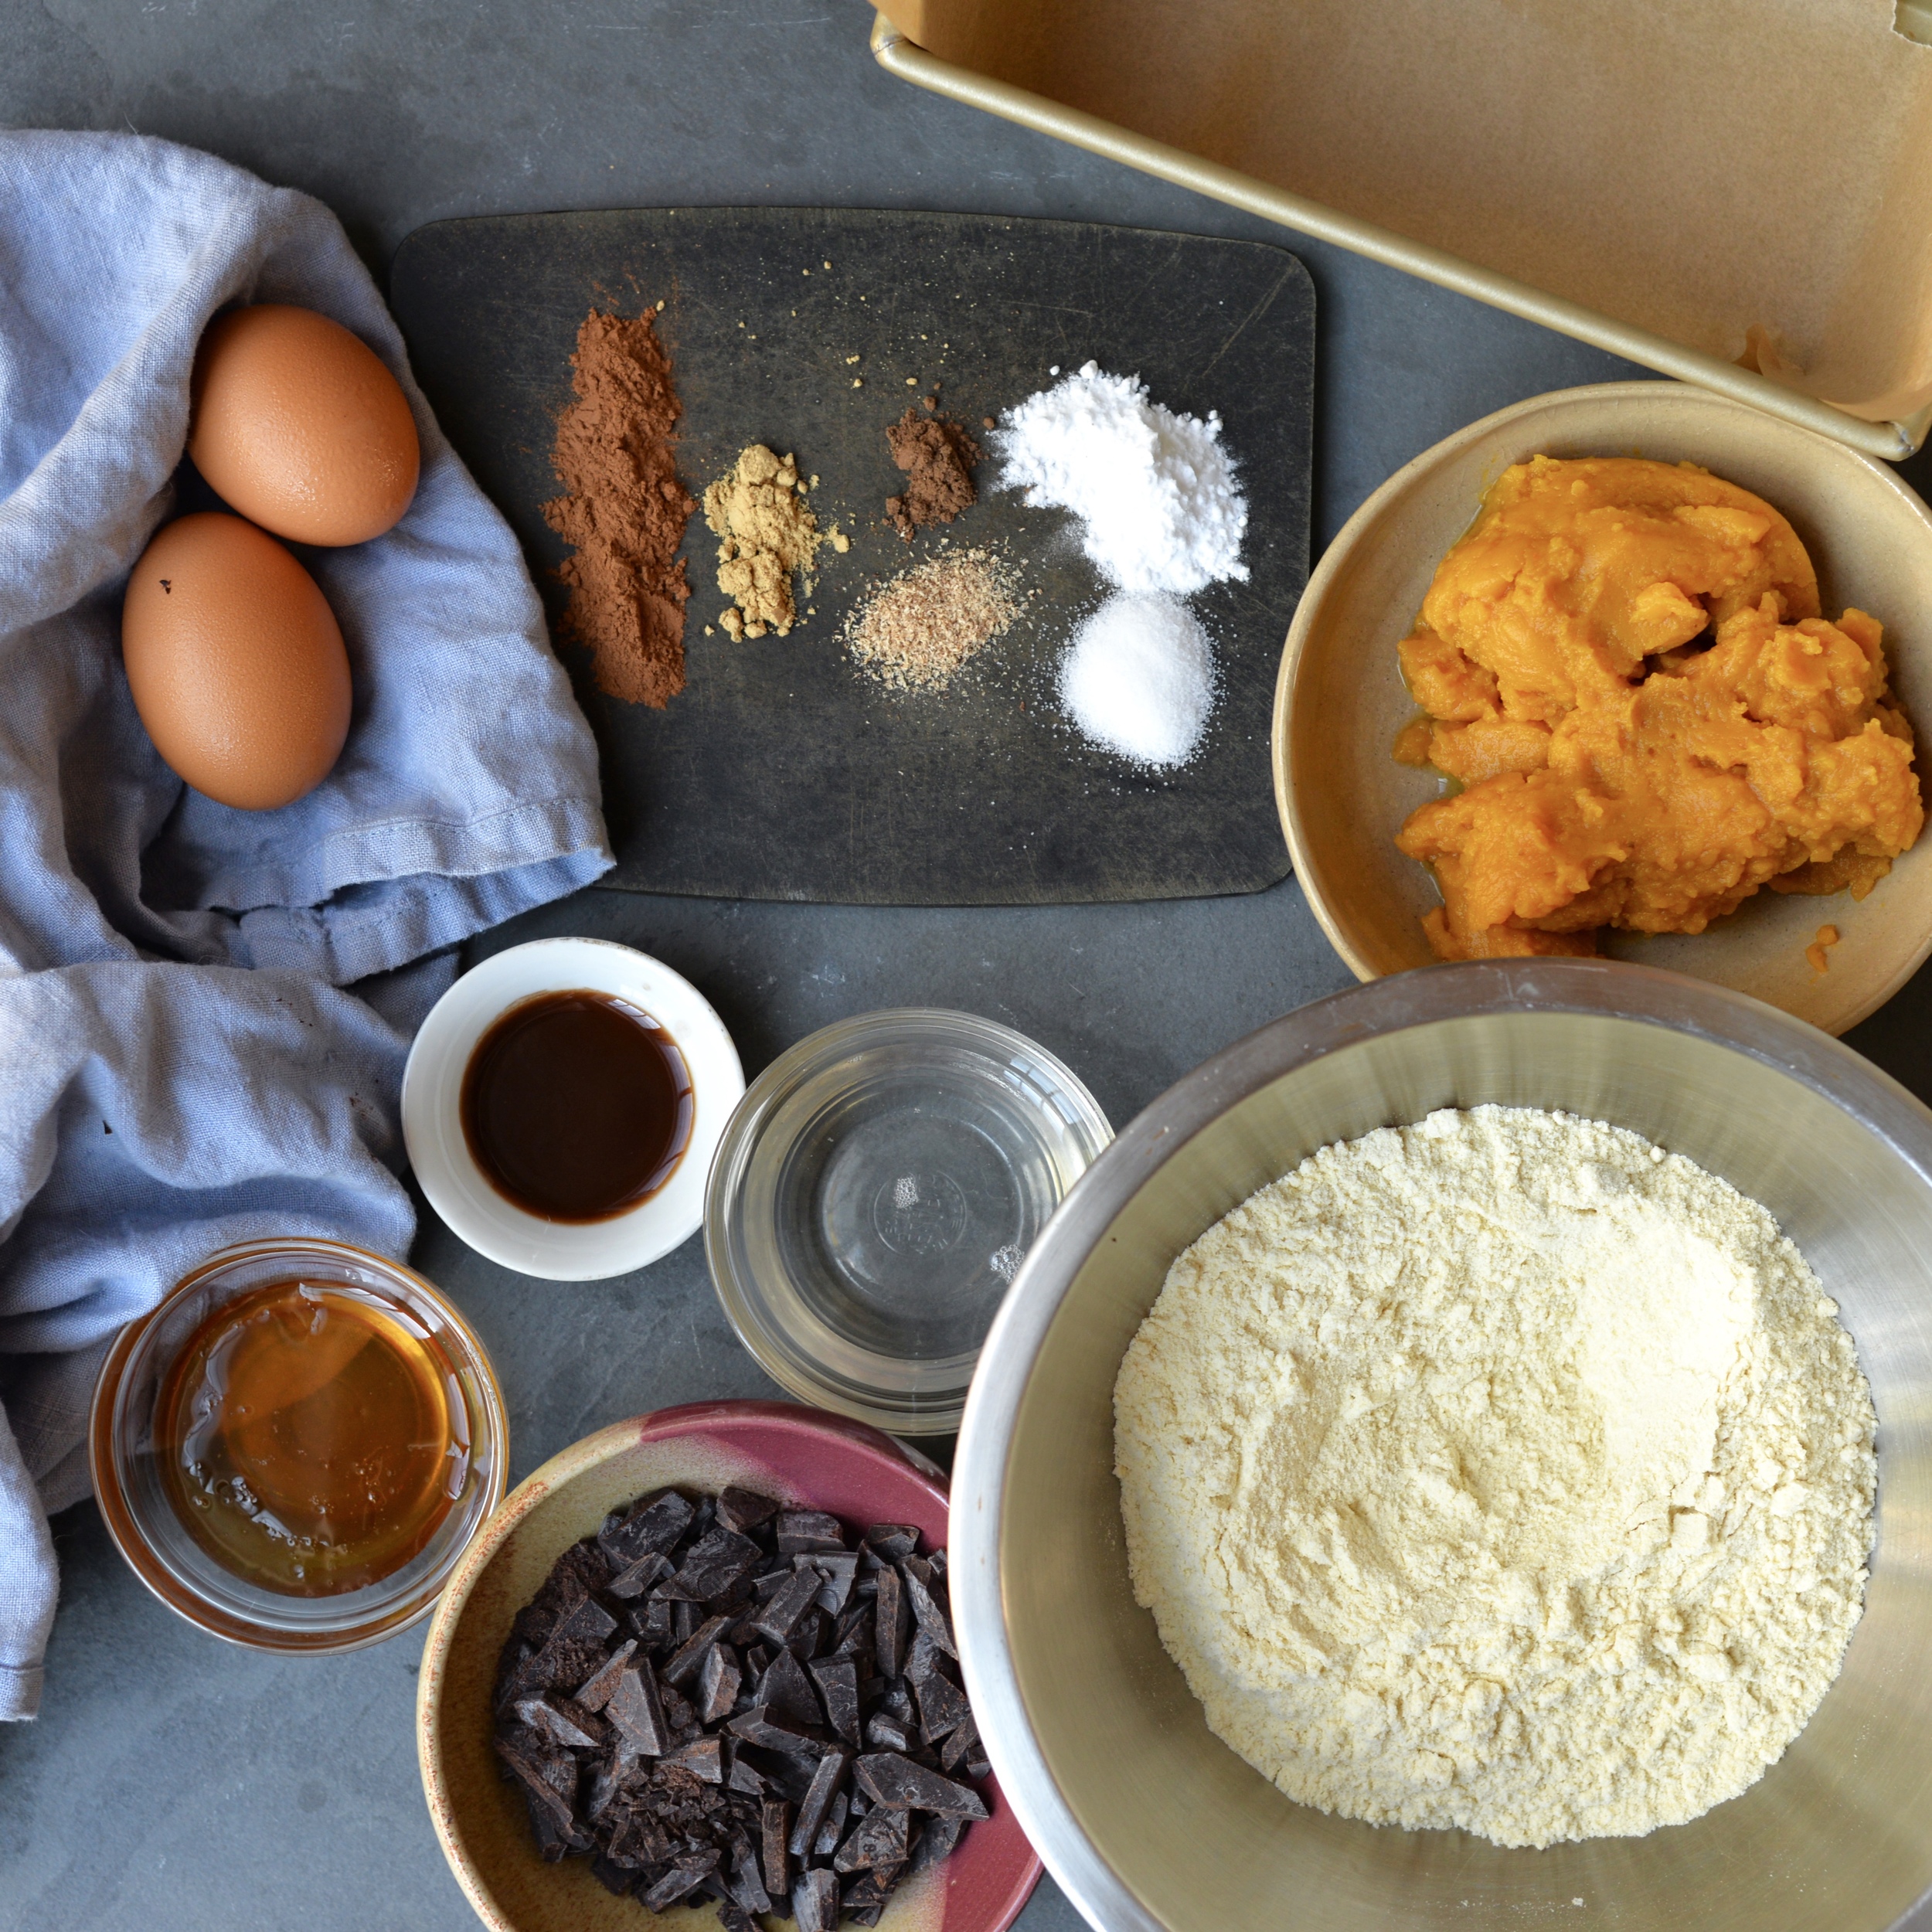
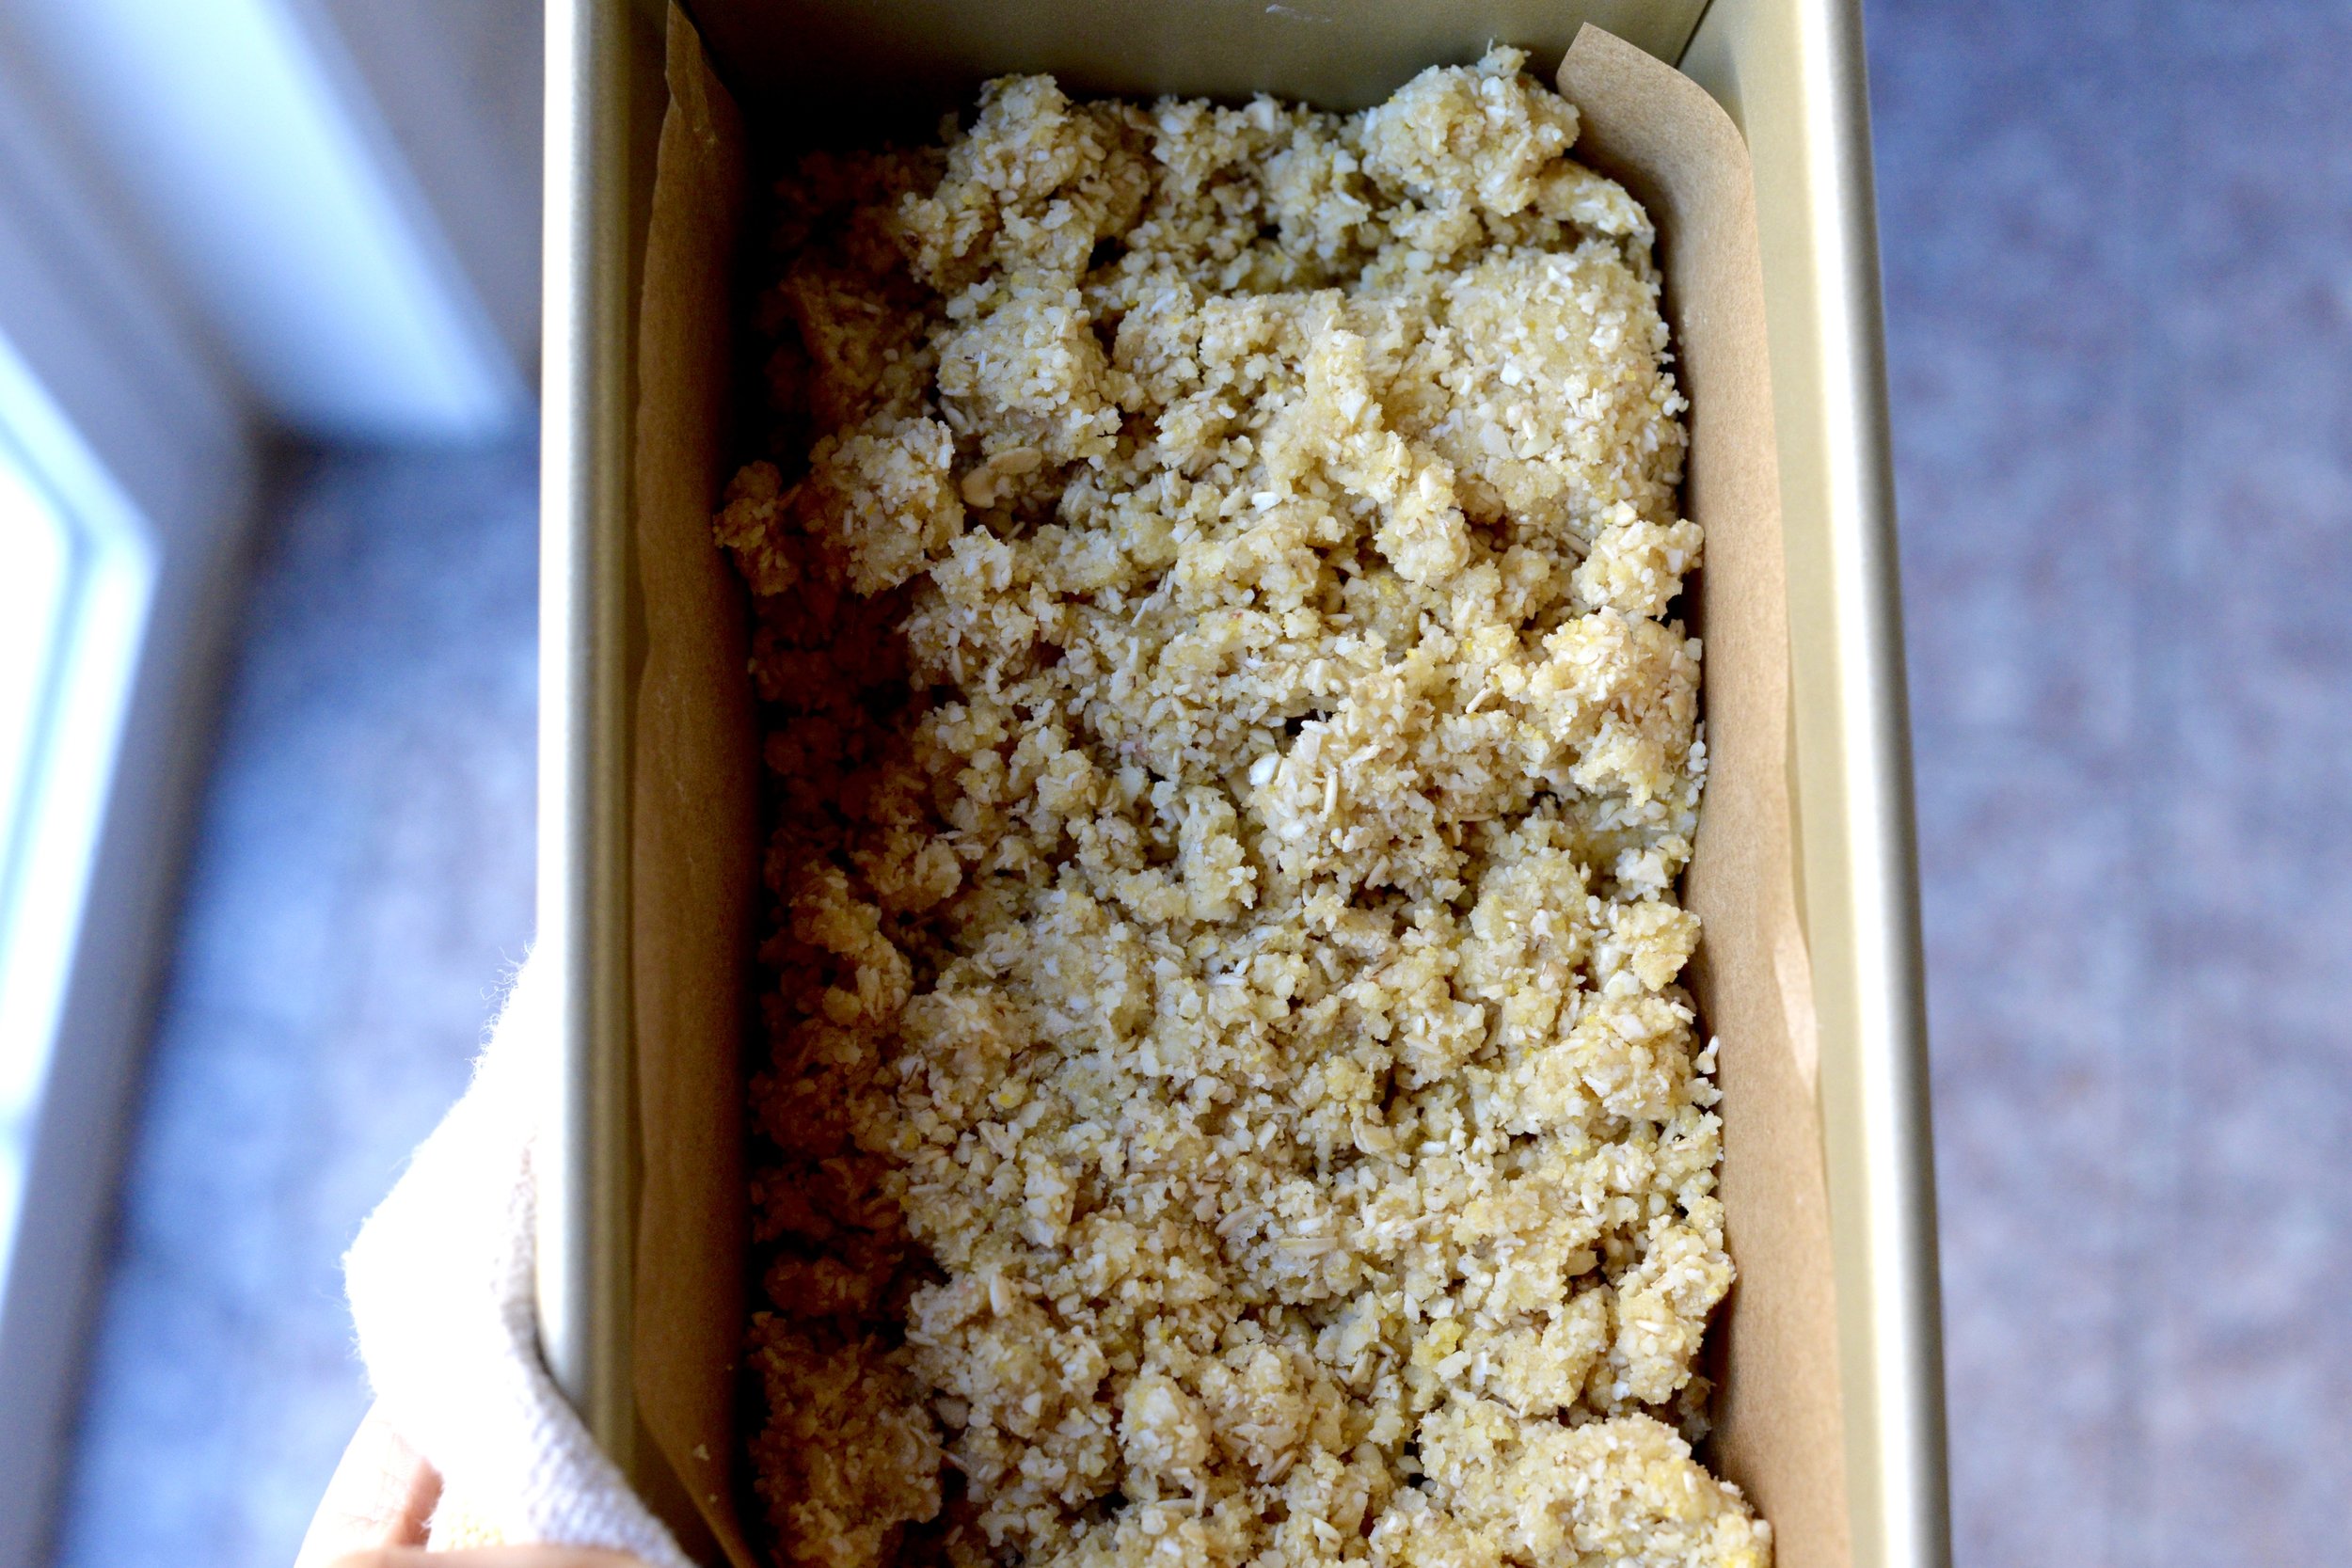
In a food processor, process oats until finely ground, about 30 seconds. Add almond meal, cornmeal, baking powder, and pinch of salt, and pulse 10 seconds to combine.

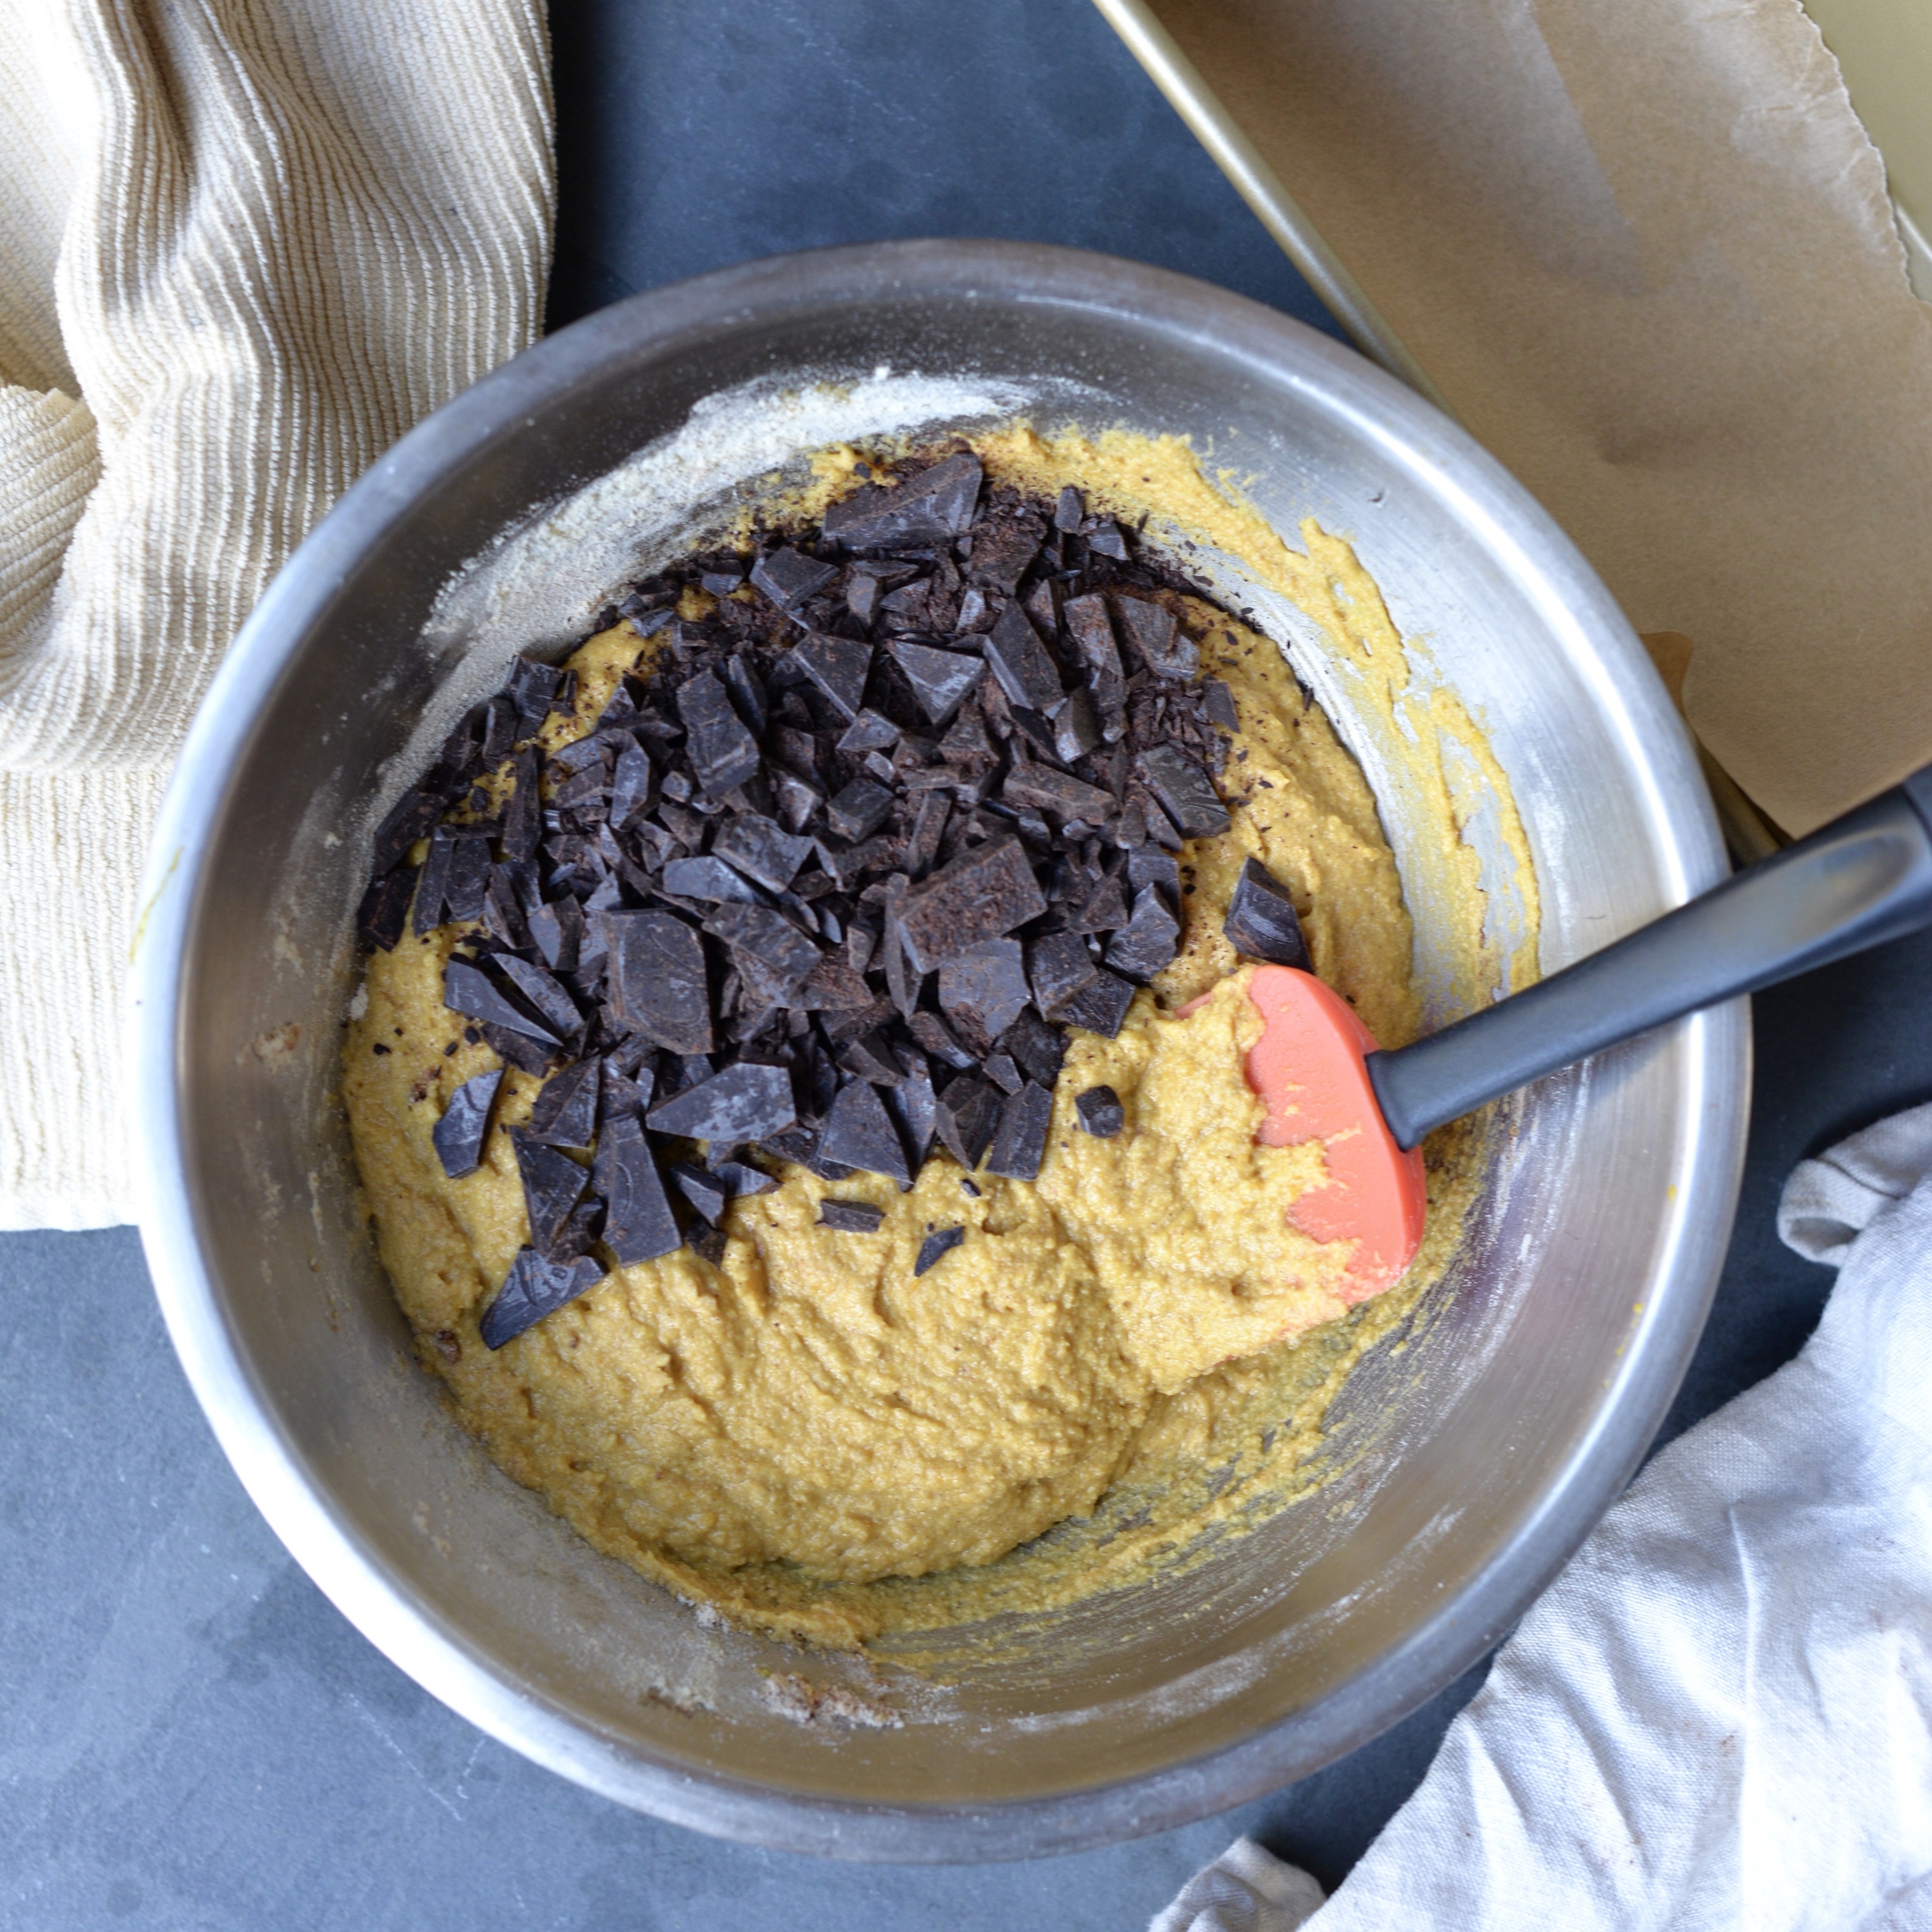
In a small bowl, whisk egg until well-beaten and no longer stringy. Add in melted coconut oil, extracts, and maple syrup. Stir to combine. Add dry ingredients to wet, and stir until well-mixed. Mixture will resemble a shortbread batter of sorts. Lightly press batter into prepared loaf pan to an even thickness and bake for 15 minutes. Remove pan from oven and overlap persimmon slices atop the batter, lightly pressing down so as not to squish the persimmons. Brush persimmons lightly with 1 tablespoon maple syrup. Return to oven and bake for another 20-25 minutes or until edges are golden brown.

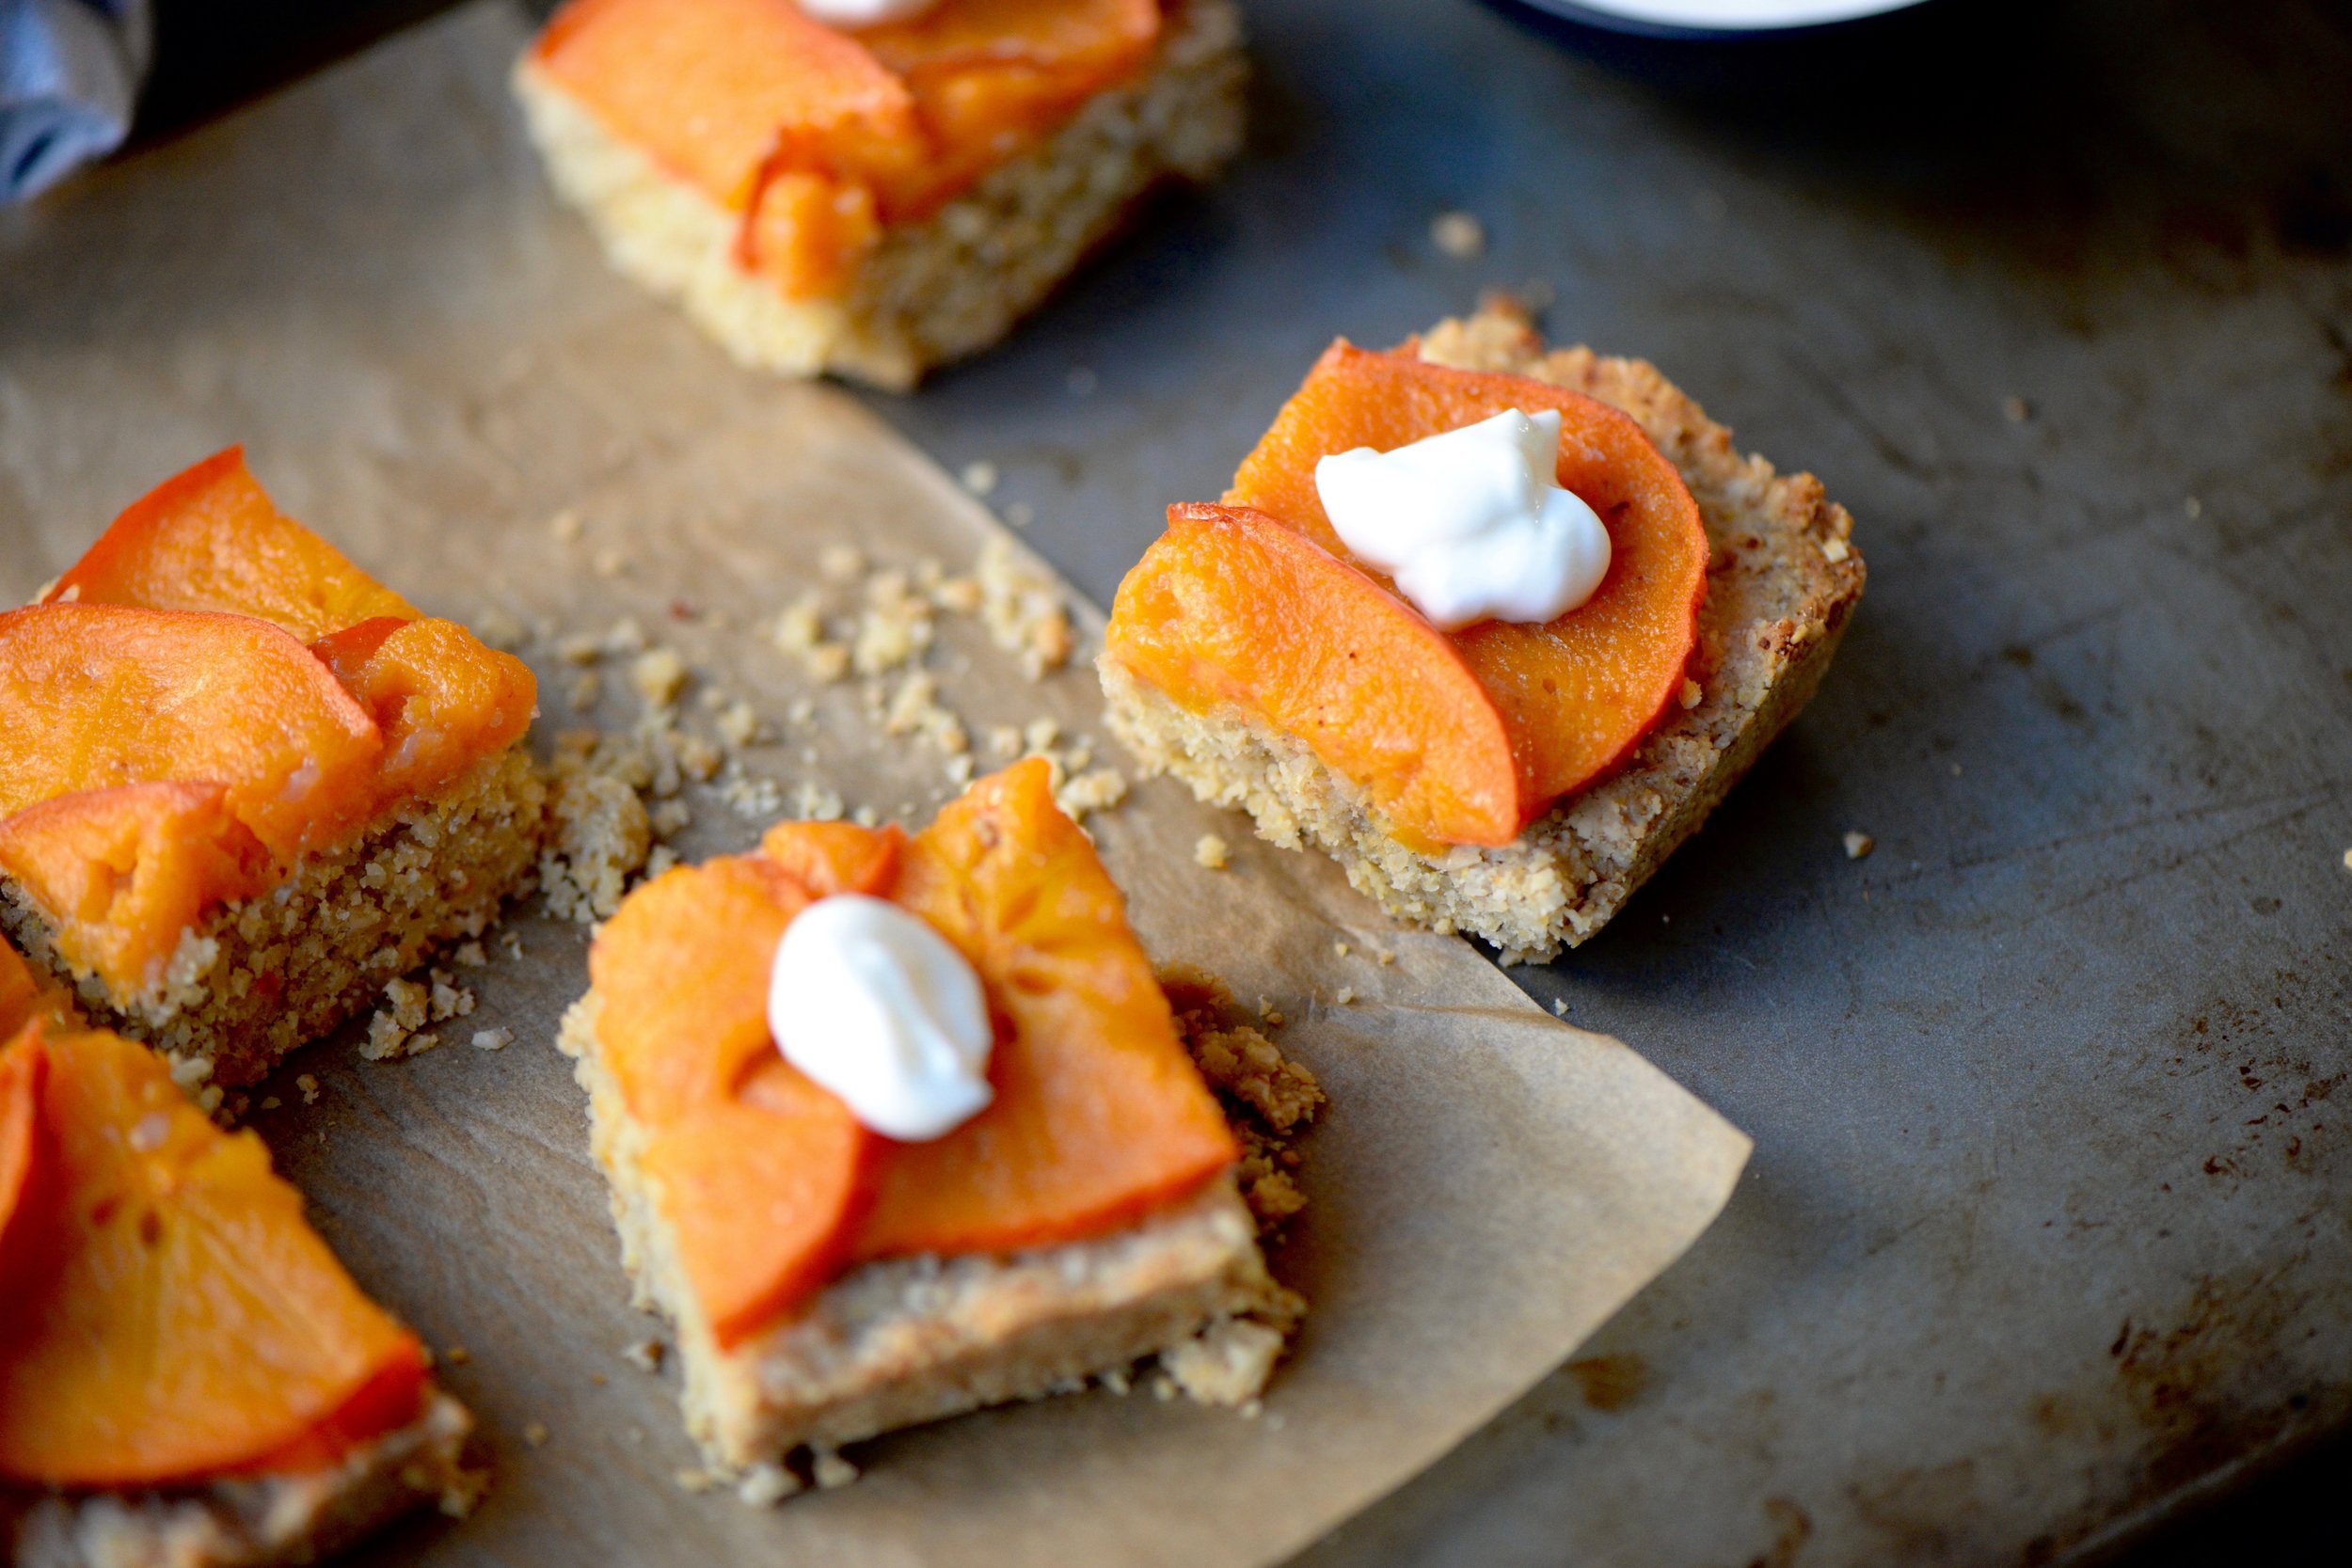
Remove from oven and allow to cool for 10 minutes. Using parchment handles, carefully lift bars from pan and remove to baking rack to allow to cool completely. Place on cutting board to cut into eight squares. Serve with a dollop of whipped coconut cream. Bars can be stored in container in the refrigerator for 5 days. Makes 8 squares.

**To make flax egg: Stir 3 tablespoons water with 1 tablespoon ground flaxseed and allow to rest for 15 minutes

DSC_4927.jpg
DSC_4937.jpg
In Sweets Tags dessert, recipe, persimmon, winter, cookie, baking
Comment

30 + Chocolate and Hazelnut Tin Can Cake

December 5, 2015 Emily Watson

Just a few months ago, I was cleaning out my closet with my sister, and I pulled out this cute little black dress. It was made of a soft and stretchy material and had a flowy little skirt. Minus the little skirt, it was a pretty conservative number with short sleeves and a crew neck that covered even my collar bones, so I was a bit surprised by my sister's reaction when I held it up to her. I expected her to ooh and ahh at how cute the dress was, ask me where I got it, and do that whole girly thing, but instead what I got was, "You're too old for that." I stuffed the dress back into the closet, lost total interest in going through the rest of my clothes, and wondered what else was I too old for. 

I sulked about my twenty-nine years for about two weeks after that, thought about how I should have been more established in my career by now, about how I should have been more adventurous in my twenties, about how I should have worn that little black dress more times than I did when I was still "young," still allowed. I went on this downward spiral of feeling sorry for myself, about those lost opportunities, about the shoulda-woulda-couldas. I know, I was being a bit dramatic, but my sister's comment stung. I know she did not mean it to be so harsh, but I took it way more personally, probably because I was a bit sensitive about getting older anyway, about entering another decade and dealing with the expectations of what someone in his or her thirties does and does not do.

I finally snapped out of my little self-pity phase. When my 30th birthday finally rolled around earlier this week, I was ready to celebrate not the old shoulda-woulda-couldas, but the shall, will, and can do's. My twenties brought some pretty exciting experiences in my life, all for which I am grateful, but I am making sure that my thirties top it.

No more pity party over here, just this delicious little chocolate and hazelnut cake.

Before getting to the recipe, I have to say that my family is always so wonderful about celebrating my birthday over Thanksgiving. For the past few years, they have gotten me one of those super-addicting cookie cakes from the Great American Company, and each and every year, it somehow gets destroyed. One year it was dropped, another year, it somehow got folded up like a cookie taco by the time it made it home, and this year, my little sister's new dog "who never eats food off of the counter," licked half of the icing off of the cake. Unfortunate, but silly events, and I am grateful for a family that goes through the trouble of celebrating my birthday when we can all be together.

Now onto this cake! I wanted to make a little cake because there are only two of us at home, but also because just how cute is this?! This was inspired by a mix of recipes from around the web, but I picked chocolate and hazelnut because 1) I love chocolate and hazelnut (see these truffles) and 2) I wanted a fancy combo to ring in this new decade.

The tin can bit was inspired by a cake at the Domestic Goddess. I adapted the batter from a Mini One Bowl Yellow Cake at The Cake Merchant but made some changes in the prep and used coconut sugar to give it a richer, caramel flavor. The icing is my own creation.

Chocolate and Hazelnut Tin Can Cake

Cake:
1/2 cup plus 1 tablespoon whole wheat pastry flour
1/2 teaspoon baking powder
1/2 teaspoon salt
2 1/2 tablespoons unsalted butter, softened
1/3 cup coconut sugar
3 tablespoons kefir or buttermilk
1 large egg
1/2 teaspoon vanilla extract

Frosting:
1/4 cup unsalted butter, softened
1/2- 3/4 cup coconut sugar (or powdered sugar for a smoother frosting)
3 tablespoons nutella or other chocolate hazelnut spread
2 teaspoons cocoa powder
1/4 teaspoon kosher salt
1 cup chopped toasted hazelnuts (skins removed after toasting)

For the cake, preheat oven to 350 degrees Fahrenheit. Grease a clean 28 ounce tin can and line bottom and sides with parchment paper.

In a bowl, whisk together flour, baking powder, and salt. In a separate bowl, beat the butter and sugar until light and fluffy with an electric mixer. Add kefir or buttermilk, egg, and vanilla, and beat for about a minute or until well combined. Slowly sprinkle in flour mixture. and beat for 45 seconds or until mixture is smooth, scraping down the sides often.

Pour batter into prepared tin can, bang can on counter to get out any air bubbles, and bake for 35-45 minutes or until toothpick poked into center comes out clean. Cool on wire rack for 15 minutes. Remove from can and allow to cool completely.

Meanwhile, prepare frosting. Cream butter and sugar together until light and fluffy. Start with 1/2 cup sugar and add more sugar to taste. Beat in nutella, cocoa powder, and salt until well combined. Set aside until cake has cooled completely.

To frost cake, remove top rounded portion of cake until top is level. Cut cake into two even layers. Apply an even layer of frosting on the bottom layer (about 1/3 of the frosting), then top with second layer. Apply a thin crumb-coating all over cake, place in fridge for 10 minutes to firm up, and then continue to frost cake with remaining frosting. Press chopped hazelnuts into side of cake. Cake is best eaten the day it is made, but you can store it in the fridge overnight. Enjoy! Makes 1 4-inch two layer cake.

IMG_0668.jpg
DSC_2325.jpg
DSC_2350.jpg
DSC_2372.jpg
In Sweets Tags cake, dessert, chocolate, hazelnut
Comment

Chocolate Chip Pumpkin Bread

October 9, 2015 Emily Watson

What's your favorite way to celebrate fall? I still have not brought out my boots or unpacked my fall sweaters, but I have brought out the canned pumpkin. The thing with canned pumpkin is that a can (or now there is pumpkin in easy-to-open cartons!) can go a long way. You can get creative with adding a little bit of pumpkin to this or that, and it generally turns out pretty tasty. Think pumpkin in your oats, swirl some pumpkin into soup, add a little to curry or a nice stew. In baked goods, pumpkin tends to keep things moist but it also lends a more cakey texture. Pumpkin cookies tend to be fluffier rather than crispier, and cakes with pumpkin tend to have just a lighter crumb.

This quick bread is perfect as a breakfast or as a snack because it is not too heavy or too sweet. I season it with some favorite fall spices like cinnamon, ginger, nutmeg, and allspice, and I love chocolate chips with pumpkin so could not resist throwing in some semi-sweet chocolate that I chopped from a bar. If milk chocolate is your thing, use that instead. It is a mix and dump sort of bread, but do not let it's ease fool you. It is tasty and will whisk you into fall, even if you are still wearing those flip=flops.

Do you have a favorite pumpkin bread recipe? Or another favorite pumpkin treat?

DSC_1598.jpg

Chocolate Chunk Pumpkin Bread

1 1/2 cups spelt flour or whole wheat pastry flour (or a mix of wheat and all-purpose)
1 teaspoon ground cinnamon
1/4 teaspoon ground ginger
1/8 teaspoon ground nutmeg
1/8 teaspoon ground allspice
1 teaspoon baking soda
1/2 teaspoon salt
2 eggs
1 teaspoon vanilla extract
1/3 cup coconut oil, melted, or vegetable oil
1/3 cup honey, preferably local or maple syrup
1 cup pumpkin puree
1 cup chocolate chunks of chocolate chips (I used semi-sweet)

Preheat oven to 350 degrees Fahrenheit. Grease a loaf pan and line with parchment paper to create a sling that is easy to lift out.

Mix dry ingredients in a small bowl (flour through salt). Whisk wet ingredients in another bowl until smooth (eggs through pumpkin puree). Stir dry ingredients into wet until just mixed. Stir in chocolate chunks.

Pour batter into prepared pan. Bake on middle rack for 45-50 minutes or until toothpick comes out with just a few crumbs stuck to it. Remove pan from oven and allow bread to cool for 10 minutes in pan. Remove from pan and allow to cool completely on wire rack. Slice and serve. Enjoy! Makes 1 loaf.

DSC_1558.jpg
DSC_1572.jpg
DSC_1575.jpg
In Breakfast, Sweets Tags recipe, chocolate, pumpkin, fall, baking
1 Comment

Frozen Chocolate Covered Banana Nut Butter Bites

April 15, 2015 Emily Watson

Now that it is finally getting warmer, I am craving frozen treats. I frequently find my older sister munching on these frozen chocolate covered bananas. Have you ever had them? The whole concept sounds totally delicious except for the fact that my sensitive front teeth cannot handle taking a bite out of the things. Way too cold. I had come across a recipe for smaller chocolate covered banana slices back in college, made them, and liked them, but I always felt that they could use a little oomph. Hence, these little bites. Now I thought I was pretty darn smart for coming up with these little sandwiches, but it turns out that there are already similar creations out there- or at least there is already a similar creation out there. I only found this out after starting to write this post, when I took a break to peruse Pinterest and behold, there was a version right there on my welcome page. So to celebrate great minds (and tummies) thinking alike, here is the link to that recipe.

These little bites combine a few of my favorite things: bananas + nut butter + chocolate. This is essentially a template for a frozen banana sandwich, but you can really customize it to what you like. I used peanut butter and almond butter, but you could use sunflower seed butter, pecan butter, even coconut butter. Now that I am typing that, I think coconut butter would be really tasty...I melted a 70% dark chocolate for the coating, but if you prefer milk, do that instead! The beauty is that you really cannot mess this up. It is guaranteed that you will get a delicious result.

These are a fantastic post-workout snack given that they will help you replenish your carbohydrates and supply you with protein. The bananas give you a little potassium, and if you top with hemp seeds, you get even more healthy fat. These can be made on the weekend to keep you fueled for your week ahead. Just grab a few from the freezer when you need a pick-me-up.

Frozen Chocolate Covered Banana Nut Butter Bites

1 medium banana, peeled and sliced into 1/4 inch slices (you can snack on the pointier ends)
3-4 T. nut butter of choice, I used half peanut butter and almond butter
4 oz. chocolate, I used 70% dark but other types will work
Toppings, optional: sea salt, chopped toasted almonds, toasted coconut, cacao nibs, hemp seeds

Line a small baking sheet or a plate with parchment paper. Place about 1/2 teaspoon of nut butter on one half of one banana slice and top with another slice, pressing down gently to create a banana- nut butter sandwich. Complete with the remaining bananas. Place the baking sheet in the freezer for about 1 hour for the sandwiches to firm up.

IMG_5304.jpg
IMG_5308_2.jpg
IMG_5312.jpg
IMG_5315.jpg

Right before removing the sandwiches from the freezer, melt your chocolate. I used a double boiler method, placing the chocolate in a metal bowl over simmering water and stirring to melt, but you can also melt the chocolate in a microwave safe bowl in 20-30 second increments, stirring after each increment. Remove the chocolate from the heat once completely melted. Prepare your toppings if you choose to use them.

IMG_5327_2.jpg
IMG_5337_2.JPG

Remove the banana sandwiches from the freezer. One at a time, dip the bananas in the melted chocolate, and use two forks to remove them, allowing the excess chocolate to drip off. Return to the parchment. The cold bananas will cause the chocolate to harden quickly, so be ready to sprinkle your topping of choice on top before the chocolate sets. Complete with the remaining banana sandwiches. Return to the freezer for at least 30 minutes so the chocolate can fully harden. Store in the freezer. My medium sized banana made 13 bites, but it depends on the size of your banana as to how many will be made and how much nut butter you will use.

IMG_5378.JPG
IMG_5353_2.jpg
IMG_5371.JPG
In Sweets Tags recipe, bananas, chocolate, nut butter, peanut butter, almond butter, snack, vegetarian, gluten-free
5 Comments

Minty Green Chocolate Chia Puddings with Chococlate Almond Crumble

March 18, 2015 Emily Watson

Our first family pet was born on St. Patrick's Day, and while she passed away several years ago, we always honor her with a little treat every March 17th. When Ms. Whiskers was still around, we usually made a birthday cake, with either the icing, cake, or both dyed green and served with a cup of green milk. Yes, my older sister insisted on dyeing our gallon of milk green for the week of St. Patty's Day. Ms. Whiskers got a giant lick of icing off my finger while we sang Happy Birthday to her, and we all got to enjoy the rest of the cake.

This year, we kept up with tradition, but forwent the artificial dyes and the whole birthday cake, opting instead for little puddings with a naturally colored minty green layer and a chocolate layer. A crunchy cookie-like layer makes these taste like minty dirt cups. In all honesty, I was hoping that the green layer would be a little more vibrant and just a little more enticing, but after multiple attempts to make it brighter, I will settle with the murky green I got instead because taste trumps visual appeal in this case. If the green proves just too vegetable-like for your liking, forget the two-tone layers, turn this whole thing into a minty chocolate pudding and my feelings will not be hurt.

Chia seeds and avocado help thicken the pudding. Spinach provides a little green and a nutritional boost that I promise you will not taste. I used dates for sweetness not only because I love their caramel-like flavor, but they contribute additional fiber. Honey makes a wonderful substitute and is actually a little easier to blend in this recipe. The crumble can be doubled or tripled and then sprinkled on whatever you can get your hands on. It is reminiscent of those Nabisco chocolate wafers but a bit nuttier. And It definitely melts in your hand so as tempting as it is to eat by the handful, I recommend grabbing a spoon instead.

Minty Green and Chocolate Chia Puddings with Chocolate Almond Crumble

Puddings:
1/2 c. full-fat coconut milk or other milk of your choice
1/4 c. fresh mint leaves
2 T. chia seeds
1/2 avocado, peeled
1/2 c. frozen spinach or 1 large handful fresh spinach
3 pitted medjool dates, soaked in hot water for a few minutes if not still soft and then drained, or 2 1/2 T honey
1/4 t. vanilla extract
1 T. + 1 t. cocoa powder

Chocolate Almond Crumble:
2 t. coconut oil
3 T. almond meal
1 T. cocoa powder
1/2 t. honey
pinch of salt

Begin with the cookie crumble. In a small skillet over medium heat, heat the coconut oil. When it has melted, add the almond meal, cocoa powder, honey, and pinch of salt. Stir thoroughly to combine. Allow the mixture to melt and meld together. Cook over medium-low heat for about 5 minutes. Remove from heat, spread mixture in a thin layer on a plate or piece or parchment. I placed the mixture on a piece of parchment and folded the parchment over to smooth into a thin, even layer. Place it in the freezer for about 10-15 minutes to harden while you prepare the puddings.

IMG_4087.jpg
IMG_4125.jpg
IMG_4127.jpg

For the puddings, make the green layer first. Add the coconut milk, fresh mint, chia seeds, avocado, spinach, dates (or honey), and vanilla extract to a blender and blend until smooth. You will have to stop often to scrape down the sides, but it will eventually come together. If you are really having trouble, add more liquid, 1 tablespoon at a time, to help blend. Remove half of the mixture from the blender and set aside in a small bowl. To make the chocolate layer, add the 1 tablespoon + 1 teaspoon of cocoa powder to the blender, and blitz to combine.

IMG_4063.jpg
IMG_4070.jpg
IMG_4077.jpg

When the chocolate almond mixture has become firm, remove it from the freezer and chop into small crumbles. Place 2 teaspoons of the crumbles in the bottom of each of two glasses. Top each with half of the green pudding. Add 2 more teaspoons of the crumbles to each glass, and then top each with half of the chocolate chocolate. Finish each with the remaining crumbles. Place the puddings in the refrigerator for at least an hour in order to firm up and become chilled. Enjoy! Serves 2.

IMG_4133.JPG
IMG_4129.JPG


In Sweets Tags recipe, chia, pudding, chocolate, cocoa, mint, coconut milk
Comment
Older Posts →
Hi! I'm Emily. I love to cook whole, nourishing foods, and this is where I share my kitchen experiments and sometimes a little bit of life.

Hi! I'm Emily. I love to cook whole, nourishing foods, and this is where I share my kitchen experiments and sometimes a little bit of life.

Featured
  • July 2017
  • May 2017
  • April 2017
  • March 2017
  • February 2017
  • January 2017
  • December 2016
  • November 2016
  • October 2016
  • September 2016
  • August 2016
  • July 2016
  • June 2016
  • May 2016
  • April 2016
  • March 2016
  • February 2016
  • January 2016
  • December 2015
  • November 2015
  • October 2015
  • September 2015
  • August 2015
  • July 2015
  • June 2015
  • May 2015
  • April 2015
  • March 2015
  • February 2015

  • Appetizers 18
  • Breakfast 18
  • Life 4
  • Mains 39
  • Miscellaneous 2
  • Salads 21
  • Sandwiches 6
  • Side Dishes 8
  • Smoothies 4
  • Snacks 10
  • Soups 14
  • Spreads Dips Sauces 5
  • Sweets 6
  • Vegetarian 1

  • almonds
  • appetizers
  • autumn
  • avocado
  • breakfast
  • brown rice
  • chickpeas
  • chocolate
  • cilantro
  • coconut
  • coconut milk
  • fall
  • gluten-free
  • kale
  • lentils
  • make ahead
  • mint
  • oatmeal
  • recipe
  • salad
  • snack
  • soup
  • spring
  • summer
  • sweet potatoes
  • tahini
  • vegan
  • vegetarian
  • walnuts
  • winter

subscribe

Sign up with your email address to receive new posts directly

We respect your privacy.

Thank you!

All photographs, recipes and content are property of Nourishing Matters, unless otherwise noted. Please do not redistribute without my permission. Thank you!

Powered by Squarespace