• Home
    • About Nourishing Matters
    • About Emily
    • Frequently Asked Questions
  • Recipes
    • Offerings
    • Past Programs and Events
    • Experience and Teaching Style
    • Articles and Features
    • Travel
Menu

nourishing matters

Street Address
City, State, Zip
Phone Number
where wholesome meets delicious

Your Custom Text Here

nourishing matters

  • Home
  • About
    • About Nourishing Matters
    • About Emily
    • Frequently Asked Questions
  • Recipes
  • Work with Me
    • Offerings
    • Past Programs and Events
  • Yoga
    • Experience and Teaching Style
  • Press
    • Articles and Features
  • Adventures
    • Travel

Pomegranate and Roasted Red Pepper Dip

July 31, 2017 Emily Watson

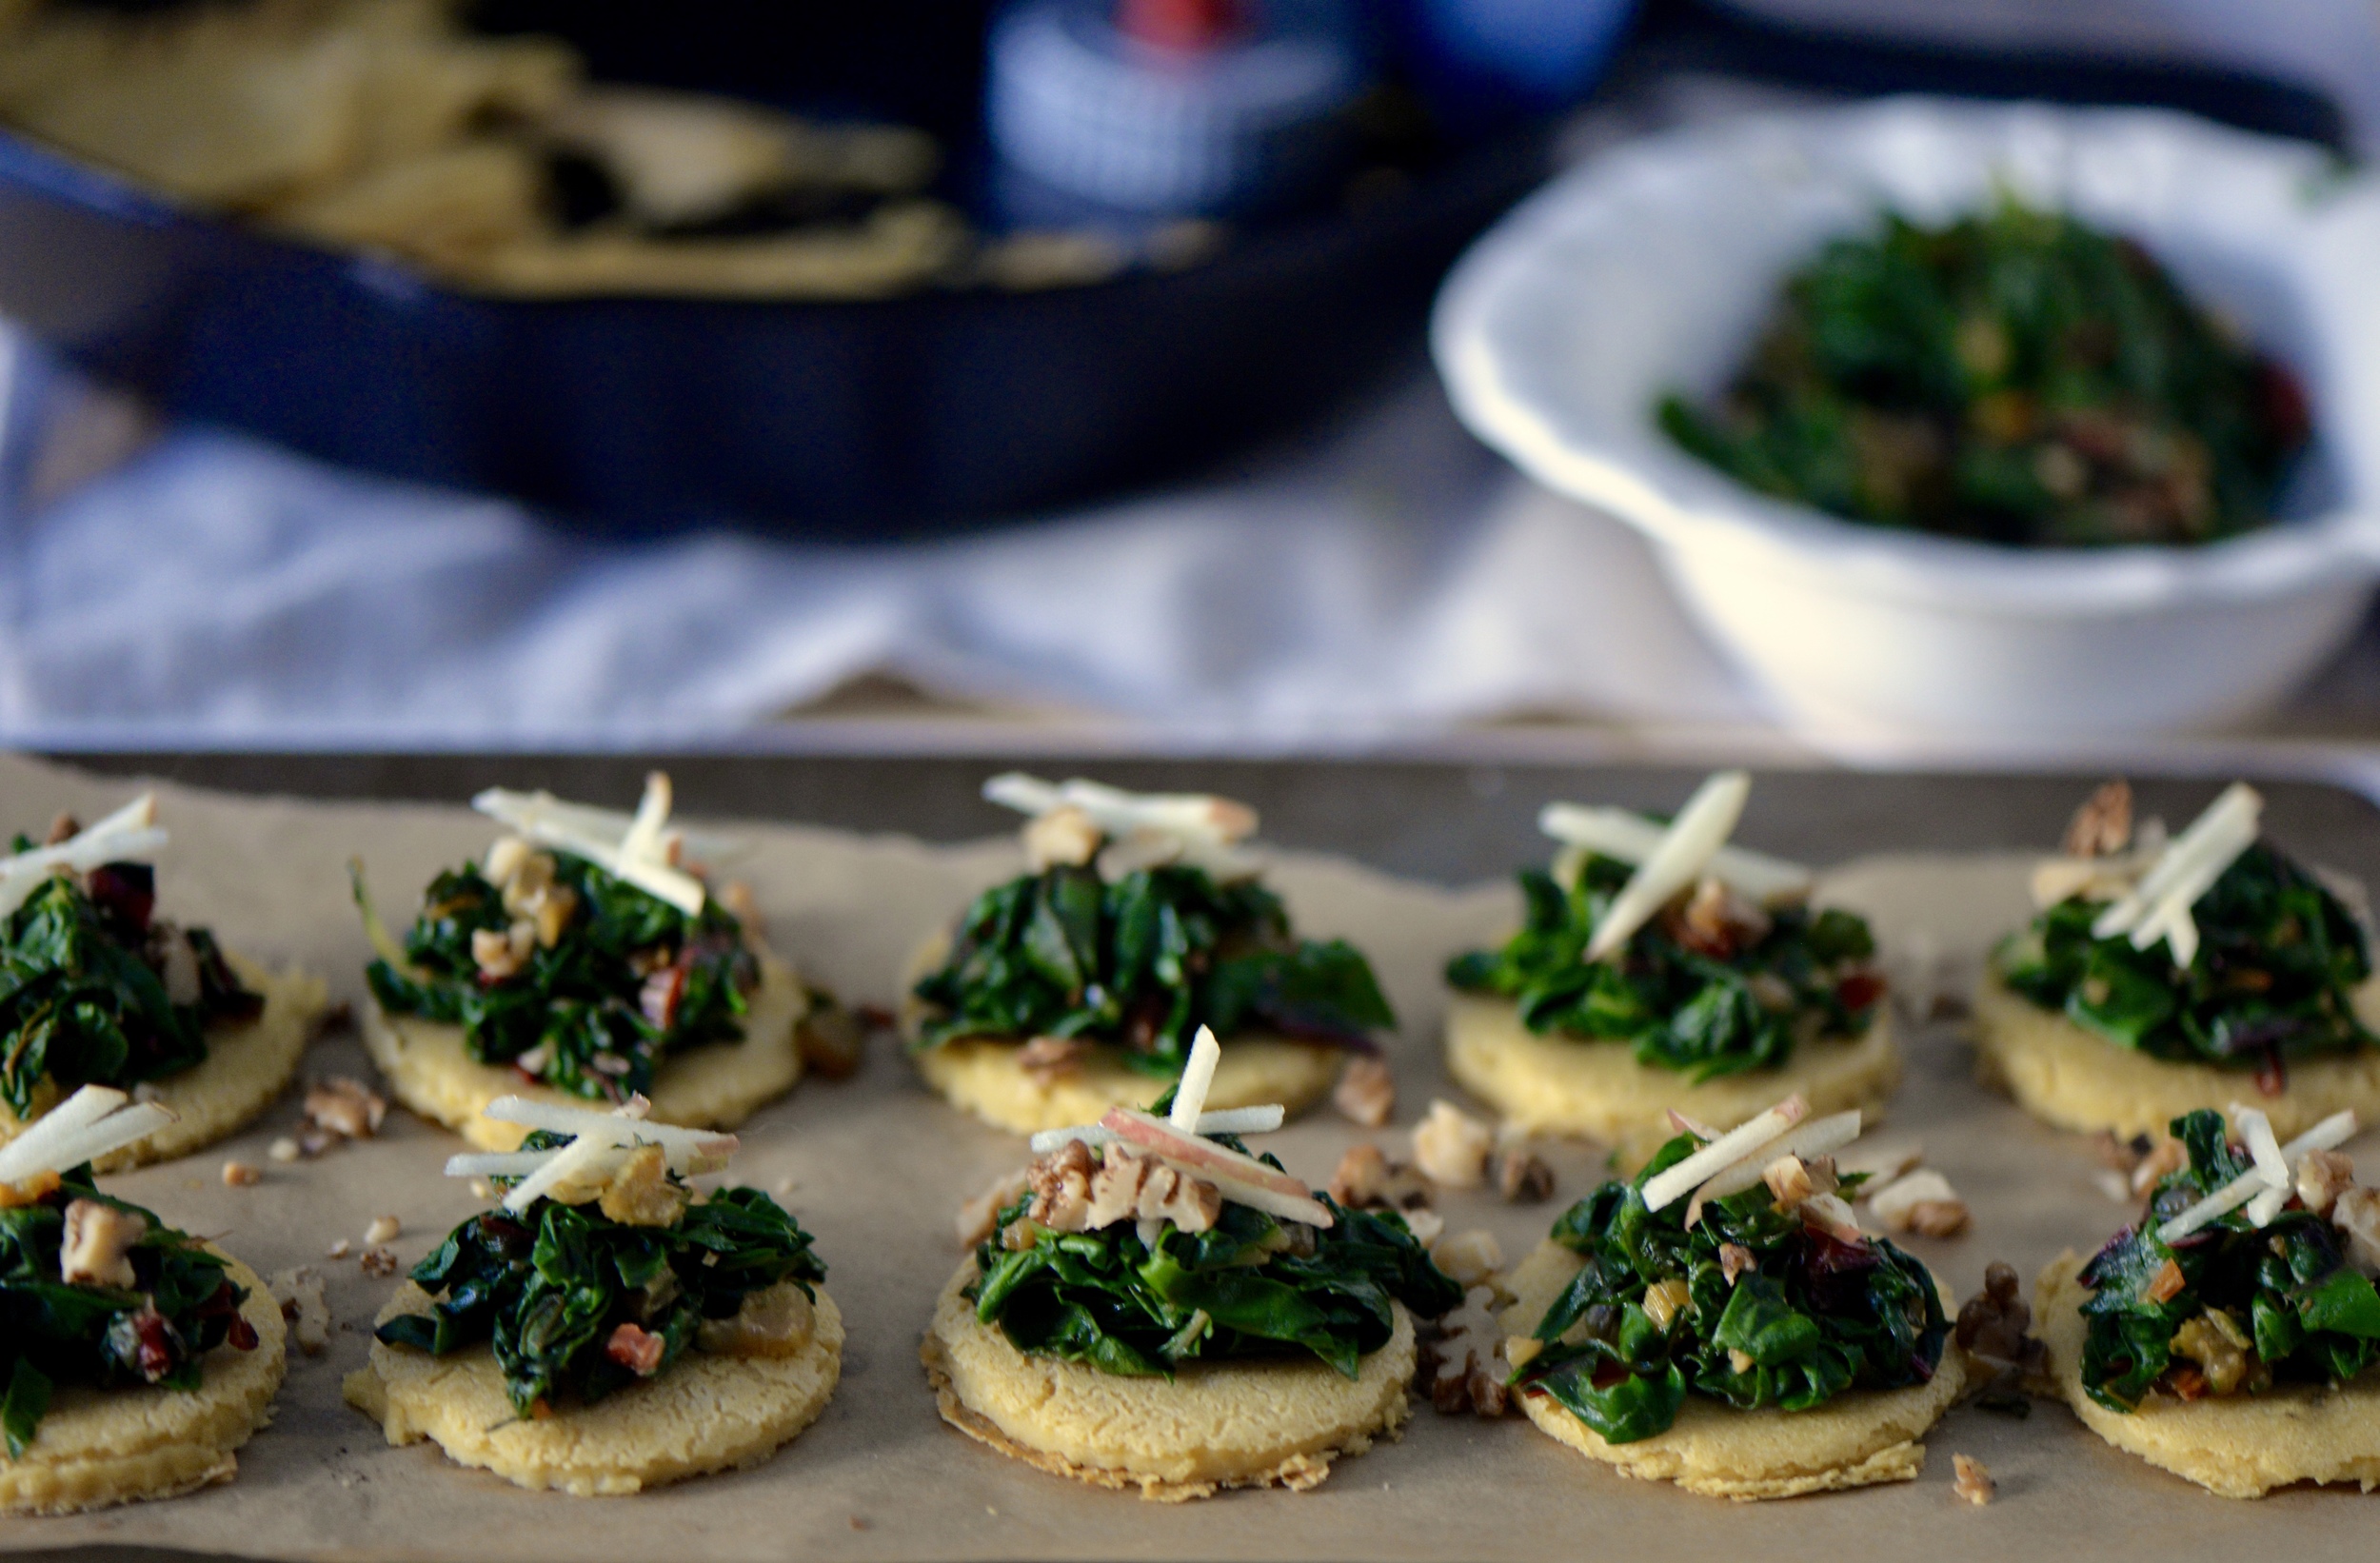
My sister-in-law got married just over a week ago in an intimate ceremony in the Catskills. It was a fun-filled three-day affair complete with a stunning bride, heartfelt vows, and tons of love from their closest family and friends. In return for an epic wedding present she and her fiancé gave us (they made us this beautiful video of my husband and me they presented us on our wedding day), I offered to prepare their welcome wedding feast. Now I'm not totally insane for offering; her wedding would only be 27 people. She requested lots of small bites that people could nibble on as they moved about, chit-chatting and getting to know each other.

The first thing that popped into my mind was a delicious dip bar! I'm a huge fan of mezze because I think there's pretty much something for everyone. Also, dips are low commitment. They can be made ahead of time, only get better with time as the flavors meld, and almost always involve throwing things in a food processor and pressing 'ON.' 

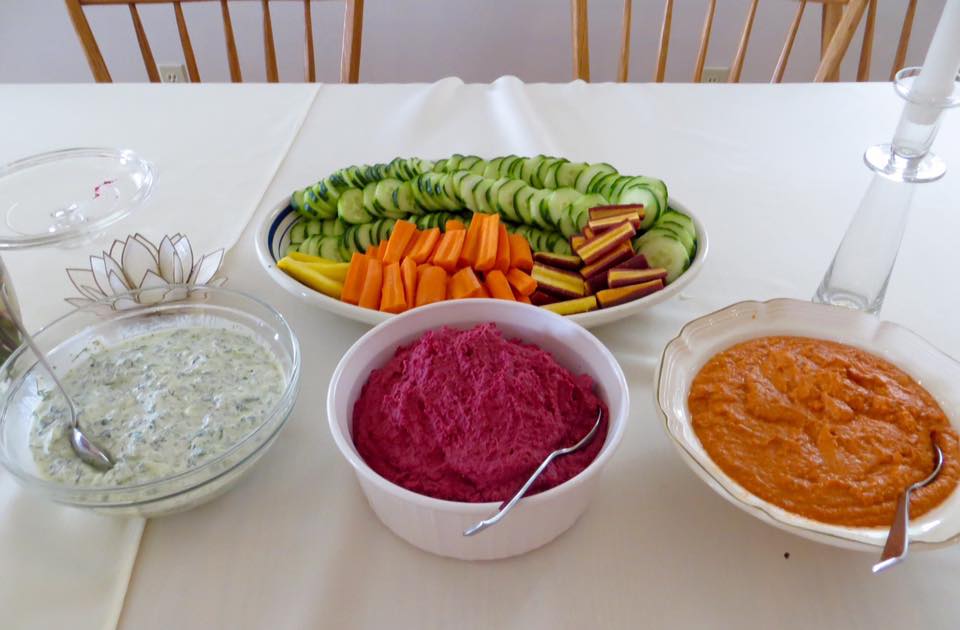
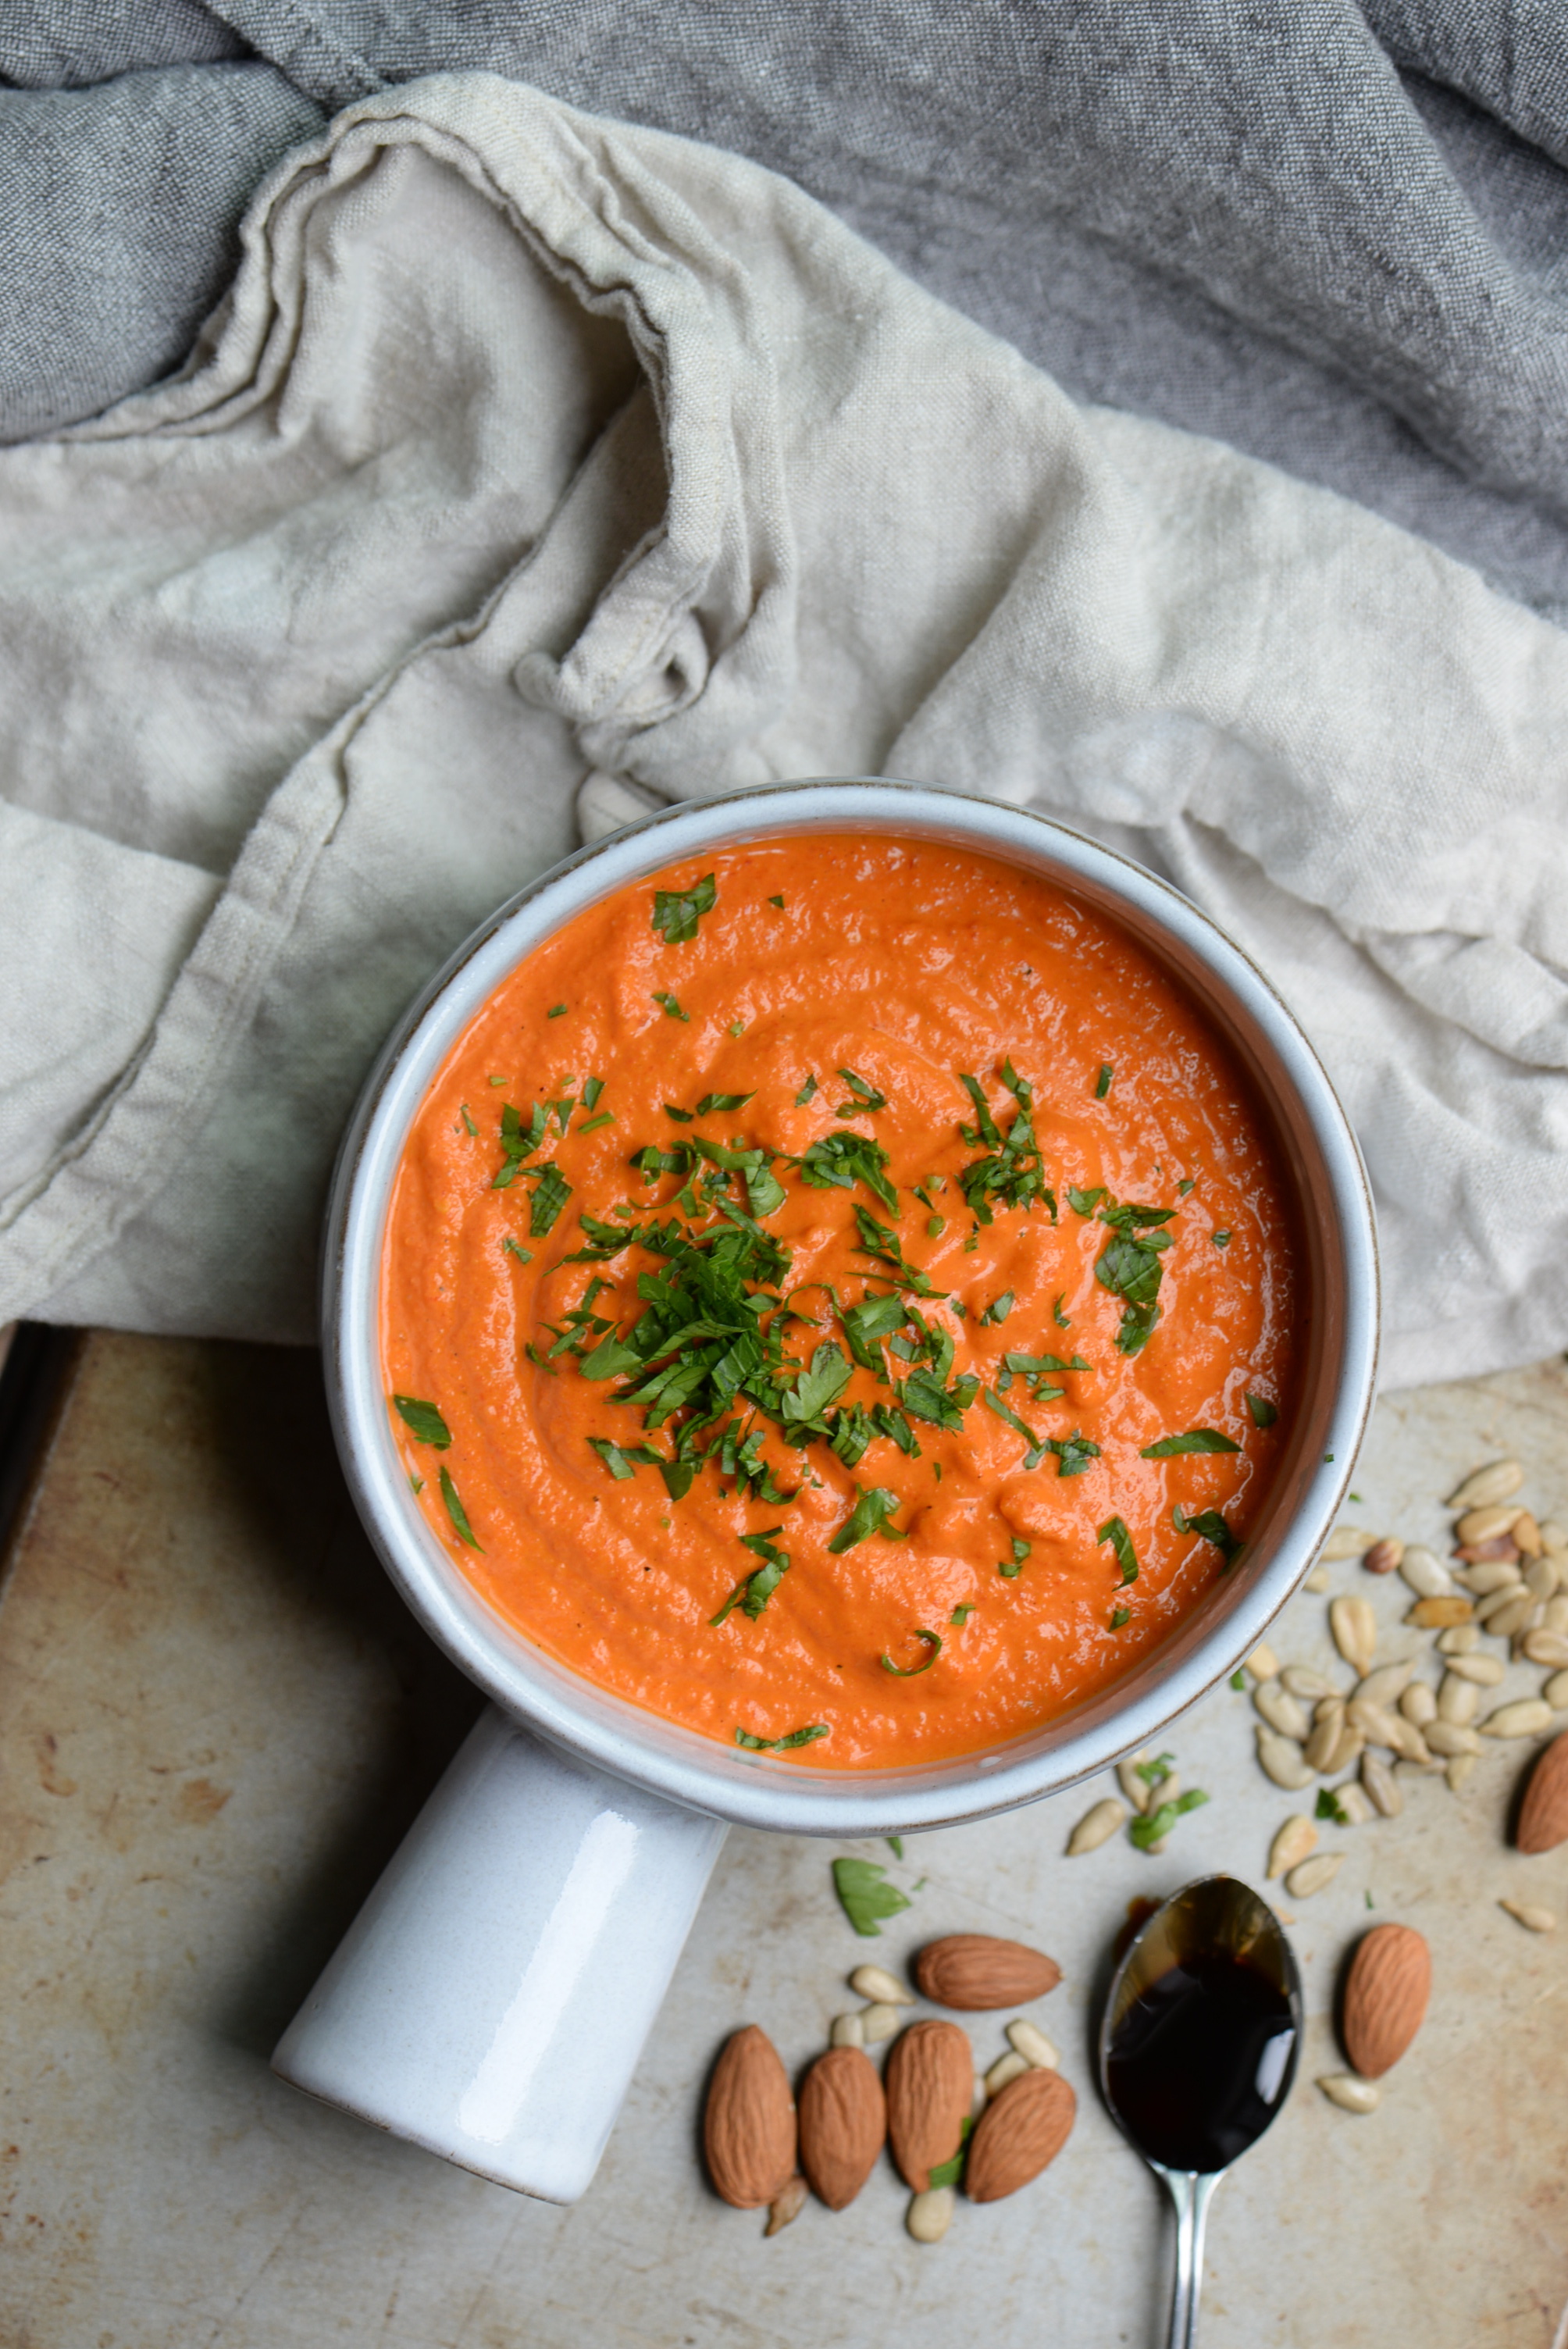
On the menu was a smoky beet hummus because it's just too pretty not to have on a tablescape, a bright and herby tzatziki of which I'm going to have to share with you someday because it was eat-with-a-spoon tasty, and this tart and earthy red pepper dip that I could slather on just about everything.

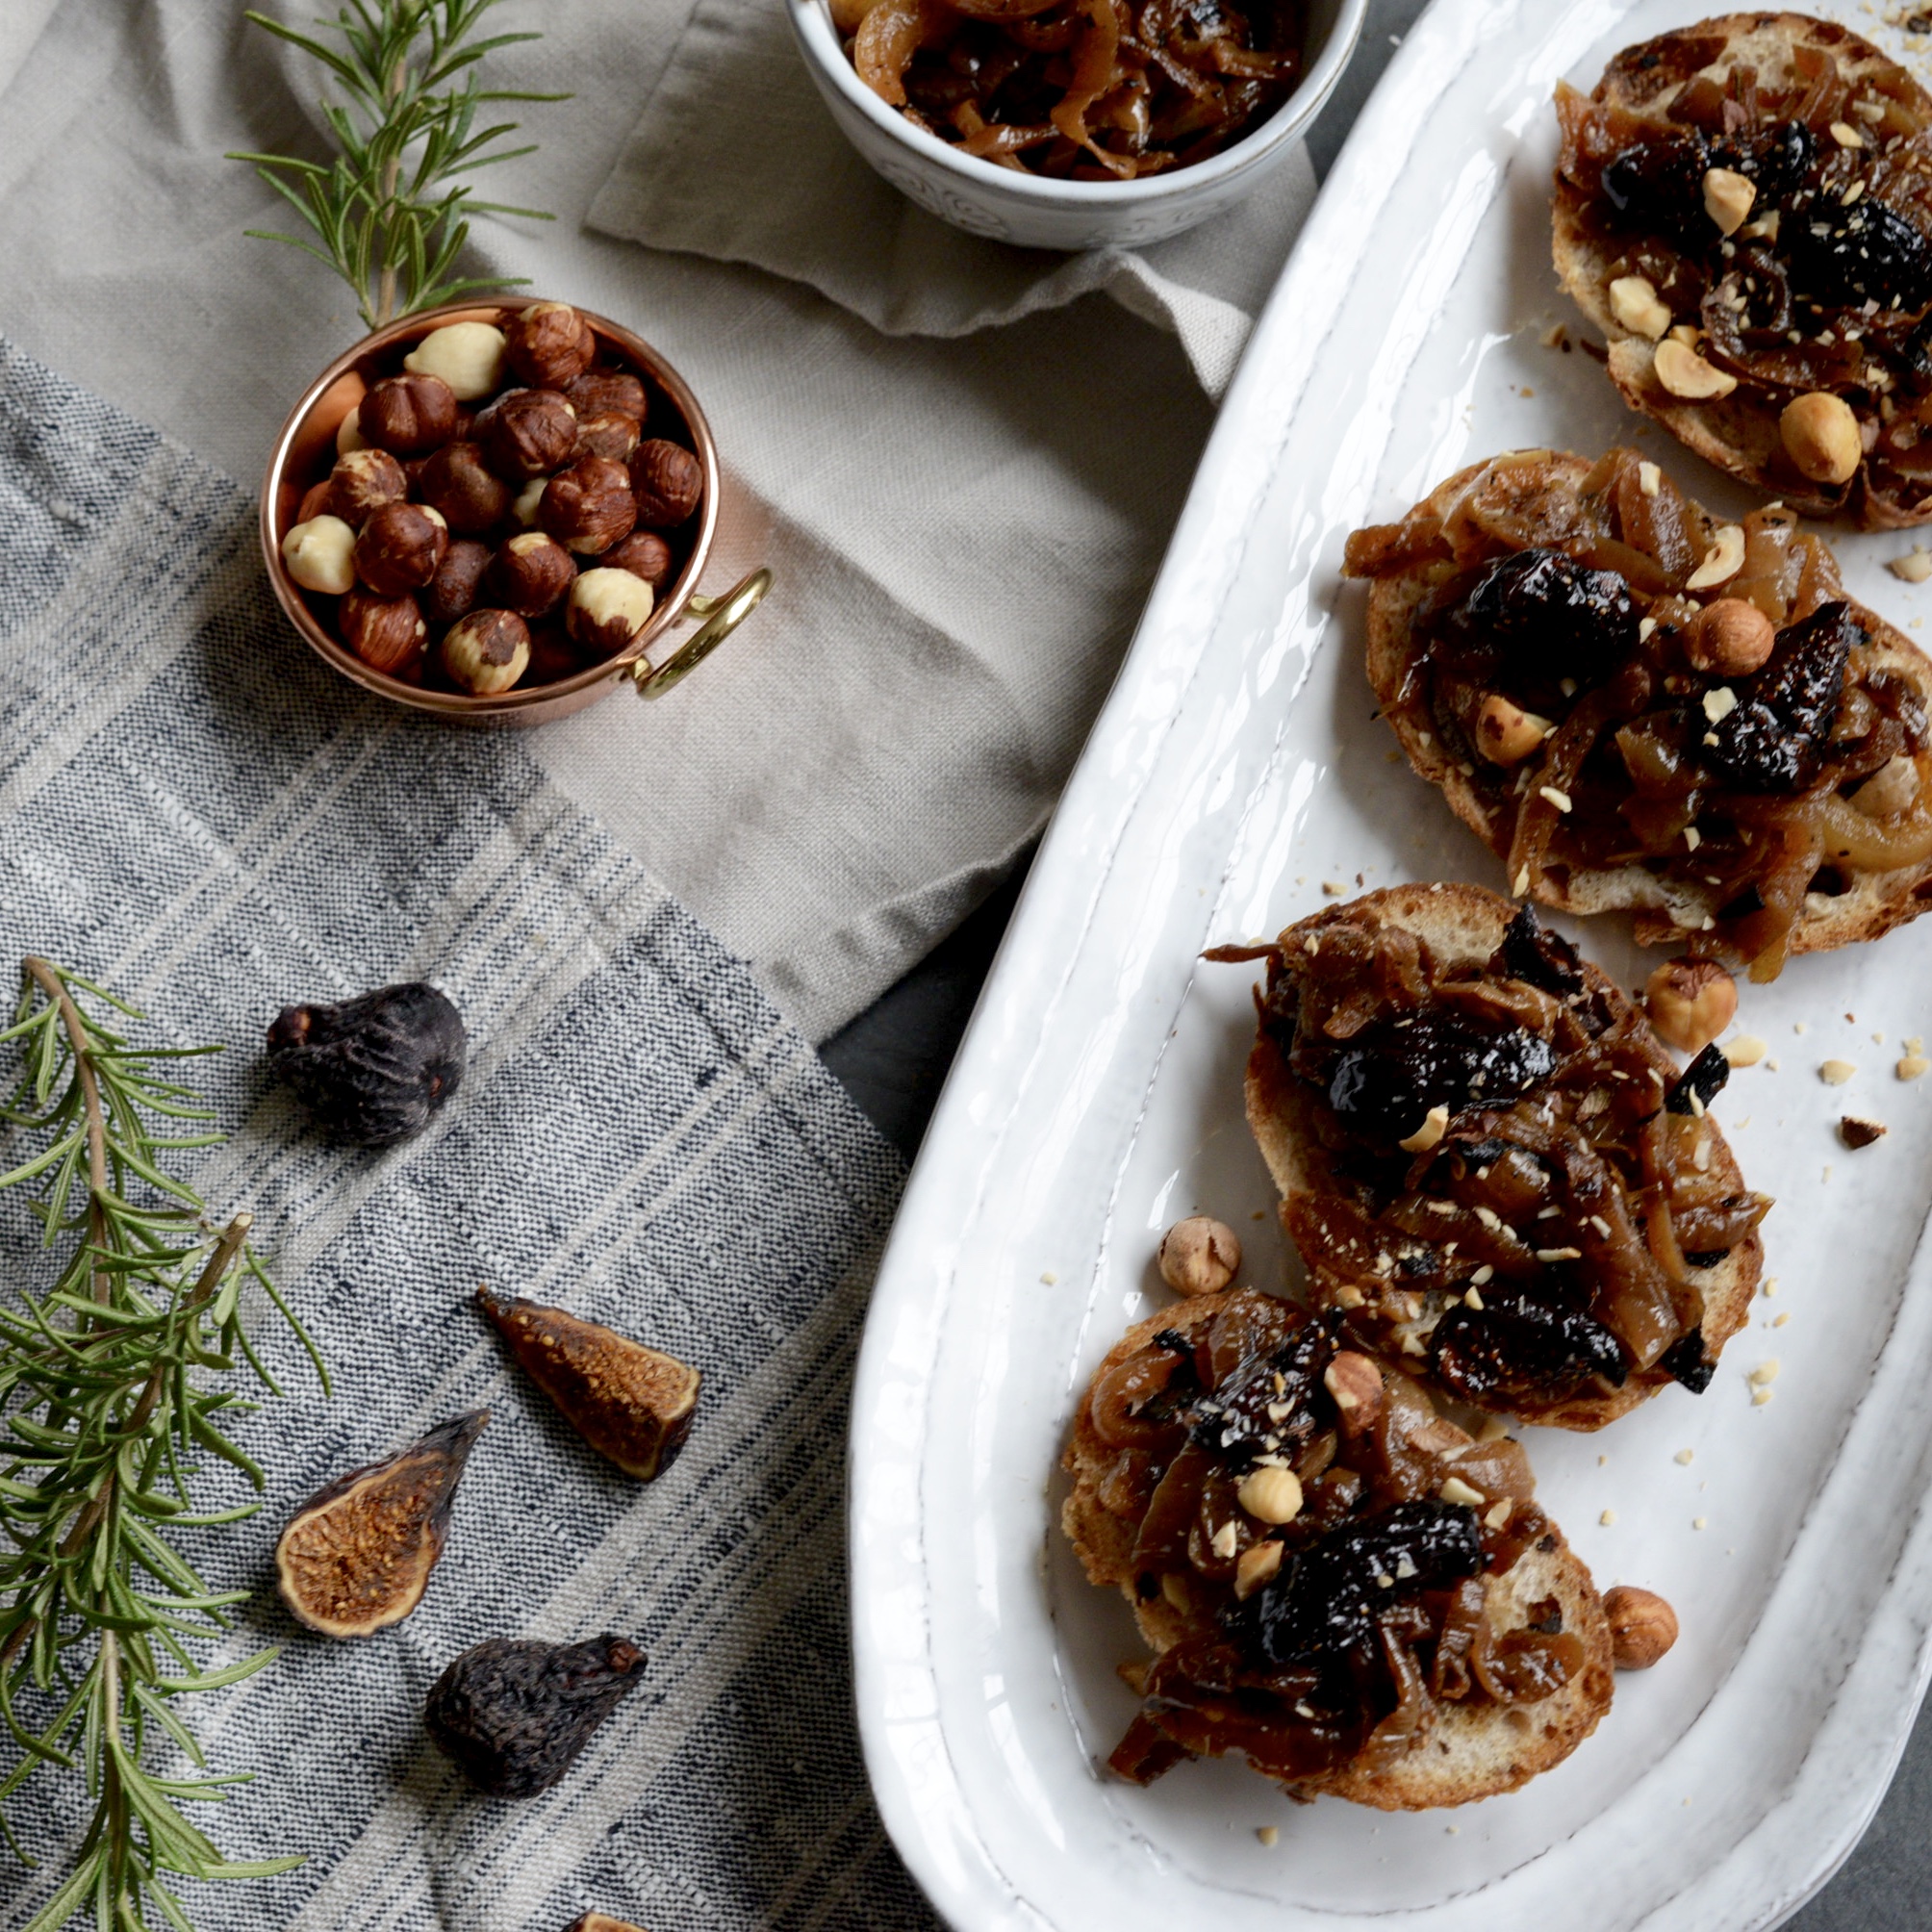
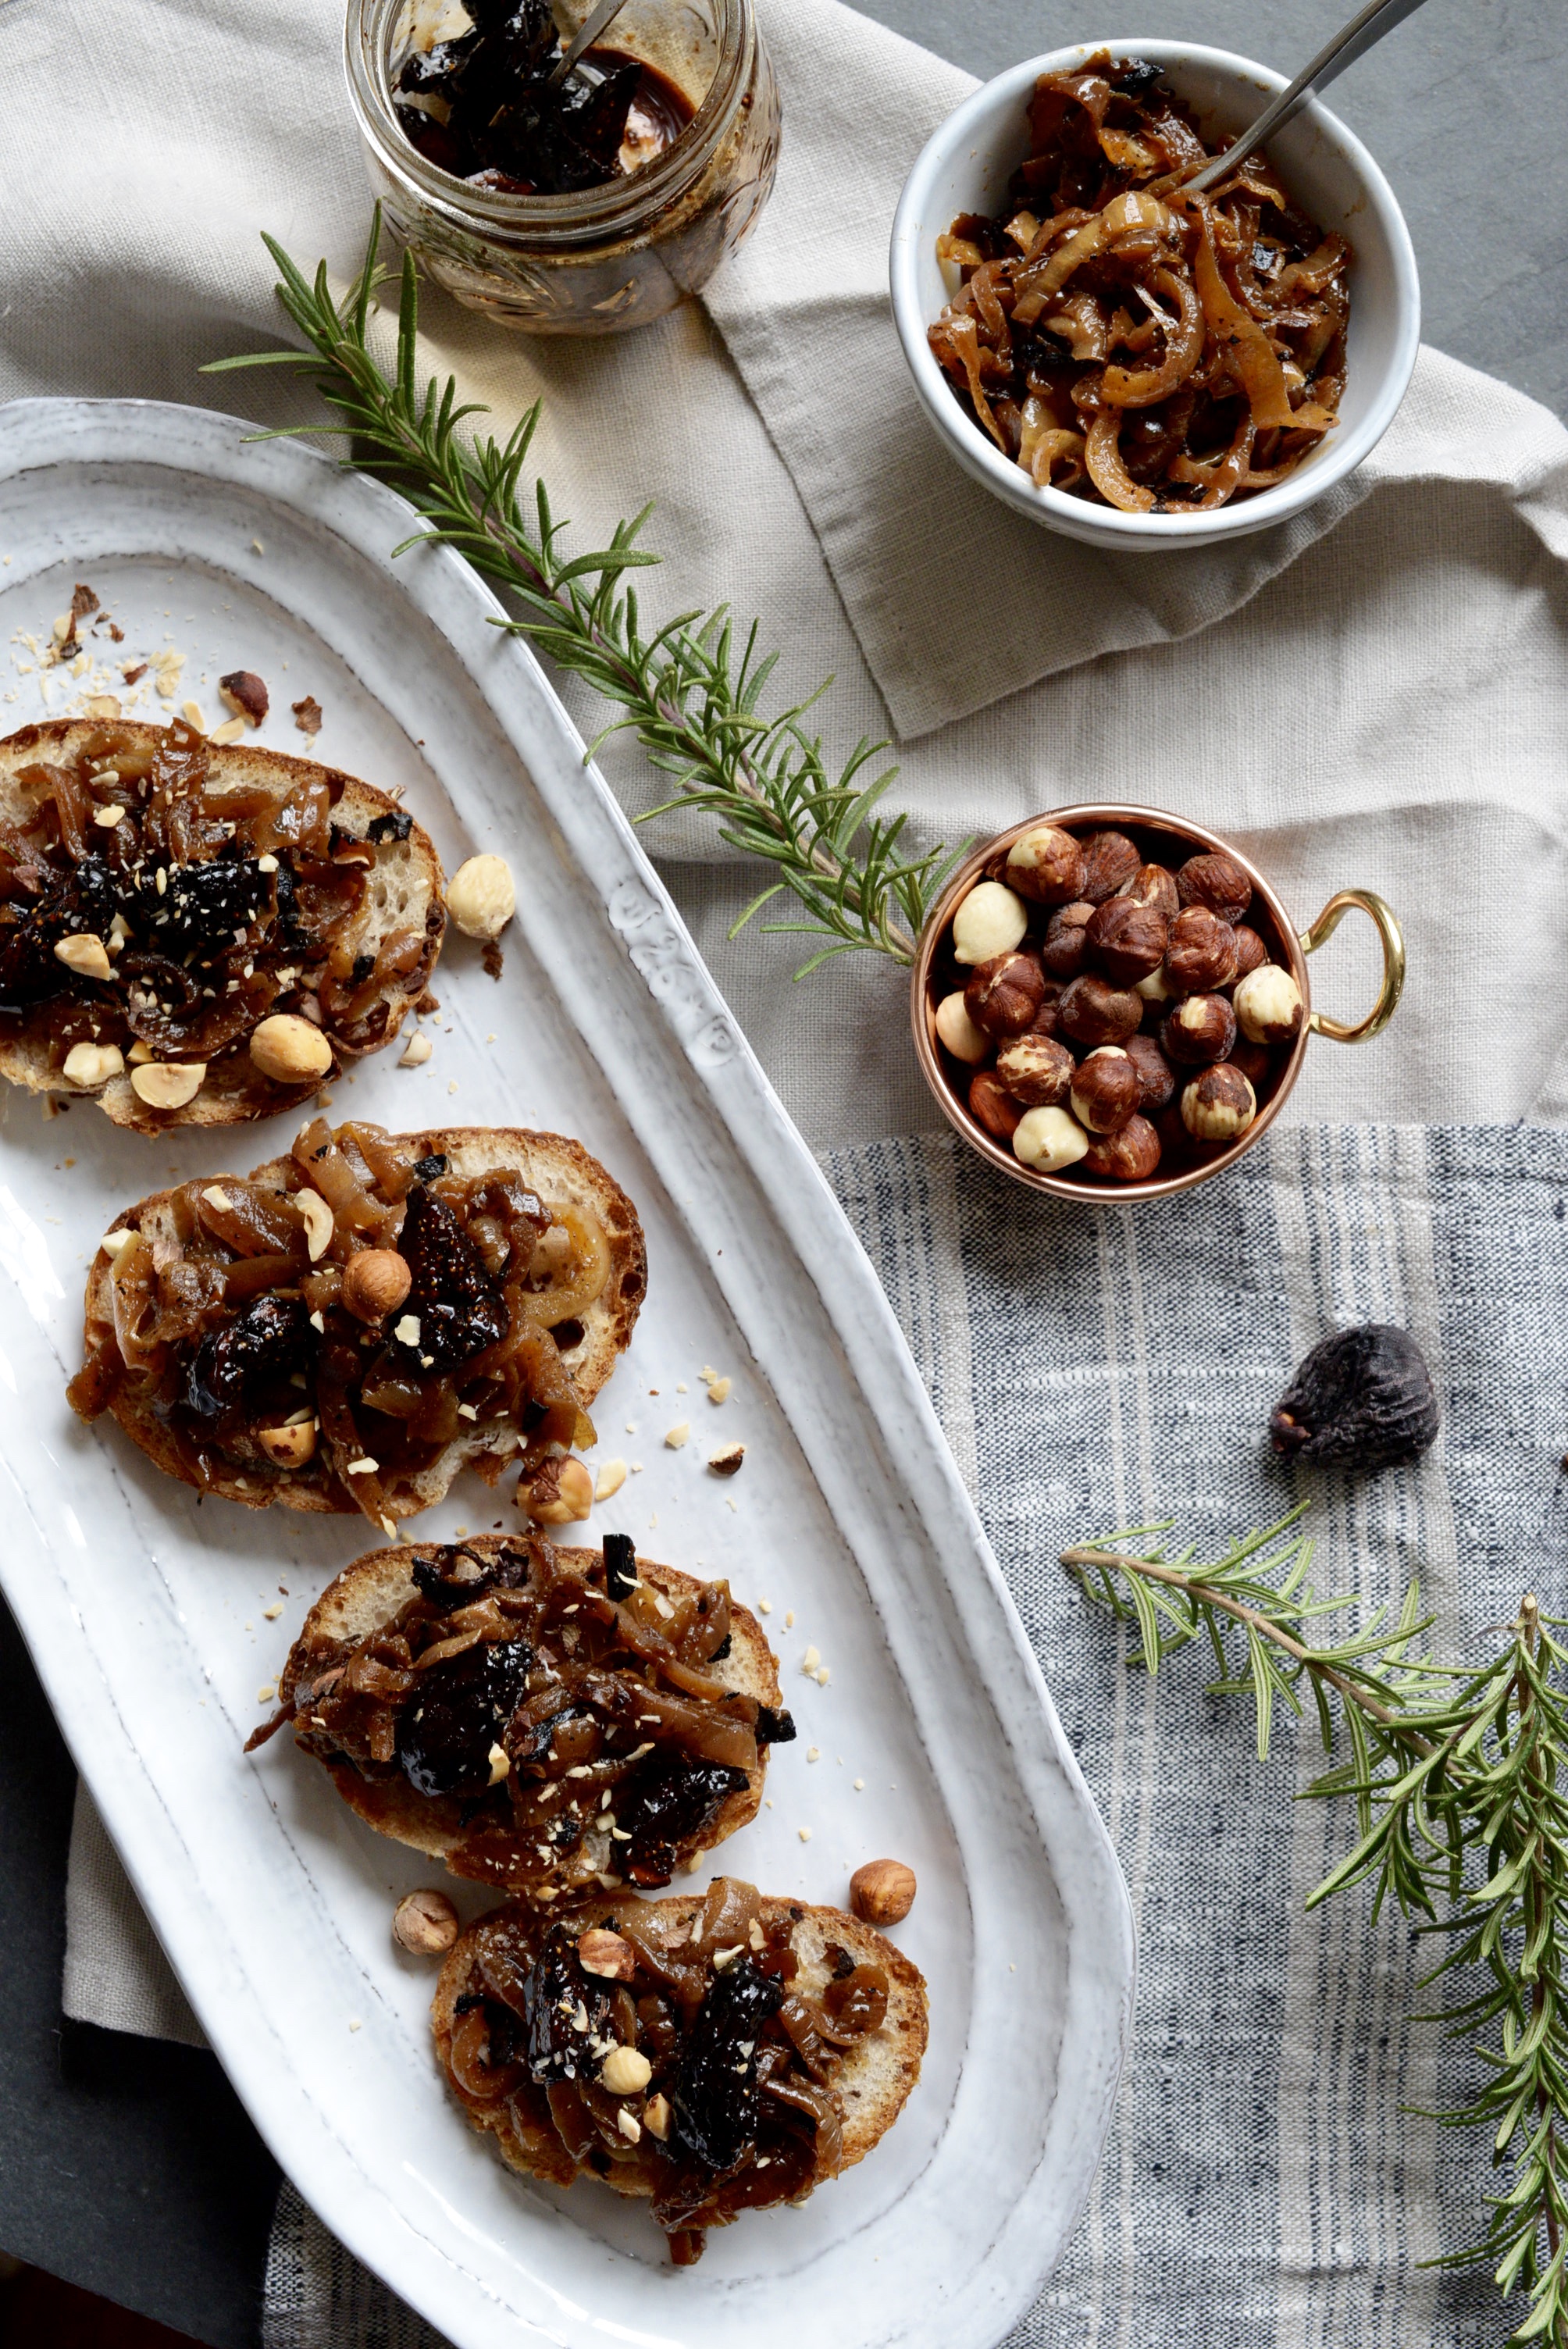
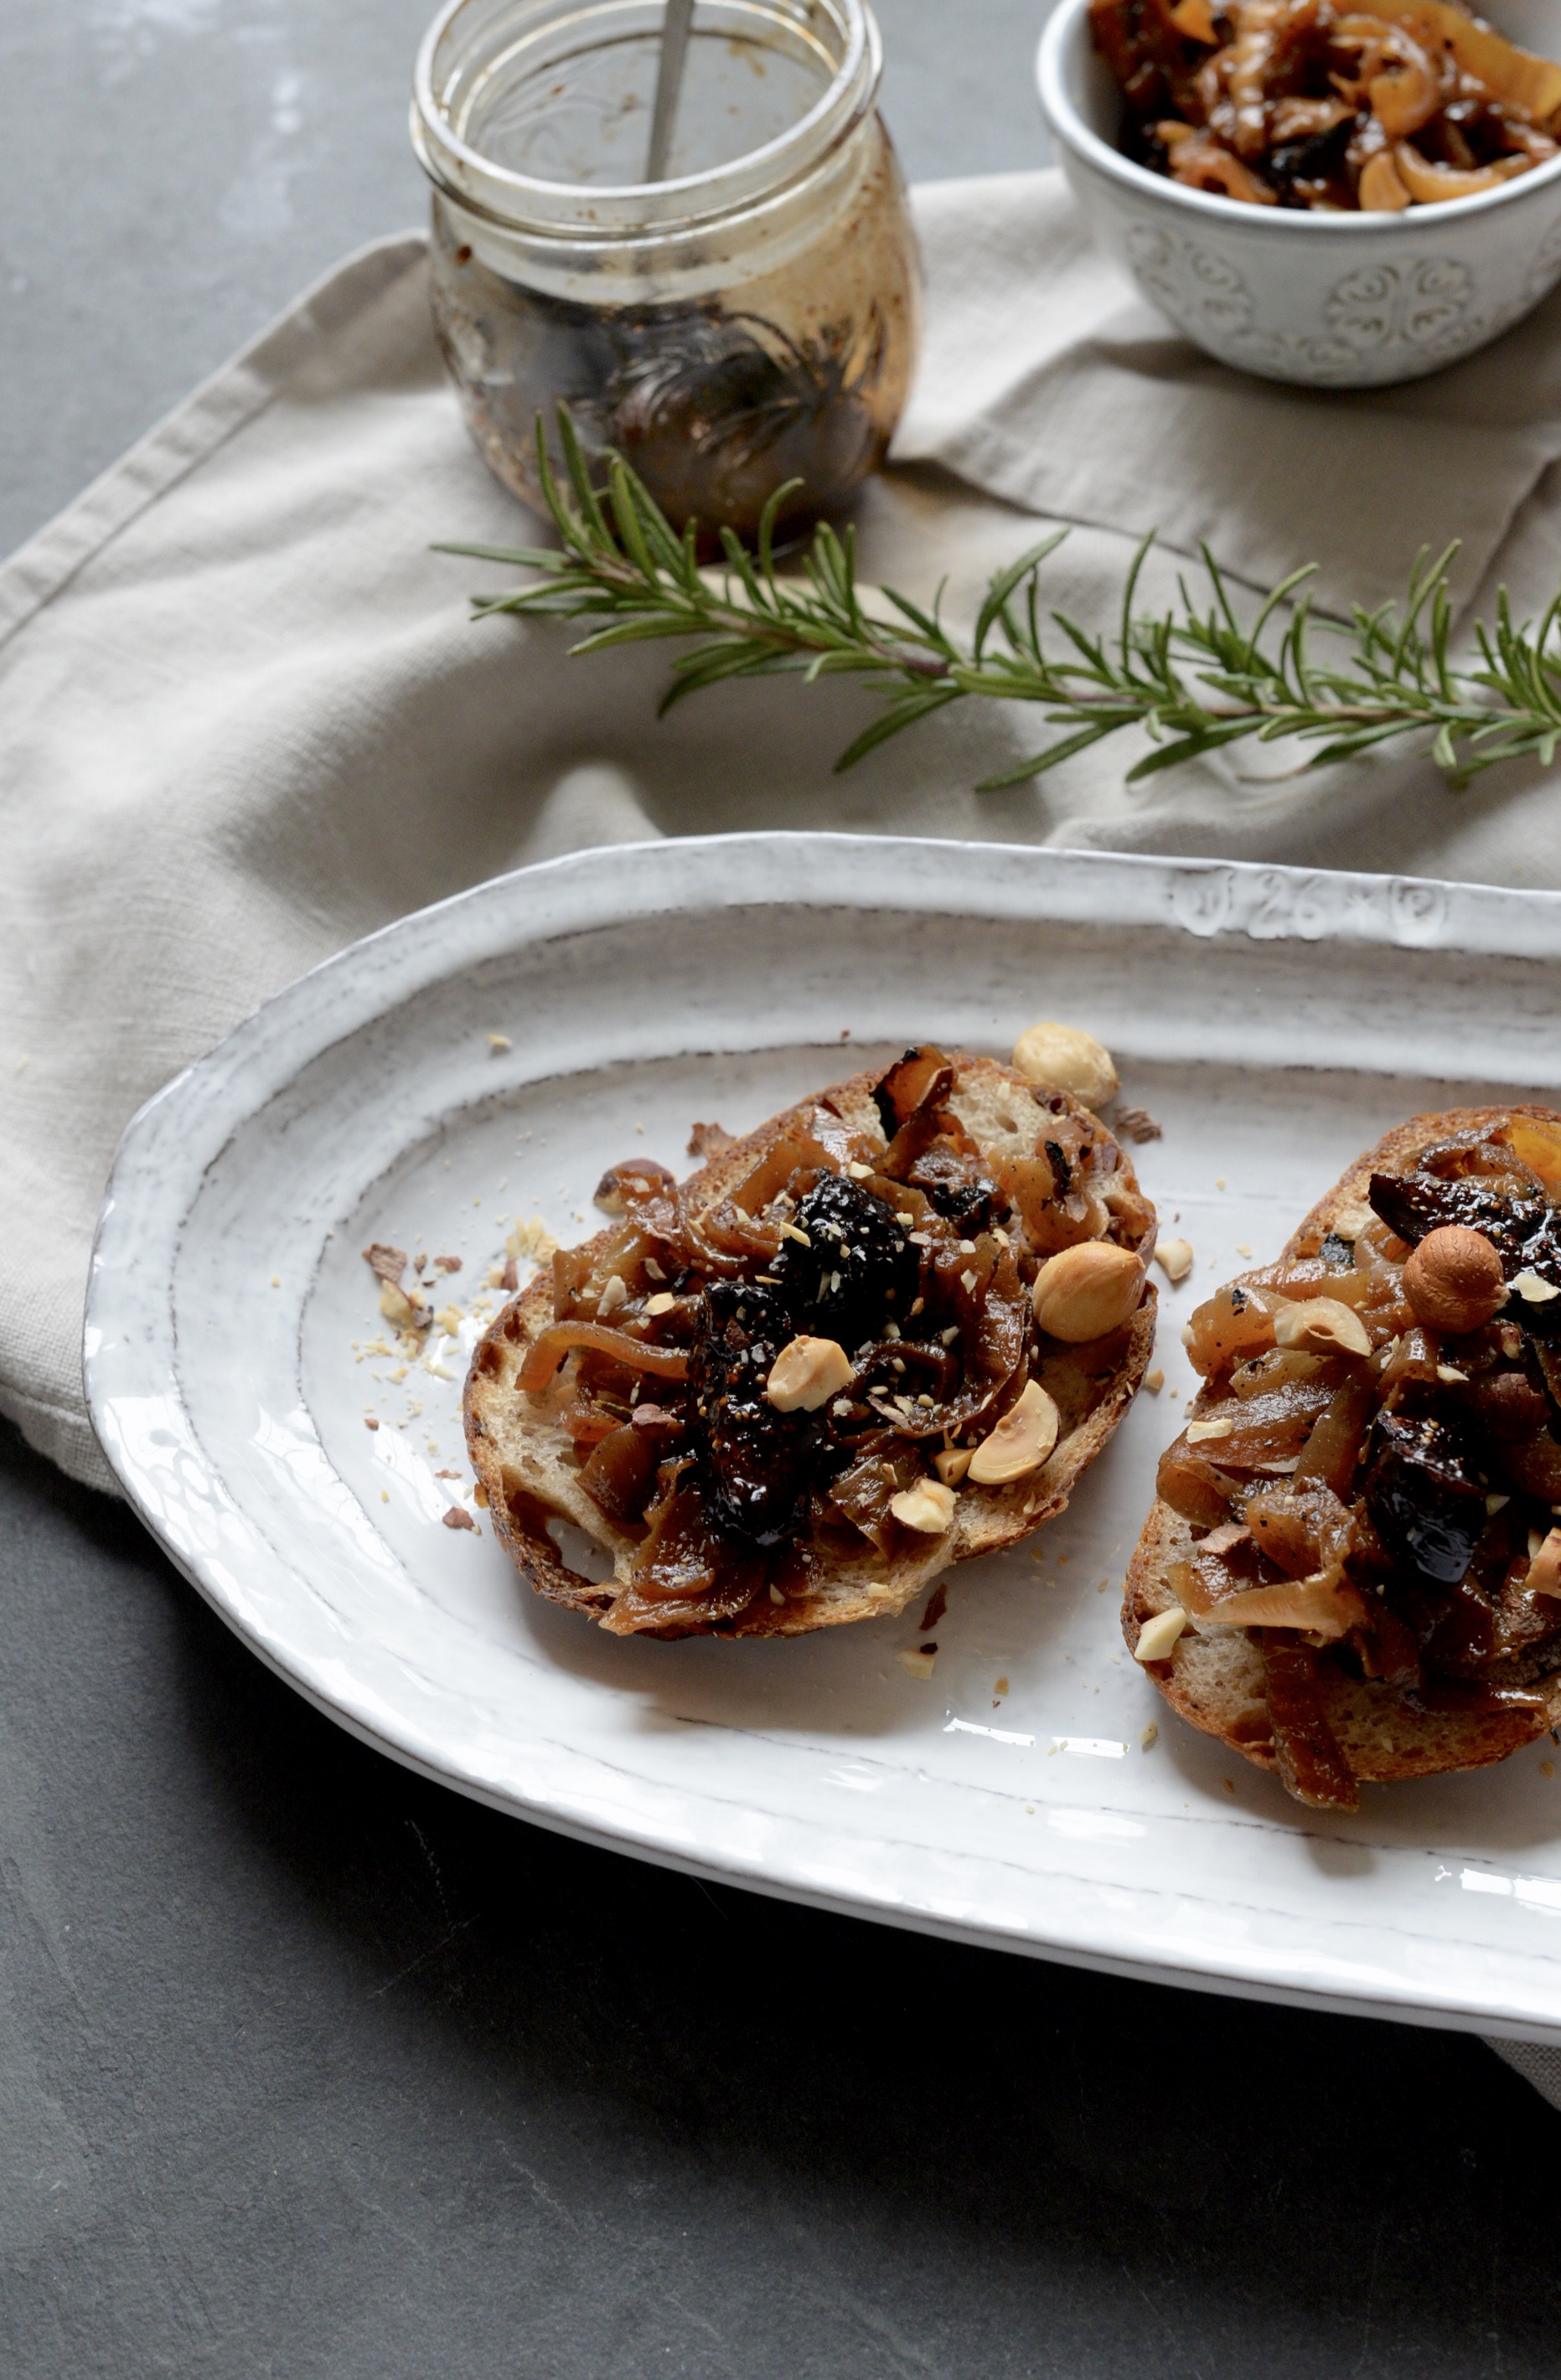
It's the offspring of two dips that come from different cultures with equally rich food histories. From Spain, you have romesco, a smoky red pepper dip that uses hazelnuts and/ or buttery Marcona almonds, smoked paprika, and often thickened with stale bread. The other dip, muhammara, hails from Syria and Turkey and is a red pepper and walnut dip slightly sweetened by the tart and tangy pomegranate molasses. If you haven't heard of or tasted pomegranate molasses, you're in for a real treat. It adds tremendous depth of flavor and nuance to anything it graces. It's that secret ingredient that people won't be able to quite put their finger on. I bought mine from Whole Foods, but you can get it online. There are even recipes out there to make your own with pomegranate juice and sugar, but a bottle of it will serve you well.

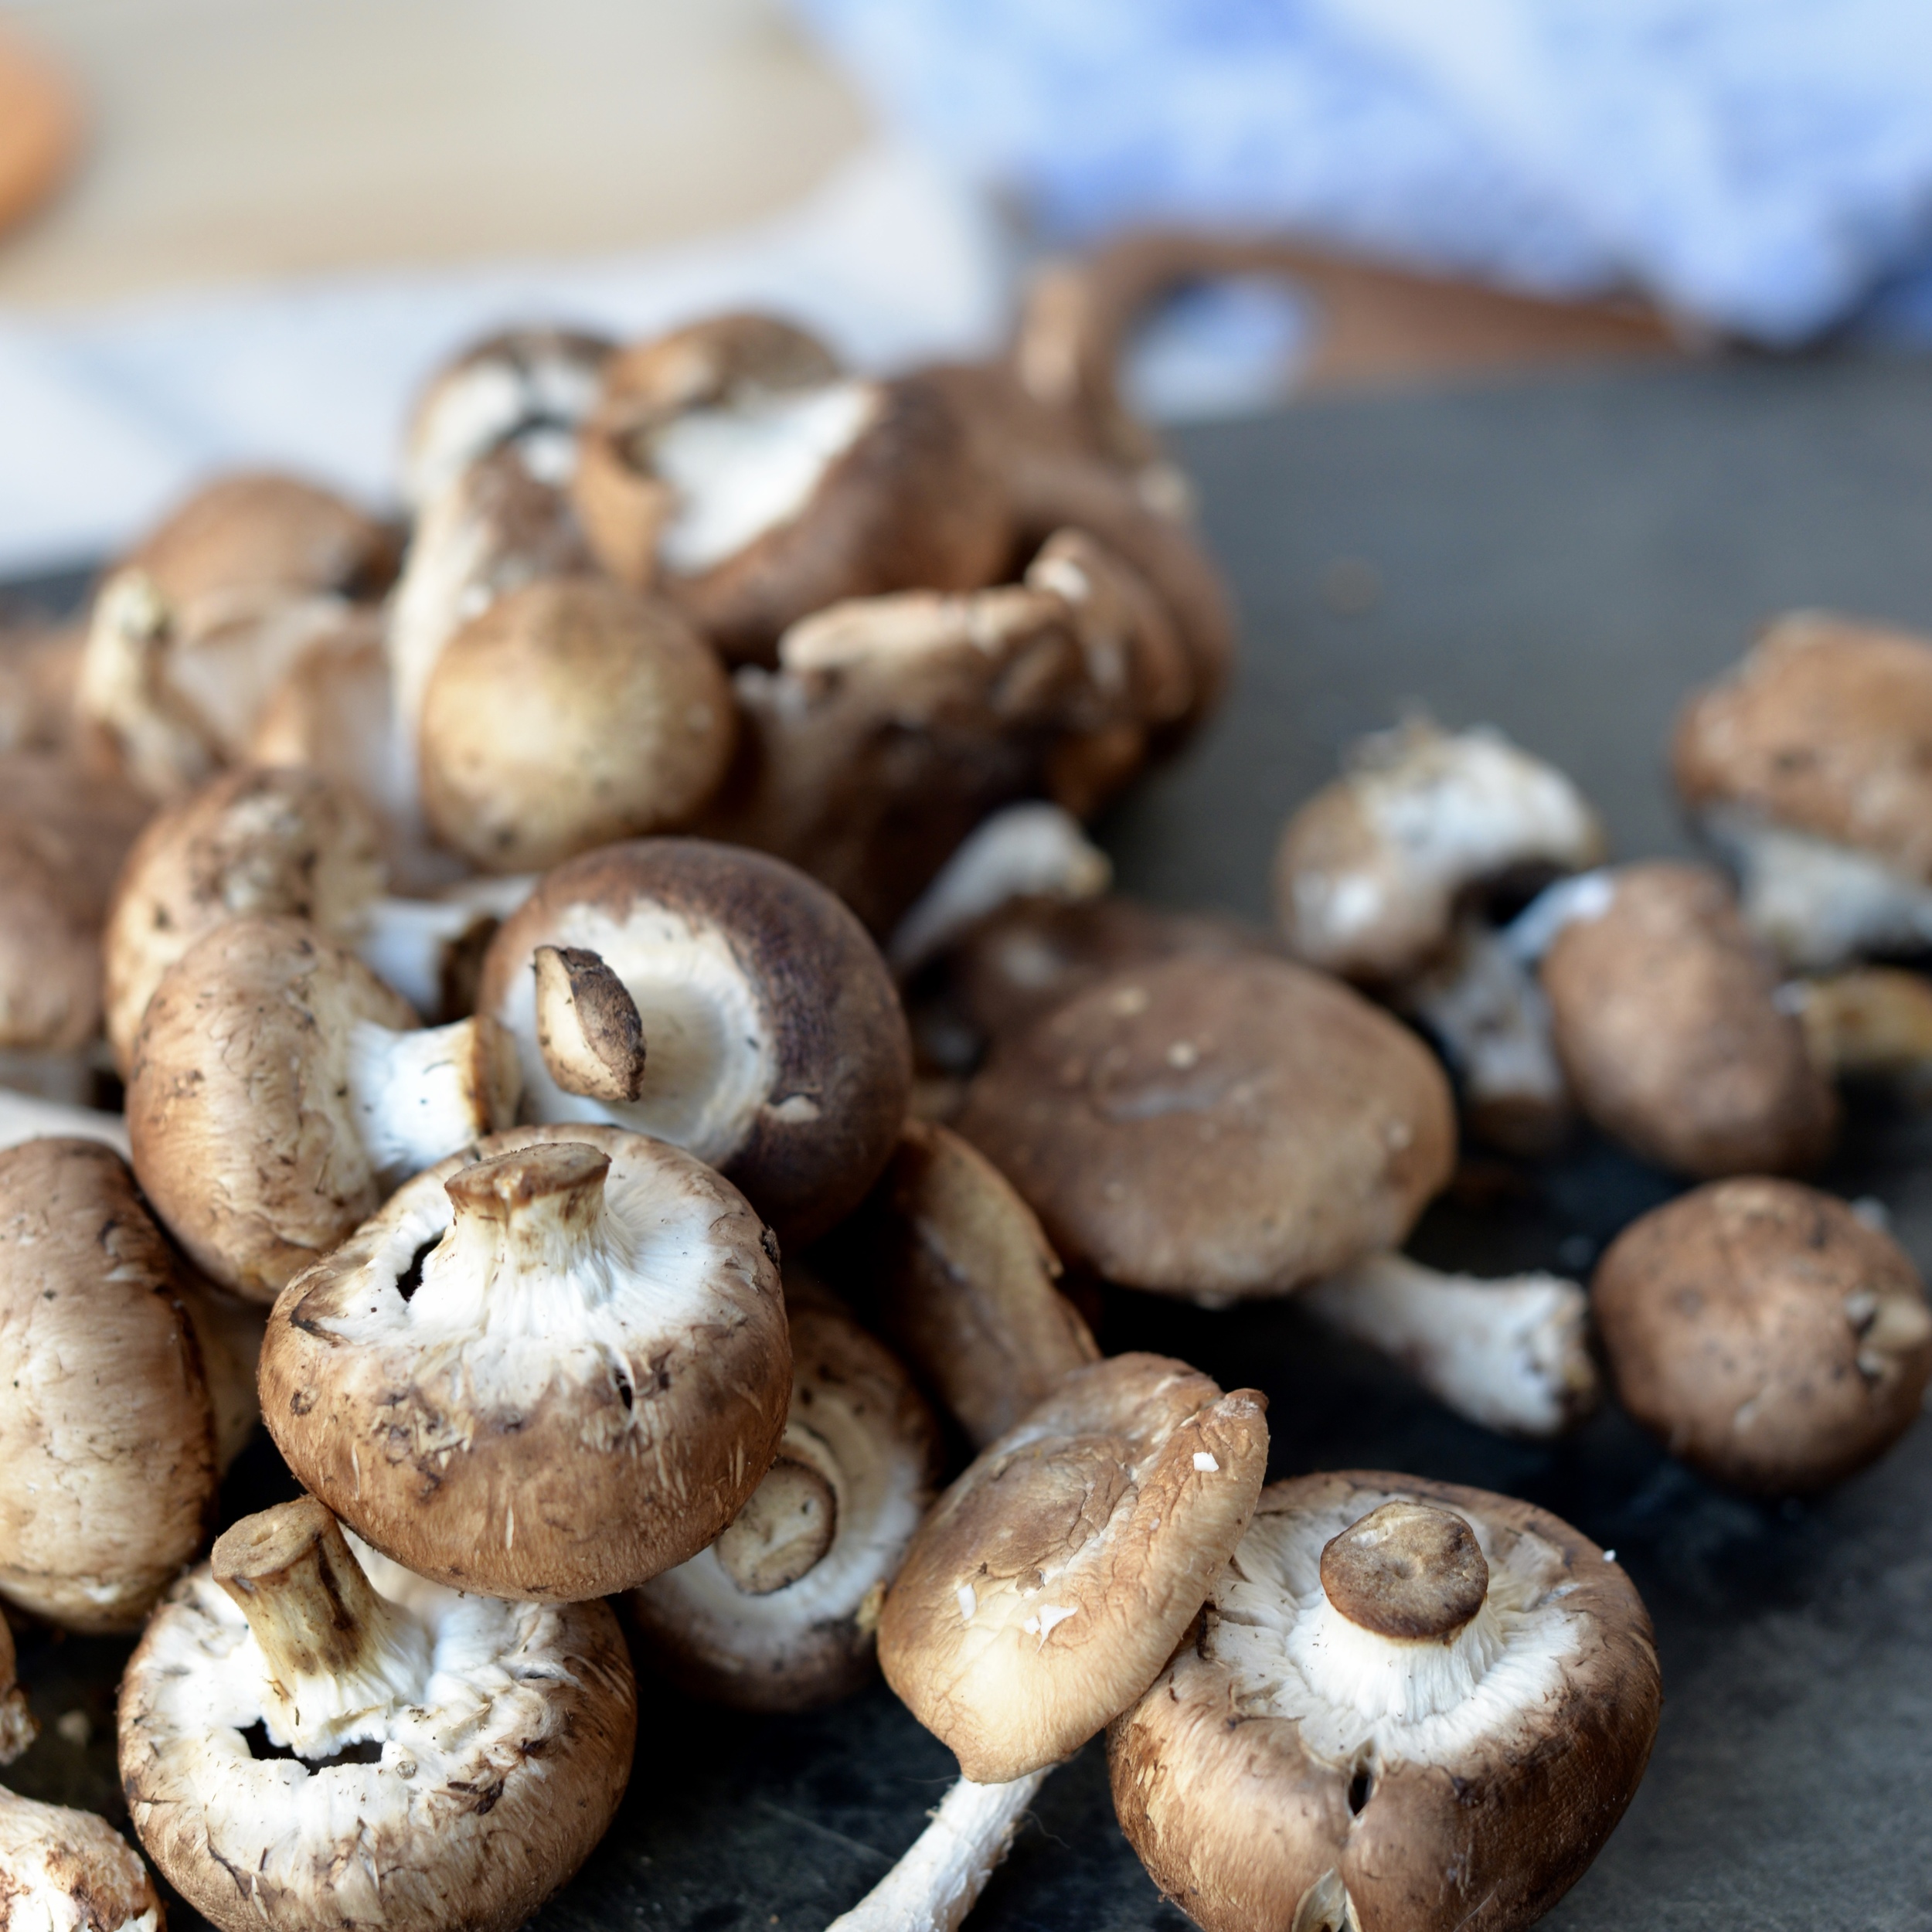
It's summer, and red peppers are quite abundant which means you can go about roasting your own in the oven and peeling them for a real seasonal treat. Or, if you're like me and have 8 other dishes to make for a wedding feast, you buy good quality roasted red peppers from a jar, drain them and proceed with the recipe. Having made this dip with home-roasted peppers, it does take on a rounder, more full-bodied taste, but it's only slightly perceptible. And probably only psychological if I'm being honest. 

Use this as dip, a sandwich spread, a bruschetta topper, a sauce for whatever protein you're having for dinner...it's so versatile. It also tastes just as great a few days after making which means it's the perfect treat for entertaining. 

DSC_6189.JPG
DSC_6197.JPG

Pomegranate Roasted Red Pepper Dip

1 10-12-ounce jar roasted red peppers, drained
1/2 cup marcona almonds
1/4 cup toasted and peeled hazelnuts for fancy version or toasted sunflower seeds for everyday version
1 tablespoons pomegranate molasses
3/4 teaspoon smoked paprika
2 garlic cloves, minced
Sea salt, to taste
5 tablespoons extra-virgin olive oil
1 1/2 tablespoons finely chopped parsley, for sprinkling
Toasted bread, pita, or vegetables for serving

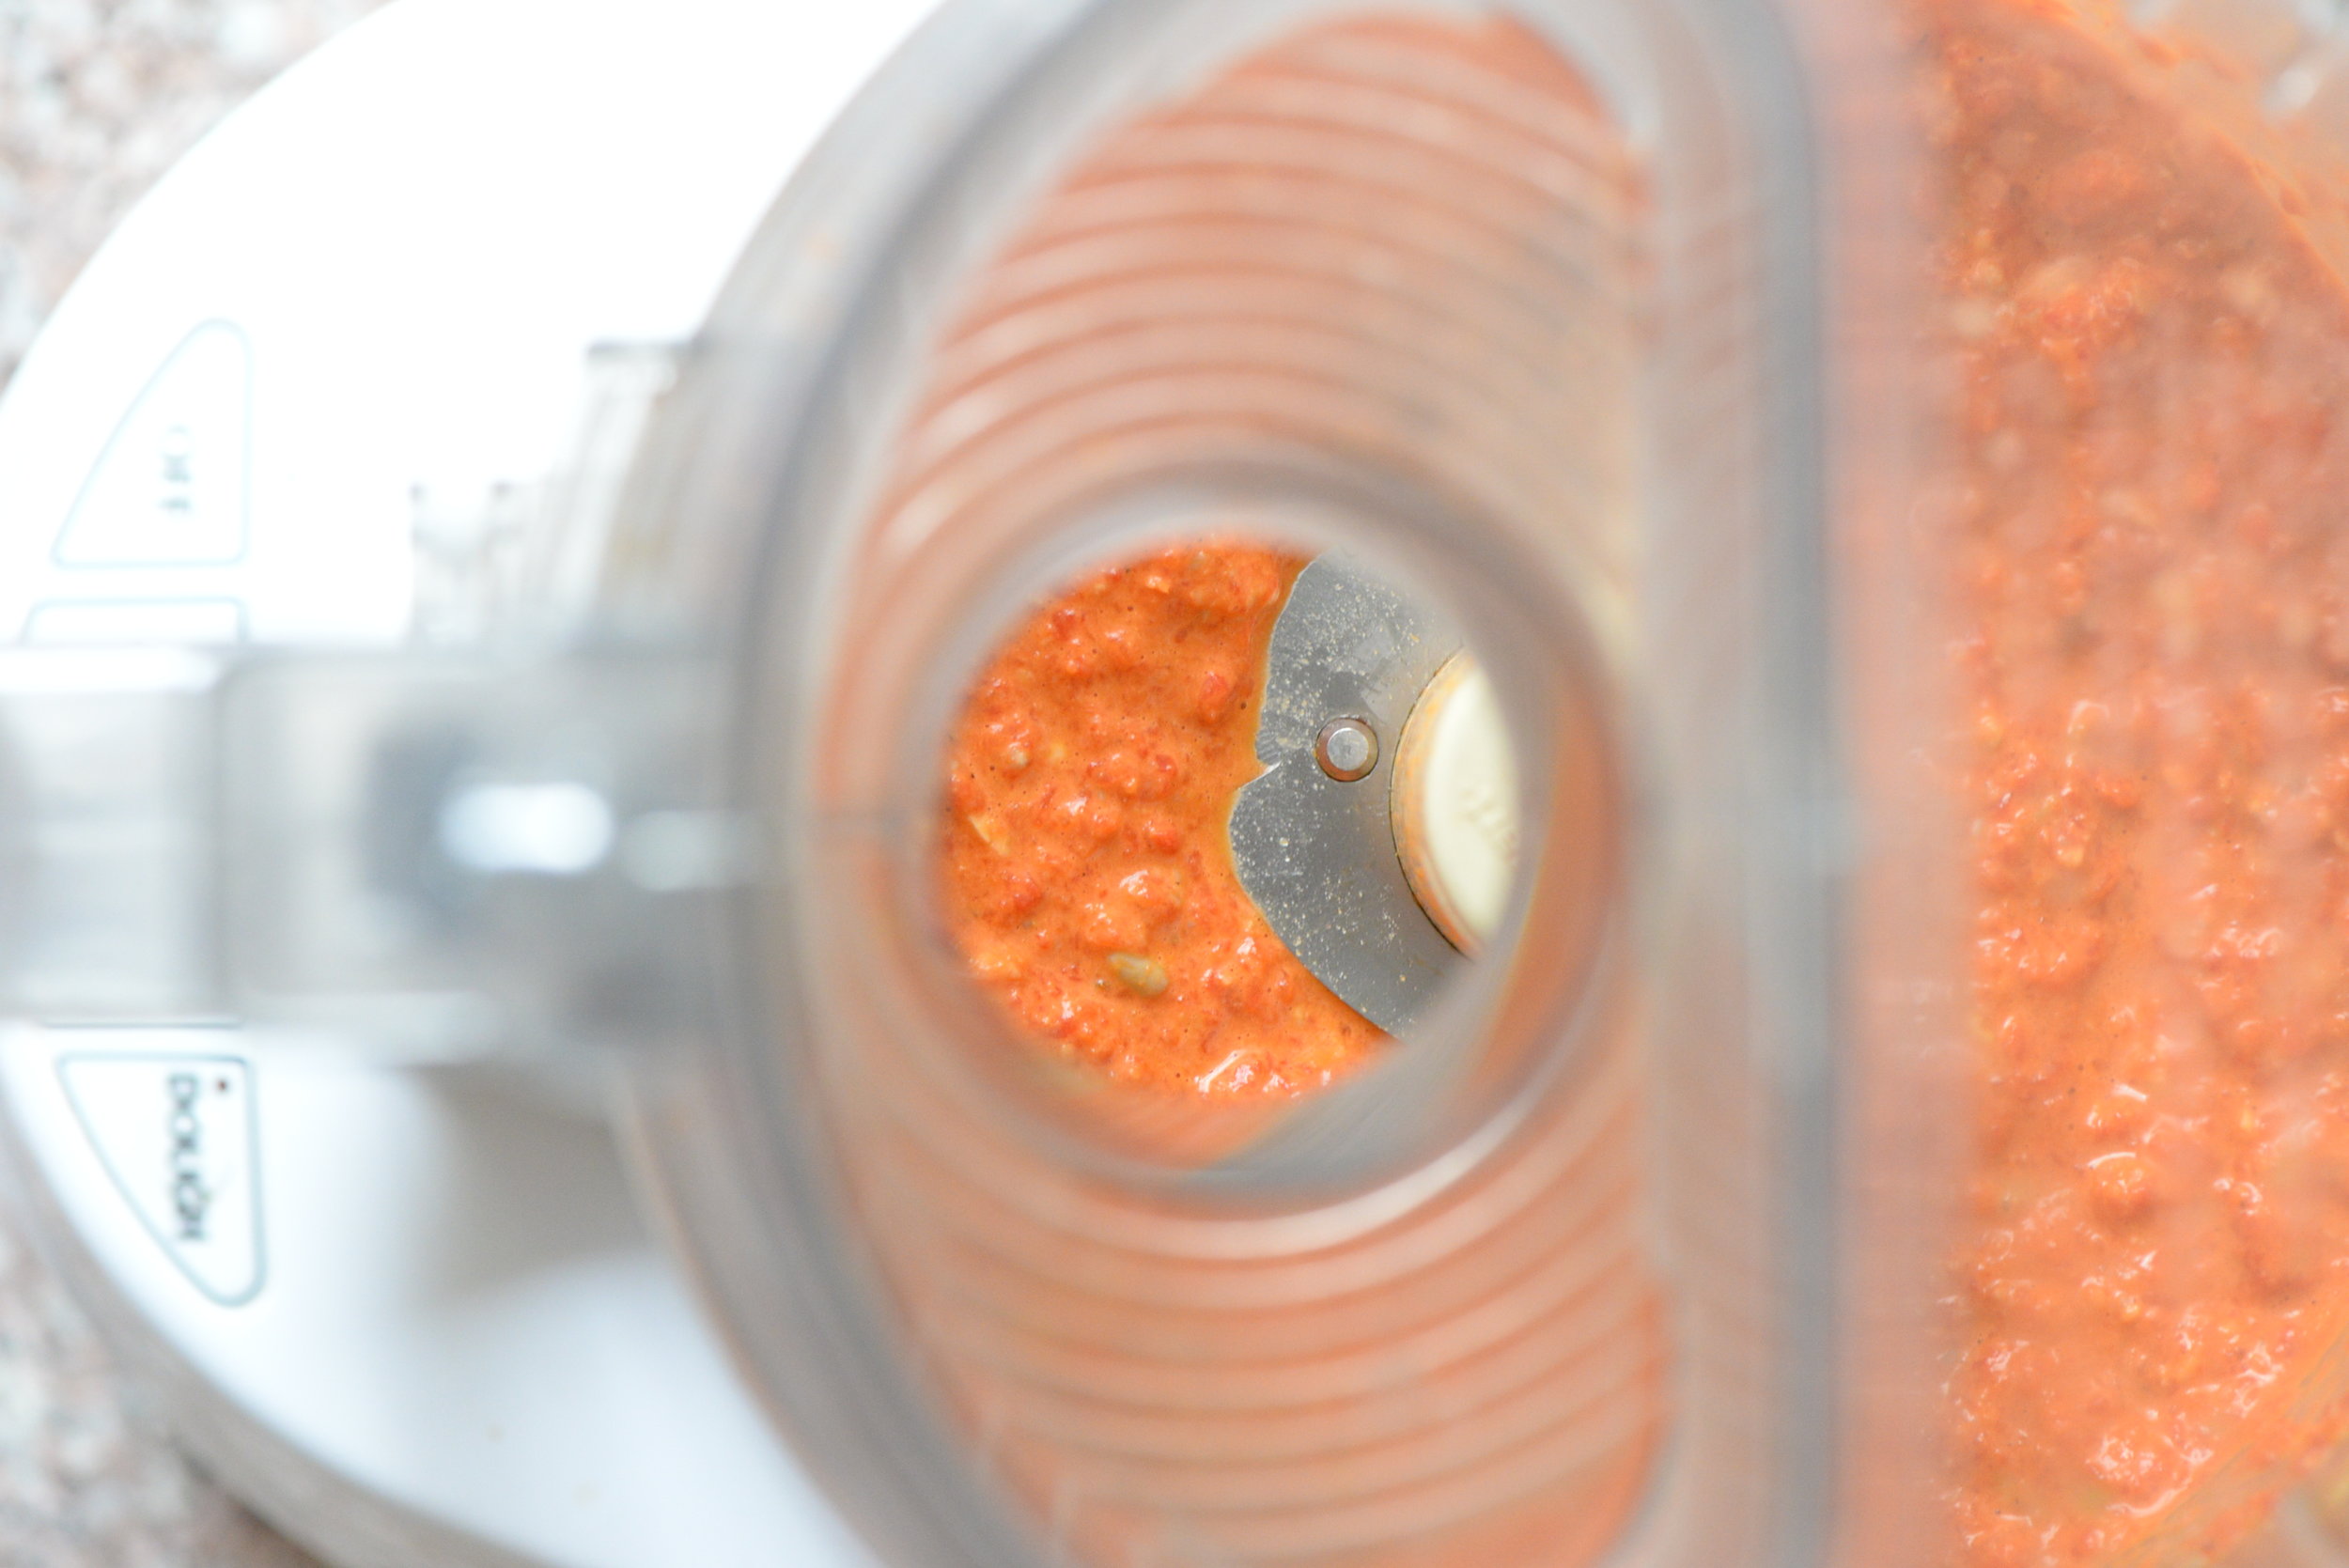
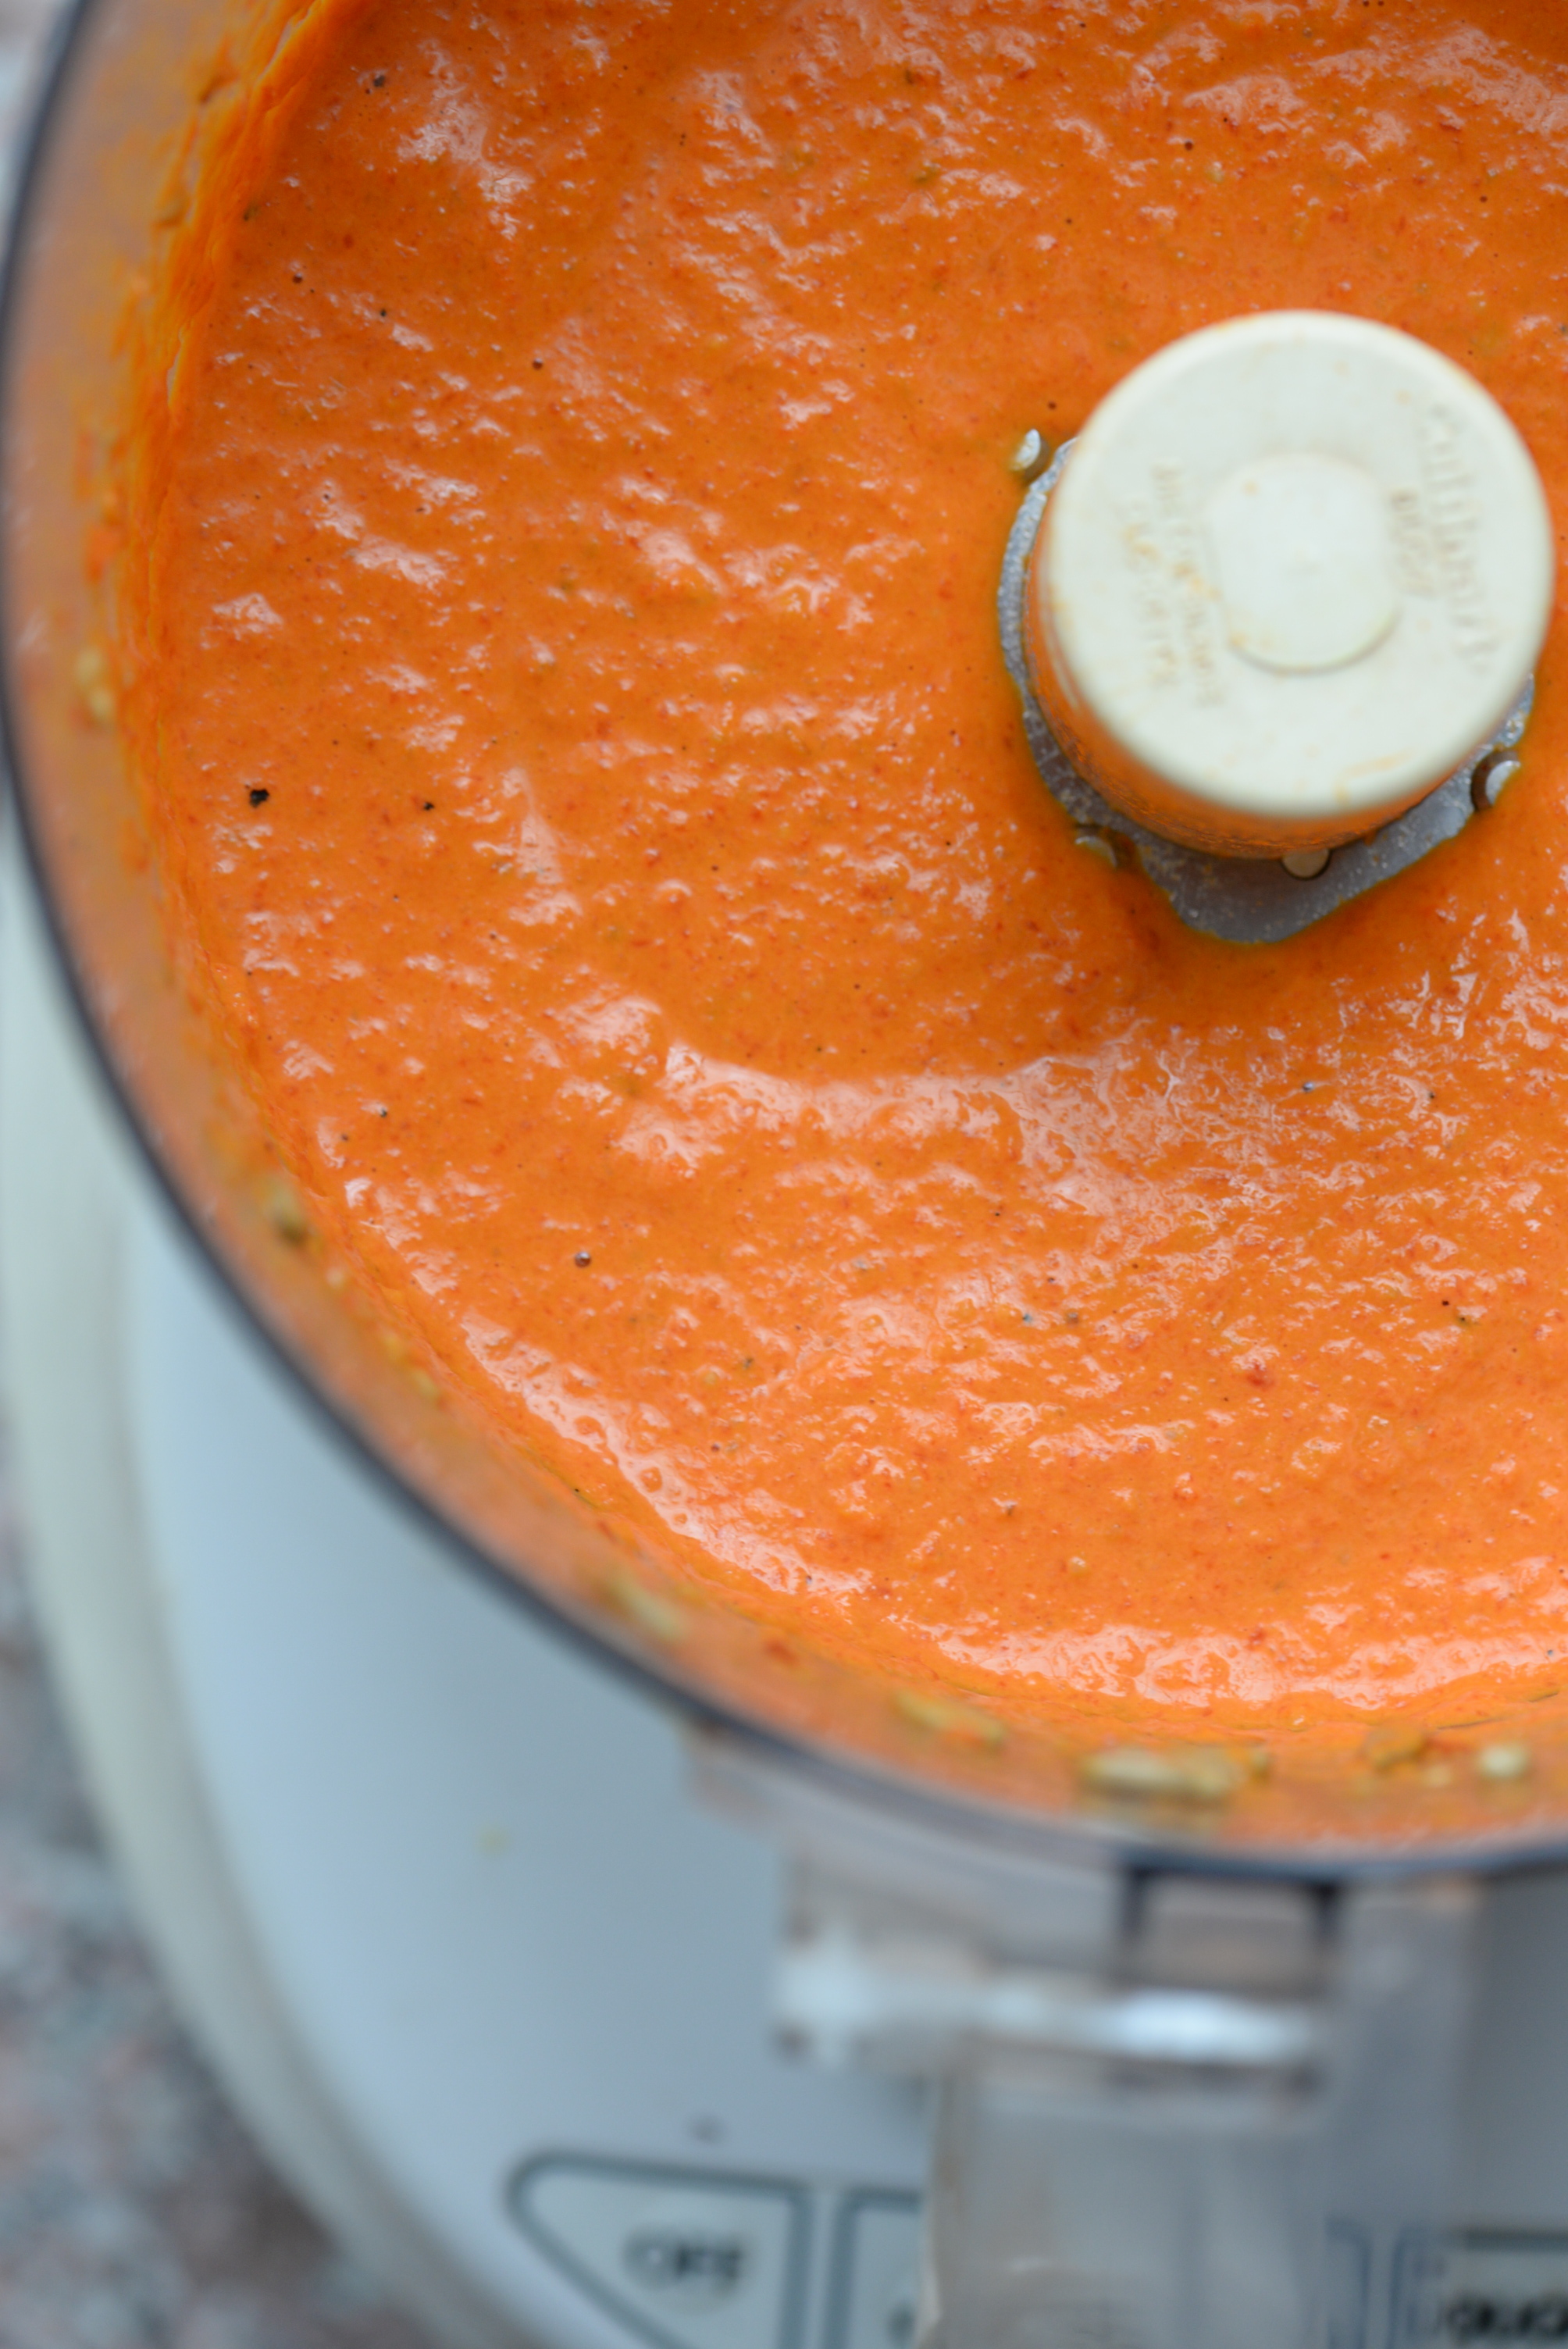
In a food processor or blender, combine all ingredients except parsley. Blend until smooth, scraping down sides as necessary. Season to taste with salt and pepper. Spoon into a bowl, sprinkle with parsley, and serve. Dip can be made ahead of time and refrigerated until serving.

DSC_6215.JPG

I leave you with a pic of all three dips at the wedding welcome dinner. Thanks to my mother-in-law for capturing the photo while I ran around like a crazy woman.

20292707_10211712055290450_1873346655898618142_n.jpg
In Appetizers Tags summer, red pepper, dip, appetizers, recipe, gluten-free, almonds, hazelnut, pomegranate
39 Comments

Caramelized Onion and Balsamic Fig Crostini

March 1, 2017 Emily Watson

You would think that as someone who loves having people over for dinner (and a food blogger) that I'd be a pro at appetizers, nibbles, and everything else to keep guests satisfied. But no matter how many times we host, it's always a scramble of what to put out while people are arriving and the main event is still cooking. Bread, really good olive oil, and nuts are the go-to's, and good local cheese if I remembered to buy some. I tend to keep canned beans on hand, so a quick pulse in the food processor with some spices, olive oil, tahini, lemon gives me the ubiquitous hummusy bean dip. 

But with a little extra planning and not a lotto extra time, I knew I could make something that I could be more proud of. Taking a cue from a pizza combo I love—caramelized onions, figs, and goat cheese—I sought out to make an appetizer that could come together with pantry ingredients the afternoon before guests arrived or even a few days before in anticipation of their arrival. 

Caramelized onions are in the same category as roasted garlic. Deceptively simple, uber delicious, and requiring little to no actual cooking. The heat does all of the work for you, and the best thing you can do is nothing. You just wait for magic to happen. 

The secret to caramelized onions is to leave them alone for a lot longer than you want to. They'll start to look and smell amazing about halfway through, but they become exponentially better with time. Jammy, nuanced, and almost spreadable, they're a far cry from their raw counterparts. I love to make a huge batch of them for sandwiches for the week or even just to top on grain bowls in the winter. They add instant complexity and richness to a dish. 

In this rendition, I cook them with woodsy rosemary, add a hint of maple syrup to enhance their sweetness, and serve them atop crostini. Toasted hazelnuts and chewy dried figs that plump up in balsamic vinegar are the finishing touches. The best part about this is that the figs and onions can be cooked separately and the hazelnuts toasted a few days before you expect guests and then warmed and assembled right before arrival. The result is a dish that looks (and tastes!) like it took all day, but really almost cooked itself. You're welcome to add goat cheese or blue cheese or substitute a different nut if you can't find hazelnuts. The real stars are the onions and juicy figs.

Caramelized Onion and Balsamic Fig Crostini

¼ cup olive oil
3 large sweet yellow onions, thinly sliced
3 fresh rosemary sprigs
1-2 teaspoons maple syrup, depending on sweetness of onions
Salt and freshly ground black pepper, to taste

½ cup dried Mission figs, sliced lengthwise in quarters and tough stems removed
3 tablespoons balsamic vinegar
3 tablespoons water
¼ cup hazelnuts
Crackers or bread of choice, toasted, for serving

Heat oil over medium heat until hot. Add onions and rosemary and stir to coat. Reduce heat to medium low and allow to cook, undisturbed, for 15 minutes. Stir again, and then allow to cook undisturbed for 15 more minutes. Repeat for 75 minutes or until onions are meltingly tender and a rich brown color. If using maple syrup, pour in after 30 minutes of cooking; it will also enhance the caramelization process. If onions start to stick while cooking, add a splash of water and stir. Discard rosemary sprigs when done and season to taste with a generous pinch of salt and fresh pepper.

Meanwhile, bring balsamic vinegar and water to boil in small pan. Boil gently for 1 minute. Add figs, boil for 30 seconds more and remove pan from heat. Allow dried figs to soak up liquid and soften as they cool.

Toast hazelnuts. Toast in oven or on stove top. In oven, toast at 400 degrees Fahrenheit for 7-10 minutes until golden and skins begin to peel off. On stove top, toast over medium-low heat, tossing often, for 10-12 minutes or until golden and skins begin to peel off. Remove from heat and transfer hazelnuts to a towel and rub nuts together to remove as much skin as possible. It’s not necessary to remove all, but it will remove a little bit of bitterness. Roughly chop hazelnuts and set aside.

To assemble, place caramelized onions atop crostini. Place a soaked fig piece on top (trimming if necessary to fit), and sprinkle with hazelnuts. Serve! Onions, figs, and hazelnuts can all be prepared 1-2 days ahead of time and assembled together right before serving. Makes about 1 cup caramelized onions and enough to serve about 10-12 people for appetizers.

DSC_5538.jpg
DSC_5549.jpg
In Appetizers Tags recipe, appetizers, onions, figs, winter
1 Comment

Swiss Chard and Apple Socca Bites

December 15, 2015 Emily Watson

We finally got around to decorating our little home for the holidays! Lights are up on the windows, garland and bows are strewn on the staircase, and our tree is chilling in its new corner home. Yes, we are proud parents of the cutest little tree there ever could be! We figured we are almost a real family now, so we need to start building our own holiday traditions. With those traditions, come a bit of compromise. I grew up with real Christmas trees. The kind that shed tiny needles everywhere, that are always a bit crooked and a little uneven but that are perfectly imperfect because they smell of Christmas. My fiance, on the other hand, grew up with a fake tree that gets dragged from the basement every year and has perfect little branches for hanging ornaments, and smells of...nothing. Our family tree looks like a Jackson Pollack while his family's tree looks like it came straight out of the Sears catalog. Nothing wrong or right with either of those things, but certainly different takes on what makes a Christmas tree tradition.

So this brings me back to our humble tree and the beginning of our new family traditions. I figured our tree is a compromise between the two family traditions. Yes, it is artificial, but it is a bit sparse and awkward. I was even fooled by its lack of authenticity when I picked it out at the nursery. Draped in itty-bitty lights and just two ornaments, it has not yet been a victim of the cats' curiosity. I give it another day or two before our terrifically I-am-pretty-sure-I-saw-that-inanimate-object-move-therefore-I-must-attack-it cat goes after it.

Now that our house is decorated, I am feeling festive! So festive in fact, we decided to throw a Christmas party by inviting probably way too many people. The more the merrier, right? For this party, we are going to need food, and this is where this nibble comes in. Green and red from the chard and red and white from the bits of apple, it is the perfect holiday bite.

Socca, if you have never heard of it, is a quick flatbread made with chickpea flour. It leans towards the savory side and is quite dense, but if you are thinking it tastes like chickpeas or hummus in baked form, you would be surprised at how different in flavor it is. I dare compare it to a really finely ground polenta with some addicting nuttiness going on. While it can certainly be eaten in pizza form, I make bite-size finger appetizers by using a small biscuit cutter to cut out little rounds. Sure, there are scraps of socca that remain from all of the hole-punching, but they are much appreciated thrown into a bowl of roasted root vegetables and topped with goat cheese. Waste not, want not.

The top is a bit of simply sauteed chard stems and garlic, wilted chard leaves, and a spattering of toasted walnuts. The addition that made this not just beautiful but quite a bit fancy feeling was the apple. I draped julienned apple pieces over top that offered just enough sweet and tart crunch to balance the earthy chard.

This is perfect party food because it is mostly make-ahead. The socca, chard, and toasted nuts can all be prepared ahead of time. Warm the socca and chard topping through, assemble with the walnuts, and top with apple, and you are ready for your holiday shindig.

Swiss Chard and Apple Socca Bites

Socca:
2 cups chickpea flour
2 1/4 cup water
1/2 teaspoon salt
3 1/2 + tablespoons olive oil, divided

Chard:
1 tablespoon olive oil
12 ounces Swiss chard (I used rainbow), washed and stems diced and leaves cut into chiffonade
2 garlic cloves, minced
salt and pepper, to taste

1/2 cup chopped walnuts, toasted
1/2 small apple, julienned

Prepare socca. Whisk chickpea flour with water, salt, and 2 1/2 tablespoons olive oil until smooth. You can adjust seasoning by tasting batter here if you would like. Allow batter to rest for at least 15 minutes, but up to 1 hour.

Preheat oven to 450 degrees Fahrenheit. Place large cast iron skillet in oven on center rack to heat while oven preheats. Remove pan from oven when hot and pour in 1 tablespoon olive oil, swirling to coat. I used a 12-inch pan, but you could do multiple batches in a smaller skillet. Add batter to thickness of scant 1/4-inch (this was all of batter in my 12-inch), and return pan to oven. Allow to cook 15-20 minutes or until golden and starting to pull away from sides. Remove from oven and allow to cool before using a spatula to loosen batter from pan. Cut socca into circles, either with a cookie cutter or by tracing a small cup.

Prepare Swiss chard while socca cooks. Heat 1 tablespoon olive oil over medium heat. Add chard stems and garlic and cook until softened, about 5 minutes. Add chard leaves and toss to combine, cooking for just a few minutes or until leaves have wilted but still have a little bite. Season to taste with salt and pepper.

Assemble bites. Top a socca round with a little pile of chard, sprinkle with toasted walnuts, and top with apple slivers. Enjoy! Makes about 12-15 bites.

DSC_2530.jpg
DSC_2535.jpg
DSC_2558.jpg
DSC_2591.jpg
DSC_2606.jpg
DSC_2631.jpg
Print Friendly and PDF
In Appetizers Tags appetizers, recipe, fall, autumn, swiss chard, vegan, vegetarian, gluten-free, chickpea flour
2 Comments

Tempeh and Squash Sesame Autumn Rolls

December 6, 2015 Emily Watson

One of the main reasons I love eating at Vietnamese restaurants is their summer rolls. Herbaceous, fresh, and clean, they will never go out of style. They are also perfect if you need a break from heavy holiday food. I decided to do a bright autumn version here, and while it is by no means traditional, it is just as bright and clean as the cucumber and carrot version, perhaps just a little more hearty.

I use soba noodles instead of vermicelli, which I believe are a bit easier to cook than vermicelli. Vermicelli can be finicky. It goes from underdone to a gloopy, sticky mess in an eye blink, at least for me who has not spent years perfecting it. So if you have tips on perfecting rice vermicelli, let me know! The soba noodles also pair well with the sesame flavors I have in the tempeh and dipping sauce. The marinated and seared tempeh and creamy avocado play off of each other's textures and add some staying power. To mimic the sweetness of carrots, I add in slices of kabocha squash, and the whole thing comes together in a delicious little roll. 

if you have never played with rice paper before, it is rather simple if you know a few tricks. I fill a pie plate half- way with really hot water, get a dish towel ready out on the cutting board or counter (this helps absorb excess water while you assemble), plunge a piece of rice paper in the water for about 15 seconds or so on until softened. I lay the softened rice paper out on the towel and begin layering on the ingredients. The trick is to keep the ingredients nice and compact, much like you would fill a sushi roll or a dumpling. Then fold the sides in like a burrito and roll away. To keep them fresh as you make them, place a damp paper towel or dish towel over the already made spring rolls.

The dipping sauce here is sesame-based rather than peanut or fish sauce-based. You could certainly sub in peanut butter for the tahini, but it will be thicker so you will want to thin out with a little water until the desired consistency is reached.

Tempeh and Squash Sesame Autumn Rolls

Roasted Squash:
1 tablespoon coconut oil or olive oil
1/2 small kabocha squash, sliced in 1/4-inch slices
salt, to taste

Tempeh:
1 tablespoon coconut oil or olive oil
8 ounces tempeh, sliced into 1/4-inch slices
2 teaspoons maple syrup
1 tablespoon low sodium soy sauce or tamari, if gluten-free
2 teaspoons sesame oil

Soba noodles:
6 ounces soba noodles
water
2 teaspoons sesame oil

Sesame Dipping Sauce:
1/2 cup tahini
1 tablespoon low sodium soy sauce or tamari
1 tablespoon rice wine vinegar or fresh lime juice
2 teaspoons maple syrup
2 garlic cloves, minced
1 teaspoon freshly grated ginger
salt and pepper, to taste
hot sauce or Sriracha, optional

Rolls:
12-15 pieces of rice paper
1 small head red leaf lettuce, leaves washed and excessive water removed
roasted kabocha squash
seared tempeh
1 avocado, sliced thinly
handful fresh cilantro, for serving
sesame seeds, optional, for serving

Roast squash. Preheat oven to 400 degrees Fahrenheit. Line a baking sheet with parchment paper. Toss kabocha with tablespoon oil, and arrange in single layer. Bake for 25-30 minutes or until golden.

Prepare tempeh. Mix maple syrup, low sodium soy sauce, and sesame oil together in a bowl. Add tempeh and toss to coat. Heat 1 tablespoon coconut oil in a skillet over medium heat. Add tempeh and cook on both sides until golden, about 5 minutes. Remove from heat.

Cook soba noodles. Bring pot of water to a boil. Add soba and cook for 5-7 minutes or until just done but not mushy. Start tasting at the 4 1/2 minute mark. Drain in colander and rinse with cold water until cool. Drain thoroughly and toss with 1 teaspoon sesame oil to prevent sticking.

Make dipping sauce. Combine tahini, soy sauce or tamari, rice wine vinegar, maple syrup, garlic, and ginger in a bowl. Season to taste with salt and pepper and add hot sauce, if using.

Prepare rolls. Fill a large shallow dish such as a pie plate half-way with steaming water. Add rice paper and allow to soak until softened, about 15 seconds. Place on a clean towel and layer ingredients on one end, starting with a small piece of red leaf lettuce, soba noodles, avocado, tempeh, kabocha, cilantro, sesame seeds, if using, and a drizzle of the dipping sauce. Roll up like a burrito, starting with the sides, and then roll up tightly. Place a damp towel over rolled pieces while repeating with remaining ingredients, heating water as necessary. Serve with dipping sauce and additional herbs, if desired. Enjoy! Makes 12-15 summer rolls.

DSC_2419.jpg
DSC_2438.jpg
DSC_2448.JPG
DSC_2450.jpg
Print Friendly and PDF
In Appetizers Tags recipe, fall, autumn, appetizers, asian, tempeh, vegetarian, tahini, gluten-free, vegan
2 Comments

Miso Mushroom Stroganoff Toast

November 20, 2015 Emily Watson

One of the shows we love to watch at home is Beat Bobby Flay. I know, I know. It is a cooking competition, which have become entirely too common, too dramatic, and are not much about the actual cookery. But Beat Bobby Flay is one of the few food competitions that I actually like because they are really cooking, sweating, and grinding. Also, the judging is entirely anonymous which makes it feel that much more legitimate. I love to see chefs bring their trademark dish- the dish they are most proud of- and go head-to-head against Bobby Flay. Spoiler alert: Bobby Flay usually wins, but that makes it so much sweeter when the opponent finally comes out on top.

The other night, we were watching an episode where the opponent brought their trademark dish- Beef Stroganoff. I had forgotten about Beef Stroganoff and how much I loved it as a kid. It was never very fancy- beef in a mushroom sauce- probably made with Cream of Mushroom or the like, some salty beef stock, and tangy sour cream- all served atop egg noodles. I can still remember slurping those egg noodles. In the Beat Bobby Flay episode, porcini mushrooms and a medley of other wild mushrooms were used, the egg fettuccine was homemade, creme fraiche replaced the sour cream, and the beef? Both Bobby and his opponent used filet mignon. Very fancy, indeed.

I suddenly got a craving for Beef Stroganoff after watching that show, but I only had mushrooms on hand. I had made a note a while back to try Sam's beautiful Creamy Miso Mushrooms on her blog, Drizzle and Dip, and I thought it would be a good starting point to get a mushroom-based stroganoff. Mushrooms would provide meatiness and miso would help get that salty richness that I wanted to mimic. Like her, I serve this on toast, but I made a few changes to lighten up the dish and give that slight tang of a stroganoff. I use thick Greek yogurt to mimic the sour cream since I did not have any in the refrigerator, and parsley and chives at the end adds a bright and fresh note. I add in some navy beans for extra bulk and a little texture, but you could leave them out or replace them with chickpeas.

Eat as is or top with an egg like Sam. Or serve the mixture atop little crostini for a lovely appetizer. It would be perfect for this holiday season. I will still have to make real Beef Stroganoff soon, but this most definitely satisfied my craving for that classic, rich, comforting dish.

Miso Mushroom Stroganoff Toast

2 tablespoons unsalted butter
1/2 pound mushrooms, stems removed and caps thinly sliced (I used a mix of cremini and shiitake)
2 garlic cloves, minced
1/2 cup canned navy beans, drained
3 1/2 tablespoons water
1 tablespoon miso paste
3 tablespoons plain Greek yogurt (I used 2 %)
1 tablespoon minced fresh parsley
1 tablespoon minced fresh chives
salt and pepper to taste
Slices of your favorite hearty bread, toasted (I used a seeded multi-grain)

Melt butter over medium heat. When butter begins to foam, add mushrooms, stir to coat, and allow to cook until golden and tender, about 8-10 minutes. Try not to stir the mushrooms too much to get a nice color on them. Add the garlic cloves and navy beans and cook another minute more.

In a small bowl, mix together the water and the miso paste. Add to skillet, scraping any bits from the bottom of the skillet, and allow to cook until some of the liquid has evaporated and mixture has thickened. Remove from heat, swirl in Greek yogurt, herbs, and season to taste with salt and pepper. Serve atop toast. Enjoy! Makes enough to top 3-4 large pieces of toast.

DSC_1960.jpg
DSC_1967.jpg
DSC_1980.jpg
In Mains, Appetizers Tags mushrooms, miso, appetizers, vegetarian
Comment
Older Posts →
Hi! I'm Emily. I love to cook whole, nourishing foods, and this is where I share my kitchen experiments and sometimes a little bit of life.

Hi! I'm Emily. I love to cook whole, nourishing foods, and this is where I share my kitchen experiments and sometimes a little bit of life.

Featured
  • July 2017
  • May 2017
  • April 2017
  • March 2017
  • February 2017
  • January 2017
  • December 2016
  • November 2016
  • October 2016
  • September 2016
  • August 2016
  • July 2016
  • June 2016
  • May 2016
  • April 2016
  • March 2016
  • February 2016
  • January 2016
  • December 2015
  • November 2015
  • October 2015
  • September 2015
  • August 2015
  • July 2015
  • June 2015
  • May 2015
  • April 2015
  • March 2015
  • February 2015

  • Appetizers 18
  • Breakfast 18
  • Life 4
  • Mains 39
  • Miscellaneous 2
  • Salads 21
  • Sandwiches 6
  • Side Dishes 8
  • Smoothies 4
  • Snacks 10
  • Soups 14
  • Spreads Dips Sauces 5
  • Sweets 6
  • Vegetarian 1

  • almonds
  • appetizers
  • autumn
  • avocado
  • breakfast
  • brown rice
  • chickpeas
  • chocolate
  • cilantro
  • coconut
  • coconut milk
  • fall
  • gluten-free
  • kale
  • lentils
  • make ahead
  • mint
  • oatmeal
  • recipe
  • salad
  • snack
  • soup
  • spring
  • summer
  • sweet potatoes
  • tahini
  • vegan
  • vegetarian
  • walnuts
  • winter

subscribe

Sign up with your email address to receive new posts directly

We respect your privacy.

Thank you!

All photographs, recipes and content are property of Nourishing Matters, unless otherwise noted. Please do not redistribute without my permission. Thank you!

Powered by Squarespace