• Home
    • About Nourishing Matters
    • About Emily
    • Frequently Asked Questions
  • Recipes
    • Offerings
    • Past Programs and Events
    • Experience and Teaching Style
    • Articles and Features
    • Travel
Menu

nourishing matters

Street Address
City, State, Zip
Phone Number
where wholesome meets delicious

Your Custom Text Here

nourishing matters

  • Home
  • About
    • About Nourishing Matters
    • About Emily
    • Frequently Asked Questions
  • Recipes
  • Work with Me
    • Offerings
    • Past Programs and Events
  • Yoga
    • Experience and Teaching Style
  • Press
    • Articles and Features
  • Adventures
    • Travel

Two Potato Salad with North African Spiced Yogurt

July 27, 2015 Emily Watson

In the summer, we find a lot of excuses to use the grill. We grill a lot of vegetables -corn, broccoli, zucchini, you name it, but there's also my Aunt Jackie's famous grilled flank steak that marinates for days, hand-mixed burgers, local sausages, and even fish if we can find a sustainable source for it. We are always looking for fuss-free, make ahead dishes to tag alongside. Grain salads are always fun to whip up, but potato salad can be really comforting. It's cool, creamy, and the ubiquitous summer cookout food. 

I grew up with the traditional mayonnaise and mustard version where the ratio of dressing to potatoes always seemed way too high. It was always a little disturbing when the "salad" would need soup bowls to contain it and soup spoons to eat it. Not being a mayonnaise aficionado either, I mostly avoided it. Then I was introduced to the German version where I was relieved to find oil and vinegar as the main ingredients. Not being a bacon lover, however, I would leave it out. The grainy mustard, punchy vinegar, and fresh parsley gave plenty of flavors to the potatoes. This oil and vinegar version has become the standard genre of potato salad we make in the summer, but I think this recipe takes things to another level.

Boiled potatoes become little sponges for whatever you dress them in, and this recipe dresses them in a beautiful and delicious dressing that pairs so well with the mix of yellow Yukon gold potatoes and sweet potatoes that I used. I stumbled upon a Moroccan Potato Salad that Mike from the food blog The Iron You, made a a little while ago, and it looked too interesting to not give it a try. He uses olive oil, vinegar, AND Greek yogurt for a hint of creaminess and tang that works beautifully with the warm Ras el Hanout spice blend. If you are not familiar with Ras el Hanout, it is a North African spice blend with a variety of different spices such as coriander, turmeric, cardamom, clove, paprika, cayenne, cinnamon, and nutmeg, but it can vary from brand to brand much like a curry blend can. It can also vary on spice level, so be sure to test how spicy yours may be before being too generous with it. The one I had on hand from was from Seasoned Pioneers and featured galangal root, dried rose hips, and even ginger, but you can also make your own at home from a recipe here. It is a lovely, surprising ingredient that will really add some interest no matter where you use it.

I modified a few things from the original recipe, especially since I like more green with my potatoes and a little less spice (as in heat), but the template is a winner. I also used a mix of sweet potatoes and Yukon Golds because I love sweet potatoes and it also was quite beautiful when mixed with the yogurt and citrus dressing and herbs. The dressing is a delicious dip, too, so feel free to make extra. They key to this salad, as Mike mentions, is to not overcook the potatoes. You want them to hold their shape rather than turn to mush so keep checking them a few minutes before the timer goes off. This only gets better as it sits, so you can make it several hours before or even the days before and all of the flavors will soak in. I hope you try it at your next cookout!

Two Potato Salad with North African Spiced Yogurt

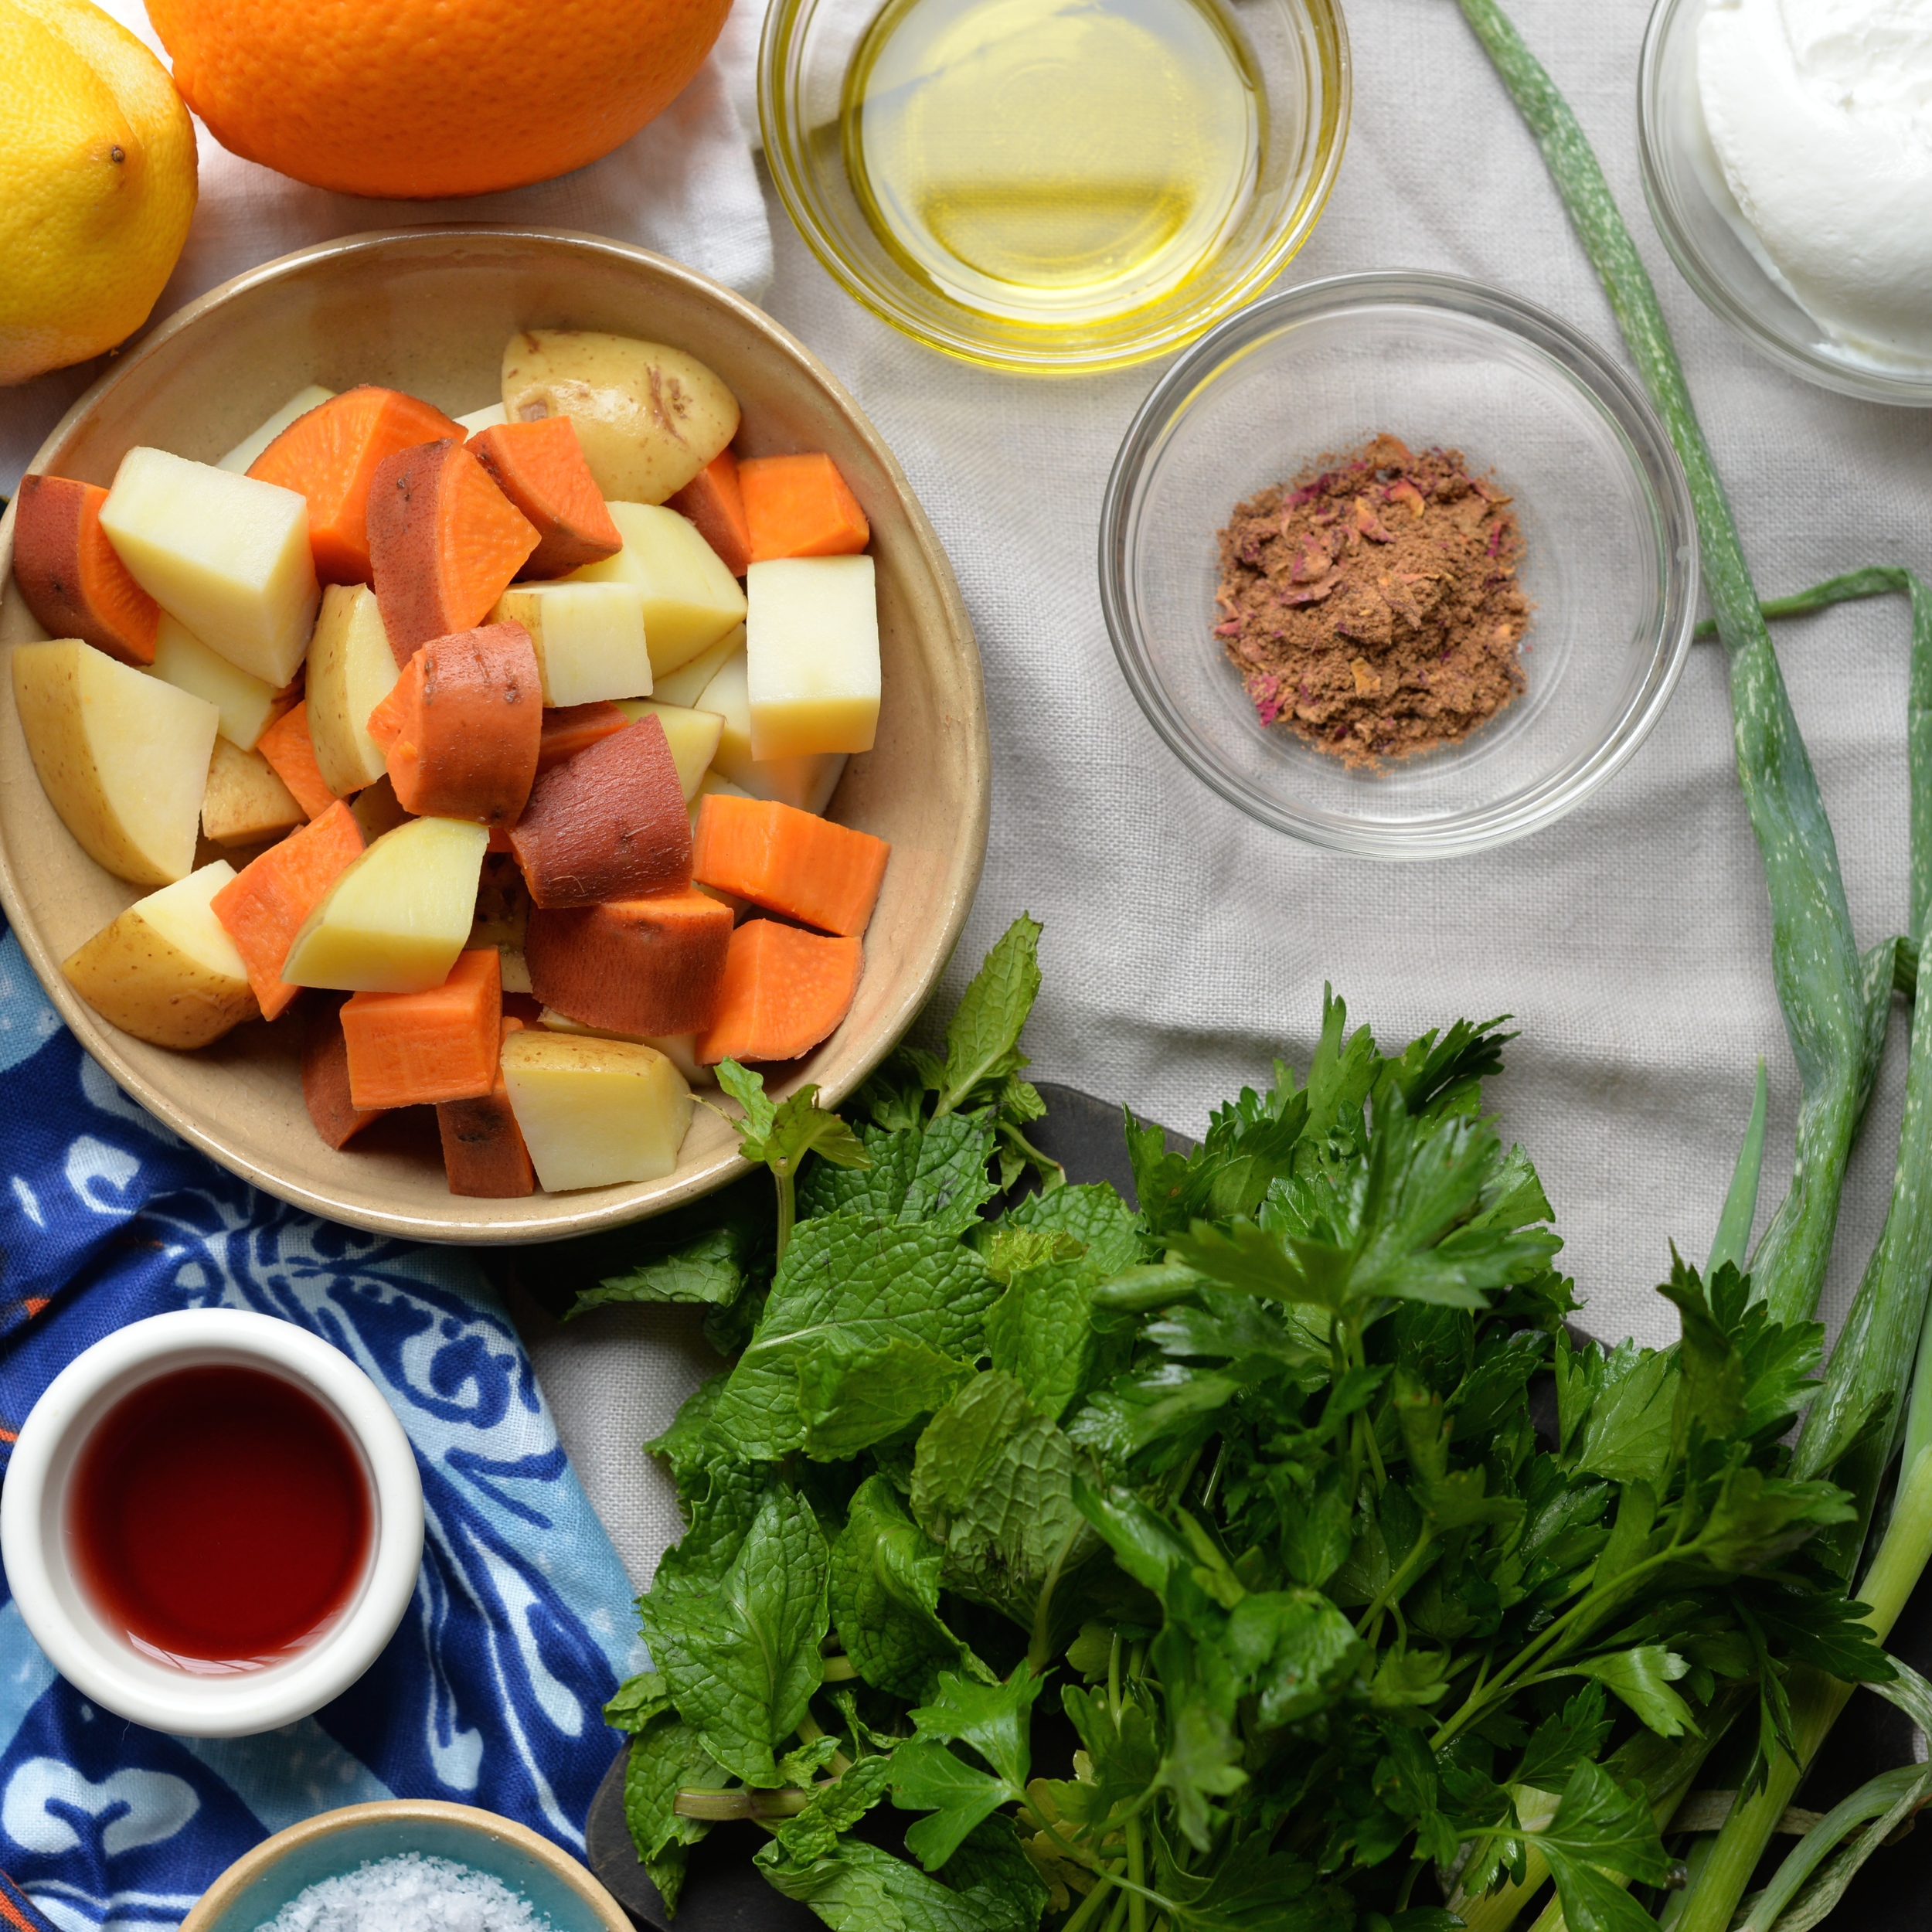
2 pounds potatoes (I recommend a mix of sweet potatoes and Yukon Gold or red potatoes
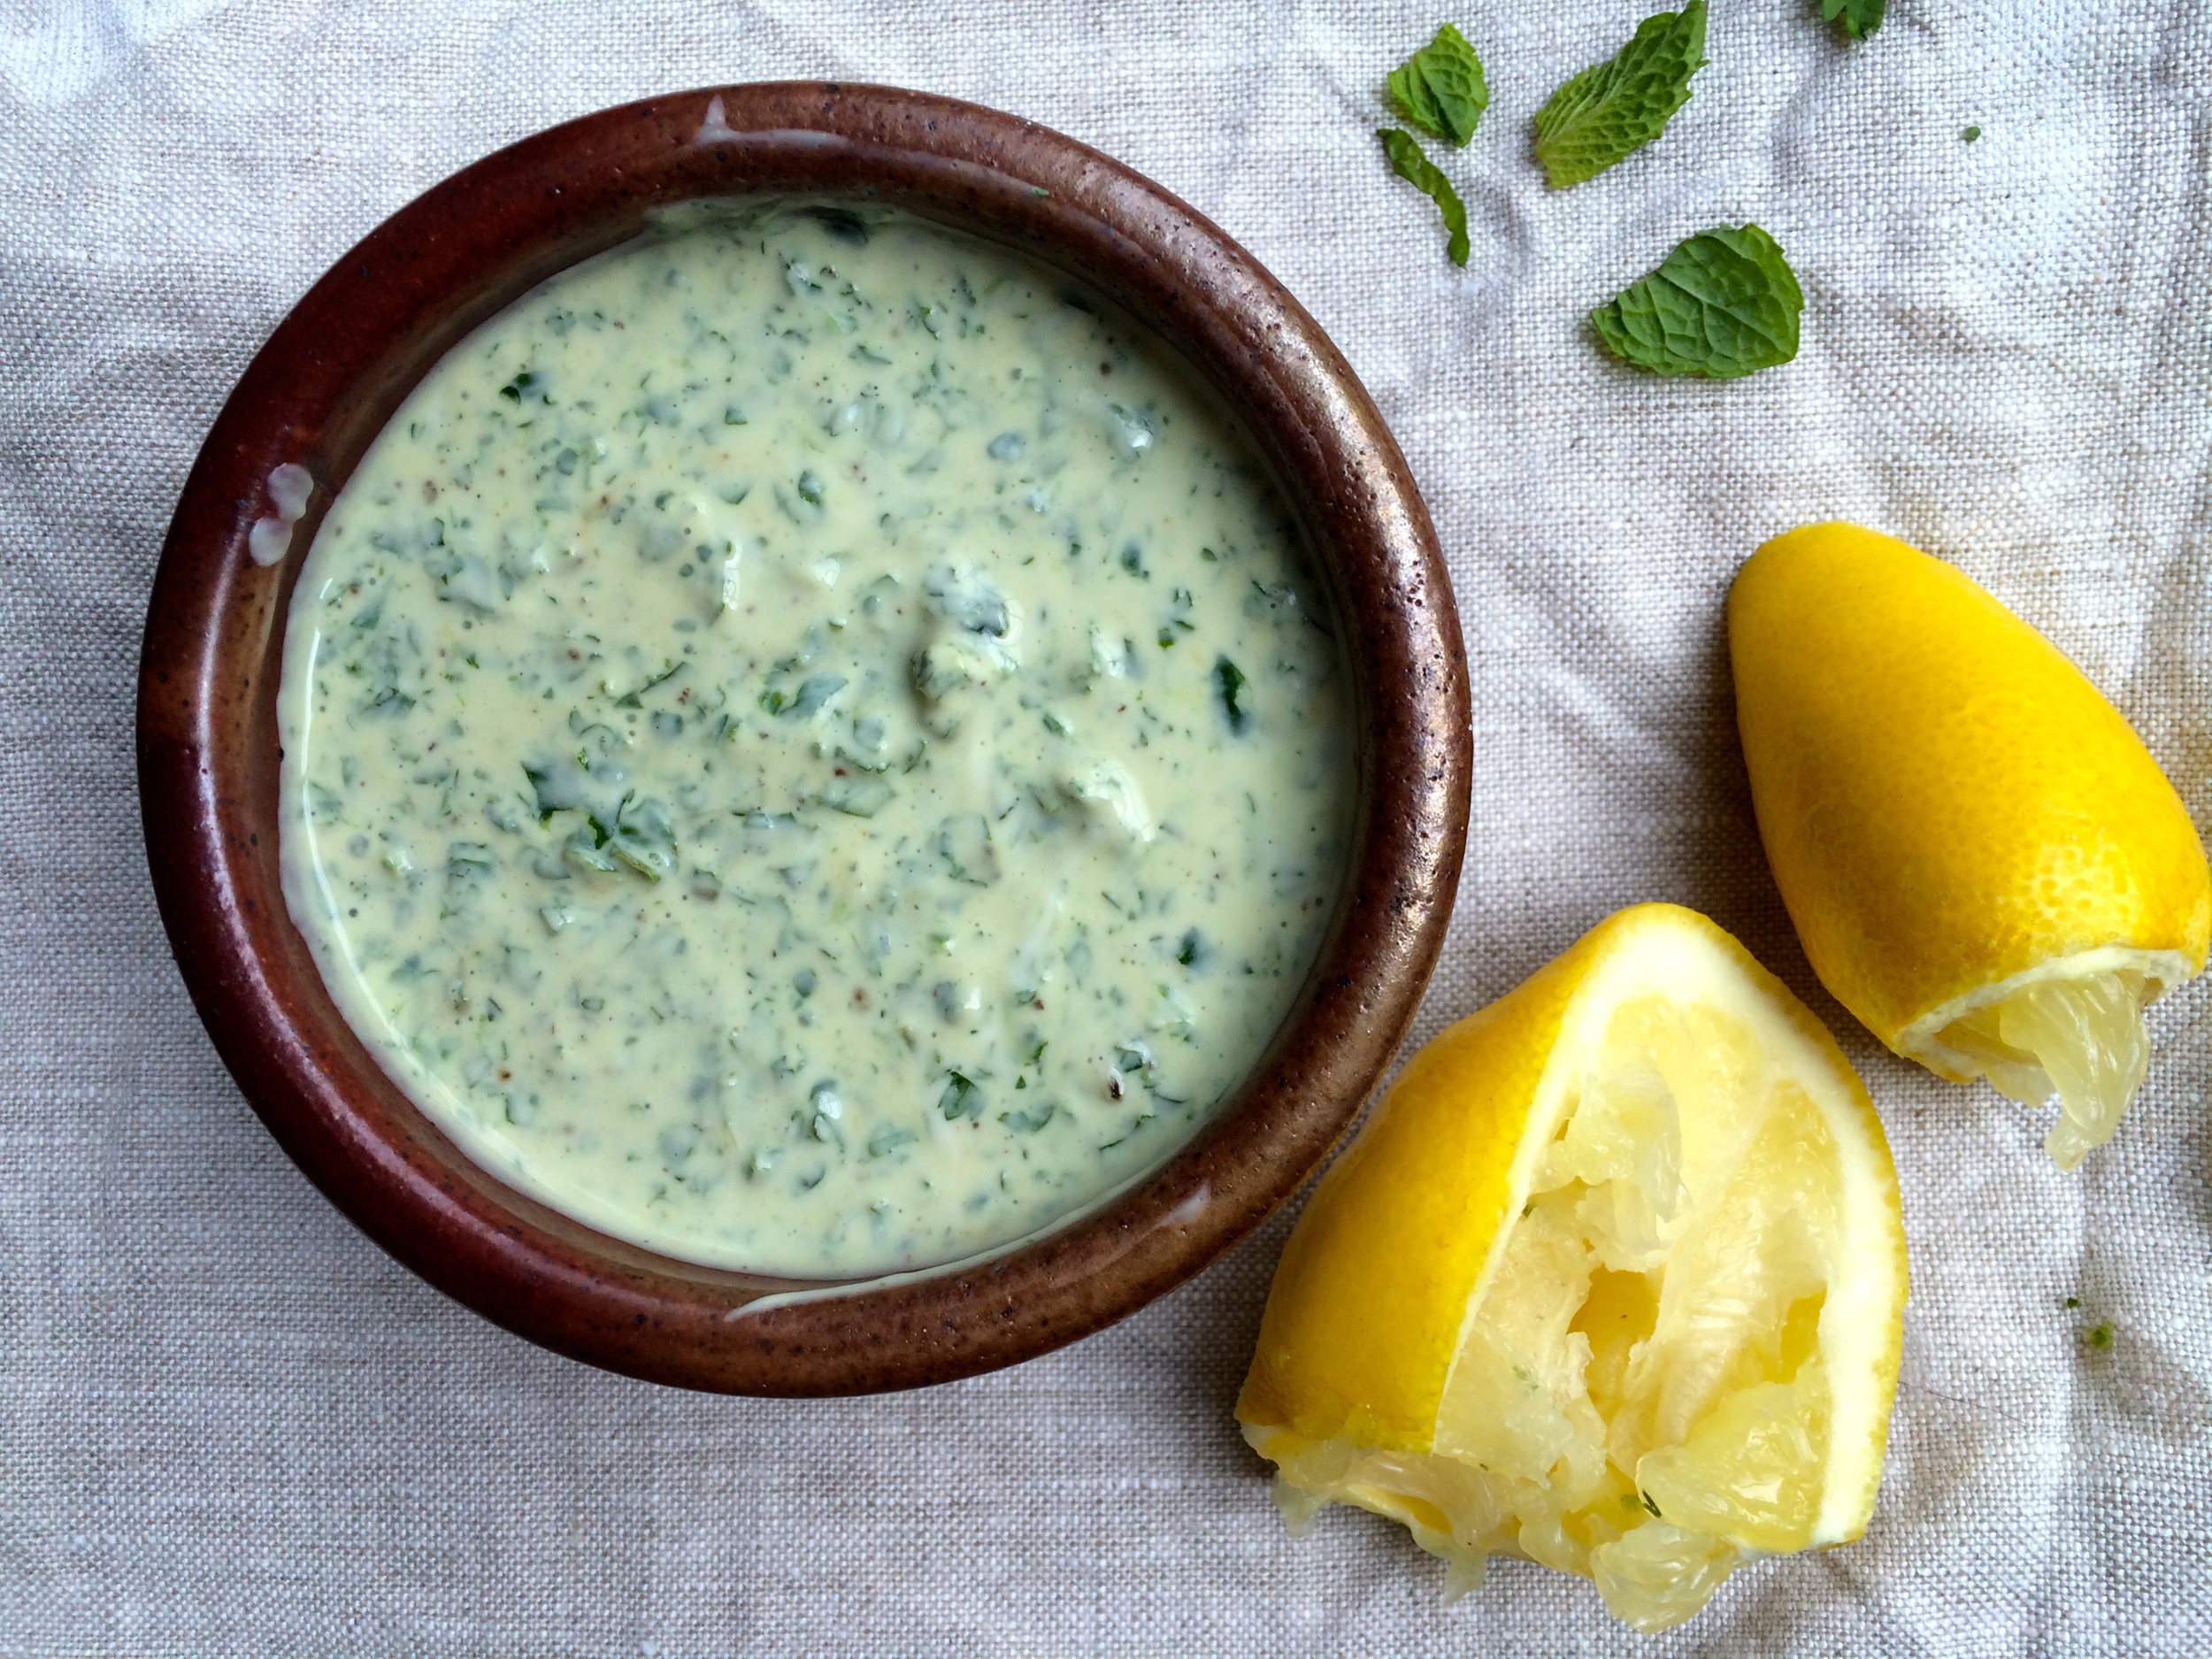
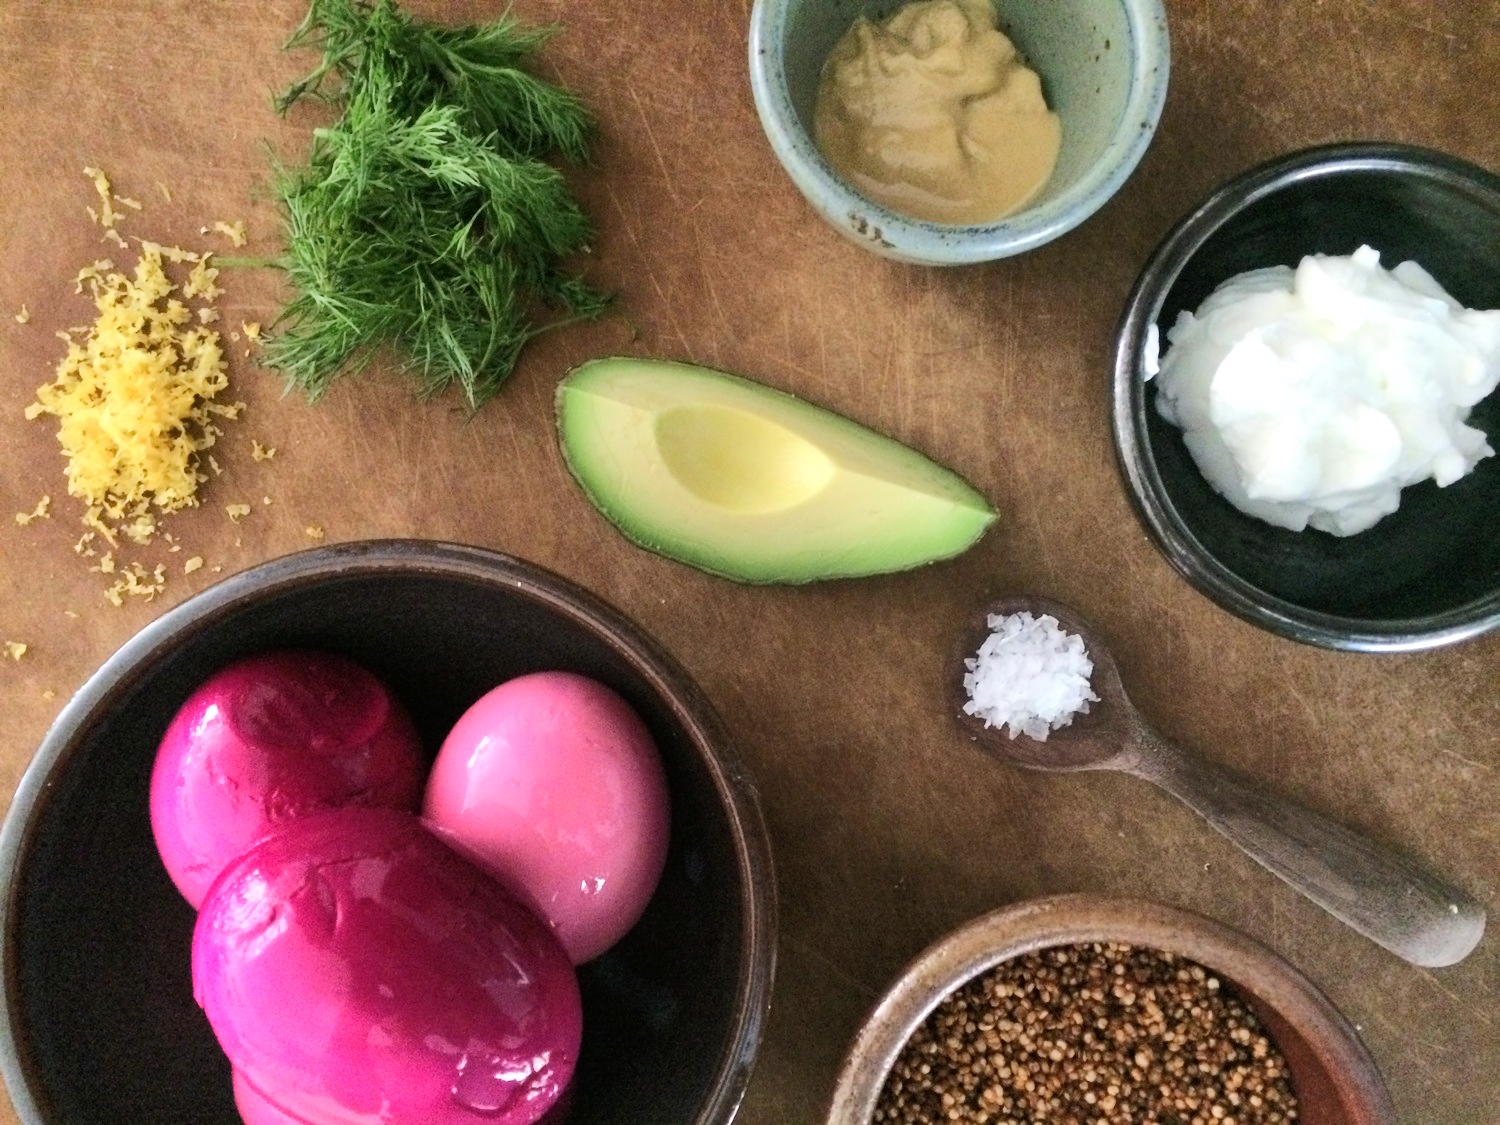
1/2 cup Greek yogurt (I used 2%)
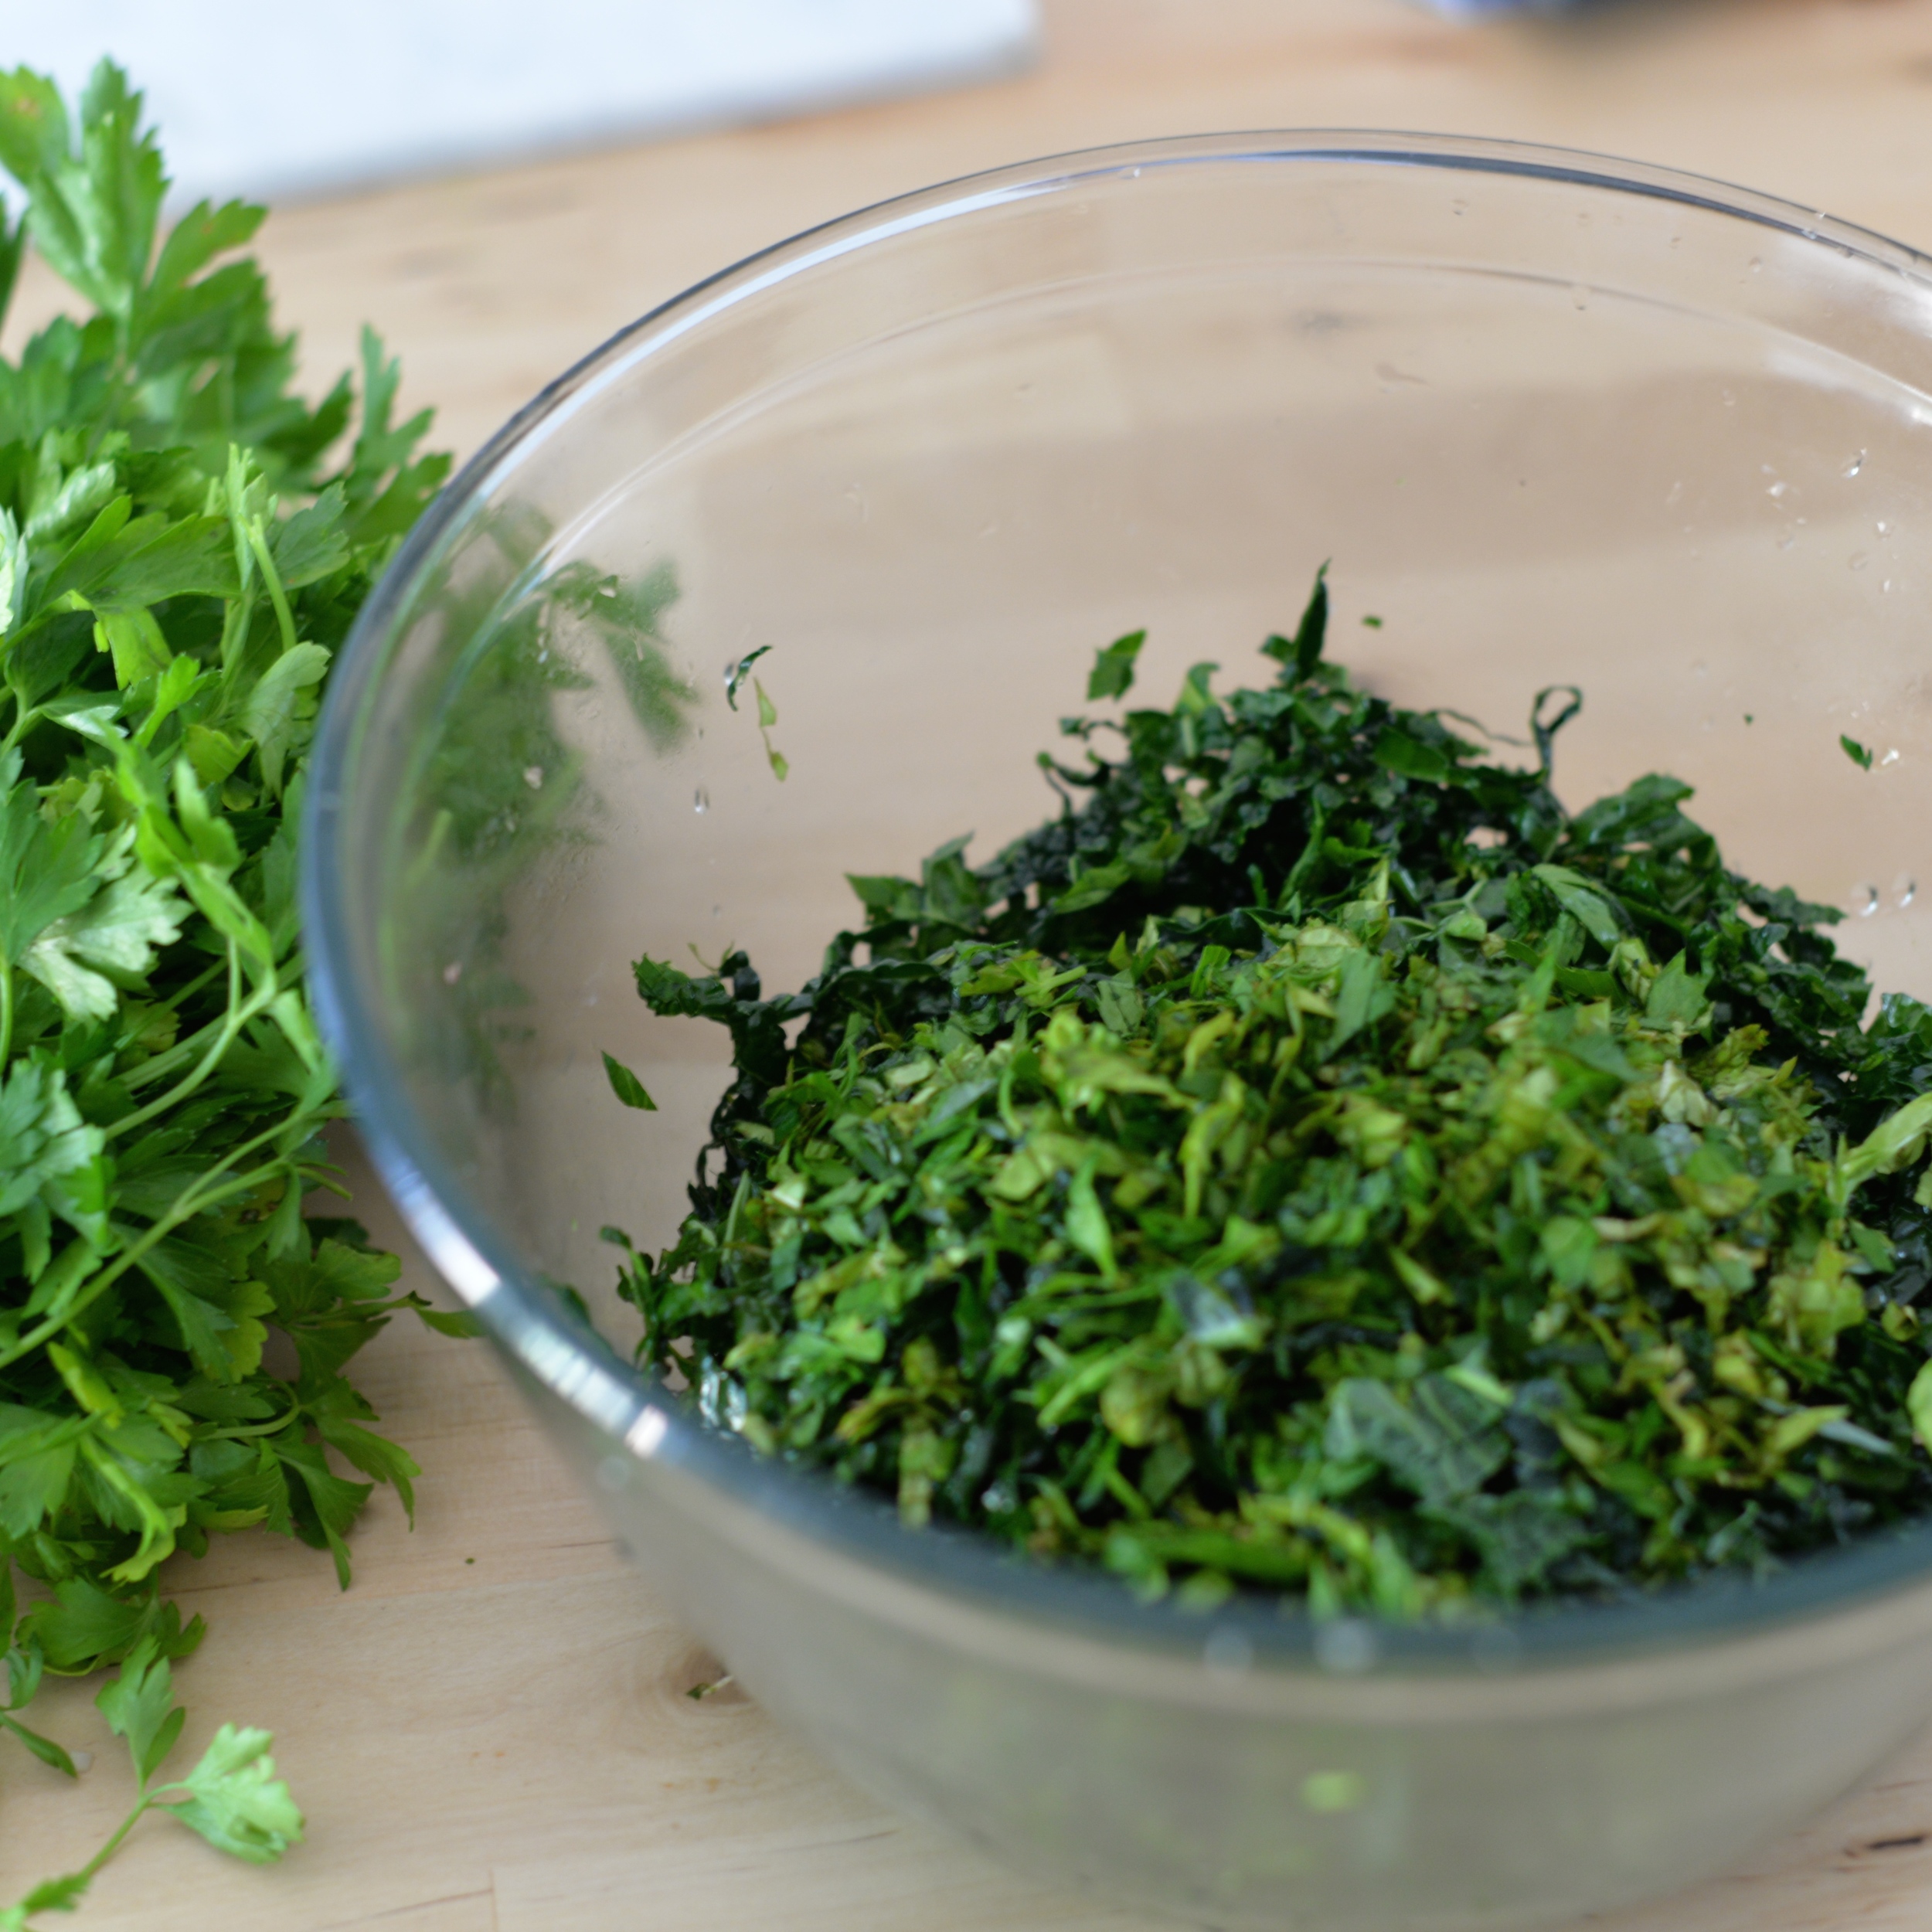
1 1/2 cups chopped fresh herbs (I used equal parts mint, parsley, cilantro, and a few scallions)
1 tablespoon red wine or white wine vinegar
zest and juice of 1 lemon
zest of 1 orange
3 tablespoons olive oil
2-3 teaspoons Ras el Hanout
salt and pepper to taste

Prepare the potatoes. Wash the potatoes, peel them if you would like, and cut into 1/2 inch pieces. I like the peel so I chose to leave it on. Place chopped potatoes in a pot and cover with water by 2 inches. Bring water to a boil, and reduce heat to a simmer and cook until just tender, about 6-8 minutes, checking around the 5 minute mark. Drain, sprinkle with salt, and set aside.

Meanwhile, prepare the dressing. In a small bowl, mix the yogurt, herbs, vinegar, lemon juice, lemon zest and orange zest, and a pinch of salt and pepper. Set aside.

Prepare the spiced oil. Heat the olive oil in a skillet over medium-low heat. Add the Ras el Hanout and cook until fragrant, about 1 minute. Pour the oil over the cooked potatoes and stir to combine. Add the yogurt mixture and stir to combine, careful not to break up the potatoes. Taste and adjust for salt and pepper. Store in the fridge until ready to serve. Enjoy! Serves 6-8 as a side.

DSC_0318.JPG
DSC_0336.jpg


In Salads Tags recipe, potatoes, sweet potatoes, gluten-free, vegetarian, yogurt
4 Comments

Kale and Beluga Lentil Salad with Lemon Yogurt Dressing

July 17, 2015 Emily Watson

I am finally incorporating some greens back into my repertoire. It is not that they disappeared entirely, but I got a little lazy. The idea of washing, drying, de-stemming, and chopping fibrous leafy things all seemed a bit much. I blame it on the heat, and on the fact that I have not been able to go to the farmer's market in over a month since we have been out of town so often. I find the farmers' market very inspiring- seeing all of the producers there makes me want to celebrate their little labors of love, and without trips there, I veered off of the vegetable path. It became easier to sink into a routine of eating eggs, avocado, and cheese on toast rather than actually making a crunchy, green thing with some nutritional value. Finally my body seems to have had enough of avocado and coconut butter, eggs and cheese, and banana and peanut butter as excuses for lunch because suddenly I found myself cleaning, de-stemming, and chopping all sorts of green things- curly kale and lacinato kale, Swiss chard, red leaf lettuce, and zucchini...recipes for dishes with each of these coming soon, by-the-way. I did not know yet what I was going to do with them all, but it was much easier to do it all in one swoop and store them in containers in the fridge, ready to go for when I actually figured that part out.

I am usually pretty good about doing this prep-now-cook-later-thing with my greens. I learned a few years ago, especially when I was busy in grad school, that one of the barriers to making most vegetable dishes is the prep time in getting them recipe-ready. It is so much easier to get them all clean and ready right when I bring them home from the market or grocery store and store them in plastic containers lined with tea towels or paper towels so that I can have them easily available. It sounds idealistic, but once it becomes a habit, it is a godsend. Just do not be like me and fall off the wagon and start eating all of your meals on toast. Or if you do fall off, try to get back on. Life happens, and we adjust. 

Now on to the actual recipe. This is a really satisfying salad. The different textures, the bulk, the brightness, all make this a salad that you keep digging your fork into. Kale is the perfect "lettuce" for this sort of salad because it can stand up to the weight of the dressing. Lacinato kale softens better than the curly kind, so that is really what I prefer here. Basil and parsley are here to break up the "green" flavor that kale can have, so I am generous with them. Plus, fresh basil makes me happy that it is summer. I threw in some cooked beluga lentils that I had in the freezer and thawed and tossed in cooked barley that I had also in the freezer and thawed. Beluga lentils provide a nice little toothsome quality to this salad but canned (and drained) chickpeas could work in a pinch, as would any grain, rice, or small pasta you like.

The onions are cooked down to give just a touch of sweetness, cumin is there for its earthy flavor, and the Greek yogurt and lemon add a creamy tang that brightens it all up. This is a great salad to make ahead of time as it slowly becomes more tender without feeling wilted. Yay for greens!

Kale and Beluga Lentil Salad with Lemon Yogurt Dressing

4 tablespoons extra-virgin olive oil, divided
1 small onion, finely chopped
1 garlic clove, minced
scant 1/2 teaspoon ground cumin
1 bunch lacinato kale, stems removed and leaves cut in chiffonade
1/2 cup cooked grain of choice (I used hulled barley)
1/2 cup cooked beluga lentils (or chickpeas)
1/2 cup fresh basil leaves, cut in chiffonade
1/2 cup fresh parsley leaves, chopped
1 lemon, zest and juice
3 tablespoons Greek yogurt (I recommend 2% Greek yogurt here for a little more richness)
1/2 teaspoon sea salt
1/2 cup walnuts, toasted* and chopped
salt and pepper, to taste

Heat a medium skillet over medium-high heat. Add 2 tablespoons olive oil. Add the onion and garlic, and cook over medium heat for about 6-8 minutes or until onion is soft and golden. Add the cumin and cook for 30 seconds or until fragrant. Remove mixture from heat and allow to cool slightly.

Meanwhile, in a large bowl, massage the kale with 2 tablespoons extra-virgin oil and a sprinkling of salt until kale begins to soften. This can take about a minute or so. Add the grain, lentils, basil, and parsley, and stir to combine.

When the onion mixture has cooled, add the lemon zest, lemon juice, yogurt, and 1/2 teaspoon sea salt and stir to mix. Add this mixture to the kale and lentil mixture, toss in the chopped walnuts, and use tongs to combine. Taste and adjust for salt and pepper. Enjoy! Serves 4-6.

*To toast walnuts, toast in oven at 400 degrees for 8-10 minutes or until golden.

DSC_0211.JPG
DSC_0213.JPG
DSC_0216.JPG
DSC_0221.JPG
DSC_0231.JPG


In Salads Tags kale, yogurt, lentils, salad, grains, walnuts, recipe
Comment

Yogurt and Honey Filled Raspberries with Mango

June 12, 2015 Emily Watson

Berries are not the hardiest of fruits, so it is a bit tricky trying to eat them before they get overripe and then turn furry. A nifty trick that I read about and recently tried was plunging my berries in a mix of white vinegar and water. The logic is that the vinegar kills any bacteria or mold spores that linger on the berries' surface. I was skeptical at first, thinking my berries would take on a vinegary taste, but not only do they just taste of sweet summer, they are still mold free after now what is 6 days in the refrigerator. In my mind, the little extra time is worth having berries for days in the fridge, so it will be something I continue to do. Ideally, I would be able to get fresh berries every few days and consume them in time, but that is just not my reality. So for berries that last:

  • Fill a bowl with a mixture of 1 part white vinegar to 3 parts cold water
  • Plunge whole berries in bowl (if using strawberries, hull first)
  • Carefully mix berries around and allow to sit in the mixture for 10 minutes
  • Rinse berries with cold water
  • Carefully drain berries and spin in a salad spinner basket lined with a paper towel, and spin gently. If you do not have a salad spinner, try to allow berries to dry as much as possible with a paper towel.
  • Place berries in a single layer in a paper-towel lined container. You can stack the berries, placing a paper towel layer in between, but be mindful of how much weight is on the bottom layer.
  • Store in the fridge and enjoy for days!

This is a bright little fruit plate that hits sweet, tart, creamy, and a little nutty notes. Hardly a recipe, however, I thought it was worth sharing because it is a beautiful and simple take on a fruit salad. It is sunshine in a bowl. I filled the raspberries with a mix of honey and Greek yogurt, but whipped cream, whipped coconut cream (if vegan), or even a mascarpone or ricotta mix would be delicious. I also love how the green pistachios contrast with the reds and yellows, but almost any nut would do. Vegan and do not use honey? Use maple syrup or agave instead as your sweetener!

To fill the raspberries, I use a plastic sandwich bag and snip the corner off just a bit. Nothing fancy, and it is more than enough to get the job done. If you are making this for a get-together, this step can be done a few hours in advance and the raspberries stored carefully in the refrigerator.

Yogurt and Honey Filled Raspberries with Mango

1 cup of fresh raspberries, washed and dried
1/2 fresh ripe mango, peeled and cut into thin slivers
1/2 cup plain Greek yogurt (or coconut yogurt, whipped cream, or mascarpone/ ricotta mixture)
2 teaspoons local honey (or maple syrup or agave if vegan)
2 tablespoons roughly chopped shelled pistachios

Mix the yogurt and honey in a small bowl until thoroughly combined. Fill a plastic sandwich bag with yogurt or other filling of choice. Squeeze the yogurt towards one corner. Snip the corner off. Pipe the filling into the raspberries until just beyond the top. You may have leftover filling depending on how large your raspberries are. Arrange the mango slices and raspberries on a plate. Sprinkle raspberries with pistachios and serve. Makes one plate, enough for 1 or 2 people.

IMG_7081.jpg
IMG_7082.jpg
IMG_7086.jpg
IMG_7158.JPG
In Breakfast, Snacks Tags snack, mangoes, raspberries, yogurt, honey, vegetarian, recipe
Comment

Roasted Carrots and Lemony Millet with Black Garlic and Herbed Yogurt

May 11, 2015 Emily Watson
IMG_6203.jpg

Carrots are rampant at the farmers' market right now. Tender and sweet, they are begging to be the star of a dish and not just the side show. A few weeks ago, I spotted Izy's beautiful carrot dish on her blog, Top with Cinnamon, and knew I had to recreate a version of it for myself at home. The carrots are left whole, slow roasted until they become fork-tender and a little caramelized, and then topped with an herbacious yogurt sauce spiked with funky black garlic. Now I just happened to have black garlic on hand from a recent market purchase of Obis One black garlic, but I am sure a little minced garlic sauteed slowly in a little olive oil until softened will sweeten and mellow its flavor and make a fine substitute. Or if you have roasted garlic clove on hand, even better. Mix that in for a substitute. I add a bit of brightness to Izy's original version with lemon juice and zest as I love the combination of mint, yogurt, and lemon.

This dish is eye-catching. I served it atop millet tossed with lemon juice, zest, salt, and a glug of good quality extra-virgin olive oil. To make it a meal, add some chunks of avocado and a handful or two of cooked beluga lentils or maybe a hard-boiled egg. This is a great dish that can be made ahead of serving time and can be eaten when the carrots and millet are warm or at room temperature. Just be sure to dollop on the cool yogurt sauce before ready to serve. Millet is a bit finicky as a grain once cooked and chilled in the refrigerator, so sprinkle it with drops of water before reheating so that it becomes soft again.

Roasted Carrots and Lemony Millet with Black Garlic and Herbed Yogurt

Carrots:
1 pound carrots, washed, peeled, and tops removed
2 tablespoons olive oil
salt

Lemony Millet:
1 cup millet
2 cups water
juice of 1 lemon
zest of 1/2 lemon
2 tablespoon extra-virgin olive oil
1/4 teaspoon salt, plus more to taste

Black Garlic and Herbed Yogurt Sauce:
1/4 teaspoon black garlic (about 1 clove), minced (see note)
1/4 cup chopped fresh mint
1/4 cup chopped fresh cilantro
1/4 cup 2% plain Greek yogurt
juice of 1 lemon
zest of 1/2 lemon
1 tablespoon extra-virgin olive oil

For serving:
3 tablespoons pumpkin seeds (pepitas), toasted (see note)
handful of chopped fresh mint, for sprinkling
handful of chopped fresh cilantro, for sprinkling

Roast the carrots. Preheat the oven to 350 degrees Fahrenheit. Line a baking pan with parchment paper or a Silpat. Toss the carrots with two tablespoons of olive oil and a sprinkling of salt. Mix and spread into an even layer. Cover the pan with foil and place in the oven. Bake for 30 minutes. Remove the foil, turn the carrots, and bake for 15-20 minutes more or until the carrots are fork tender and beginning to brown at the tips. Remove from the oven and set aside.

Prepare the millet. Bring 2 cups of water to a boil in a pot. Add 1/4 teaspoon of salt and the millet and stir. Bring back to a boil and then reduce heat to a simmer. Cover pot and allow to cook on low for 25 minutes. Remove the pot from the heat, leaving it covered, and allow to rest for 10 minutes. Fluff the millet with a fork, add the juice of 1 lemon, the zest of 1/2 lemon, and 2 tablespoons of extra-virgin olive oil. Taste and add more salt if needed.

Prepare the yogurt sauce. In a blender or mini food processor, add all of the ingredients and process until smooth. Taste and adjust for salt, and set aside.

IMG_6163.jpg

Transfer the millet to a platter. Spread the cooked carrots on top and top with the herbed yogurt sauce. Sprinkle with toasted pumpkin seeds and more fresh herbs. Enjoy! Serves 4 as a main course

IMG_6168.jpg
IMG_6169.jpg
IMG_6170.jpg
IMG_6171.jpg

Notes:
* as a black garlic substitute, you can use a gently sauteed chopped garlic clove or roasted garlic clove
* to toast pumpkin seeds if you only have raw, heat them in a dry skillet over medium heat for 8-10 minutes or until golden and a little puffed

IMG_6189.jpg
In Mains, Side Dishes Tags recipe, carrots, spring, millet, yogurt, cilantro, mint, gluten-free, vegetarian, pumpkin seeds
Comment

Pickled Deviled Eggs with Dill and Crispy Quinoa

May 1, 2015 Emily Watson

I grew up with deviled eggs making an appearance at least once a week in our house. They were always a little different, depending on the mood of our babysitter, Louise, that week. Sometimes the filling was a tad runny, sometimes it packed a bit more of a mustard punch, sometimes there was relish involved. Louise never really measured anything, but after watching her enough times, I figured out the basic idea of deviled egg-making. Hard-boil some eggs, mash the yolks with mayonnaise, mustard- she used yellow mustard, salt, pepper, maybe a little Mt. Olive relish. Taste and adjust. Fill the egg whites up and sprinkle with a healthy dose of paprika to make them pretty.

My version is a tad more refined and geared towards spring, but I promise the extra work is worth it. Maybe you do not choose to pickle the eggs or make the crispy quinoa topping, and that is absolutely okay. The filling is still bright and creamy, and you will still get a delicious deviled egg.

Pickling the eggs is optional, but it not only creates a beautiful color, but it also gives the egg a meatier texture and a zing. I use plain Greek yogurt in place of the more traditional mayo to fluff the filling. Fresh dill pairs nicely with the lemon and just makes me think of pickles, but leave it out if you wish. A sliver of avocado gives additional richness and toasted quinoa acts like a crunchy breadcrumb. These eggs can be made a day before, but if you are pickling them, be sure to start that process at least 8 hours before hand so that the pink color has a chance to penetrate the whites. These would make a fantastic spring party appetizer either for the Kentucky Derby or Mother's Day maybe?

The pickling of the eggs is based very loosely on the Beet Pickled Eggs at Cookistry. I used a few different spices and just one beet to get the hue because I know how one beet can give off a tremendous amount of color. Beet stains on hands for days, anyone? The crispy quinoa is adapted from a Real Simple magazine recipe.

Pickled Deviled Eggs with Dill and Crispy Quinoa

4 beet-pickled hard-boiled eggs, see recipe below, or just 4 hard-boiled eggs, peeled
3 tablespoons 2% plain Greek yogurt (Fage is my favorite brand)
2 teaspoons Dijon mustard
3 tablespoons fresh dill, finely chopped, divided
zest of 1/2 lemon
1 teaspoon sea salt + more for sprinkling on at very end
1/4 avocado, thinly sliced, for garnish
crispy quinoa, see recipe below (optional)

Slice the hard-boiled eggs in half length-wise. If using beet-pickled eggs, have a towel nearby so you do not stain your hands. Carefully spoon out the yolks and place in a small bowl. Add the yogurt, mustard, 2 tablespoons of fresh dill, lemon zest, and salt. Mash everything together with a fork until smooth and creamy.

Fill the egg whites up with heaping spoonfuls of the yolk mixture. Place a sliver of avocado on top of each half, sprinkle with remaining fresh dill, crispy quinoa, if using, and a little sprinkle of sea salt. Enjoy! Makes 8 deviled egg halves.

IMG_5928.JPG
IMG_5933.JPG
IMG_5943.JPG
IMG_5951.JPG
IMG_6068.JPG

Beet-Pickled Eggs

4 eggs
1 beet, peeled and chopped into 1-inch pieces
1 cup water
3/4 cup apple cider vinegar
1 bay leaf
1 inch piece of ginger, peeled and sliced into 3 pieces
1/4 teaspoon mustard seeds
3/4 teaspoon salt

Hard-boil the eggs. Place the eggs in a pot and add water to cover by 2 inches. Bring the water to a boil, cover with a lid, and remove pot from the heat. Allow eggs to sit 9 minutes. Immediately drain and rinse with cold water. Place eggs in a bowl of ice water and allow to cool. Peel the eggs carefully. I use a spoon to slip under the thin skin just beneath the shell to slide the shell off. Set eggs aside.

Cook the beet. Add the beet to a small pan with about an inch of water. Cover the pot and allow beet to steam on medium-high heat for about 15-20 minutes or until beet is tender. Drain and place the beets in a clean glass jar that is large enough to hold the eggs. Add the eggs on top of the beets.

Make the pickling mixture. Add the water, vinegar, bay leaf, ginger, mustard seeds, and salt to a pot. Bring to boil and then turn off heat and allow to cool to room temperature.

Add the pickling mixture to the beets and eggs in the glass jar. If the eggs are not covered with liquid, add a little water to the jar or stir to rearrange the eggs so that they are covered. Place in the refrigerator and allow to pickle for at least eight hours. Remove from mixture and allow to drain prior to making deviled eggs.

IMG_5792.JPG
IMG_5791.JPG
IMG_5793.JPG
IMG_5797.JPG
IMG_5789.JPG
IMG_5802.JPG

Crispy Quinoa

1/4 cup quinoa
1/4 cup water
1 tablespoon olive oil
1/4 teaspoon salt

Add all ingredients to a non-stick skillet. Heat over medium heat and cook until water evaporates and quinoa begins to toast. Stir often until quinoa is golden brown. Mine took 15 minutes. Remove to drain on a paper towel. Make about 1/3 cup of toasted quinoa which can be used in numerous recipes.

IMG_5825.jpg
In Appetizers Tags eggs, vegetarian, dill, spring, quinoa, recipe, appetizers, yogurt, gluten-free
1 Comment
Hi! I'm Emily. I love to cook whole, nourishing foods, and this is where I share my kitchen experiments and sometimes a little bit of life.

Hi! I'm Emily. I love to cook whole, nourishing foods, and this is where I share my kitchen experiments and sometimes a little bit of life.

Featured
  • July 2017
  • May 2017
  • April 2017
  • March 2017
  • February 2017
  • January 2017
  • December 2016
  • November 2016
  • October 2016
  • September 2016
  • August 2016
  • July 2016
  • June 2016
  • May 2016
  • April 2016
  • March 2016
  • February 2016
  • January 2016
  • December 2015
  • November 2015
  • October 2015
  • September 2015
  • August 2015
  • July 2015
  • June 2015
  • May 2015
  • April 2015
  • March 2015
  • February 2015

  • Appetizers 18
  • Breakfast 18
  • Life 4
  • Mains 39
  • Miscellaneous 2
  • Salads 21
  • Sandwiches 6
  • Side Dishes 8
  • Smoothies 4
  • Snacks 10
  • Soups 14
  • Spreads Dips Sauces 5
  • Sweets 6
  • Vegetarian 1

  • almonds
  • appetizers
  • autumn
  • avocado
  • breakfast
  • brown rice
  • chickpeas
  • chocolate
  • cilantro
  • coconut
  • coconut milk
  • fall
  • gluten-free
  • kale
  • lentils
  • make ahead
  • mint
  • oatmeal
  • recipe
  • salad
  • snack
  • soup
  • spring
  • summer
  • sweet potatoes
  • tahini
  • vegan
  • vegetarian
  • walnuts
  • winter

subscribe

Sign up with your email address to receive new posts directly

We respect your privacy.

Thank you!

All photographs, recipes and content are property of Nourishing Matters, unless otherwise noted. Please do not redistribute without my permission. Thank you!

Powered by Squarespace