• Home
    • About Nourishing Matters
    • About Emily
    • Frequently Asked Questions
  • Recipes
    • Offerings
    • Past Programs and Events
    • Experience and Teaching Style
    • Articles and Features
    • Travel
Menu

nourishing matters

Street Address
City, State, Zip
Phone Number
where wholesome meets delicious

Your Custom Text Here

nourishing matters

  • Home
  • About
    • About Nourishing Matters
    • About Emily
    • Frequently Asked Questions
  • Recipes
  • Work with Me
    • Offerings
    • Past Programs and Events
  • Yoga
    • Experience and Teaching Style
  • Press
    • Articles and Features
  • Adventures
    • Travel

Winter Quinoa and Sprouts Salad with Tahini Dressing

January 10, 2017 Emily Watson

It's in teens here, and while I may have been cooped up inside for the past few days, I'm growing things. Like real green things that I can eat. Sound too good to be true?

I'm talking about sprouts as in hippy-dippy alfalfa sprouts that crunchy, granola-loving peeps ate back in the sixties, then again in the nineties, and then again now. Except they're way cooler now, if only because I said so. I'm telling you—they're back.

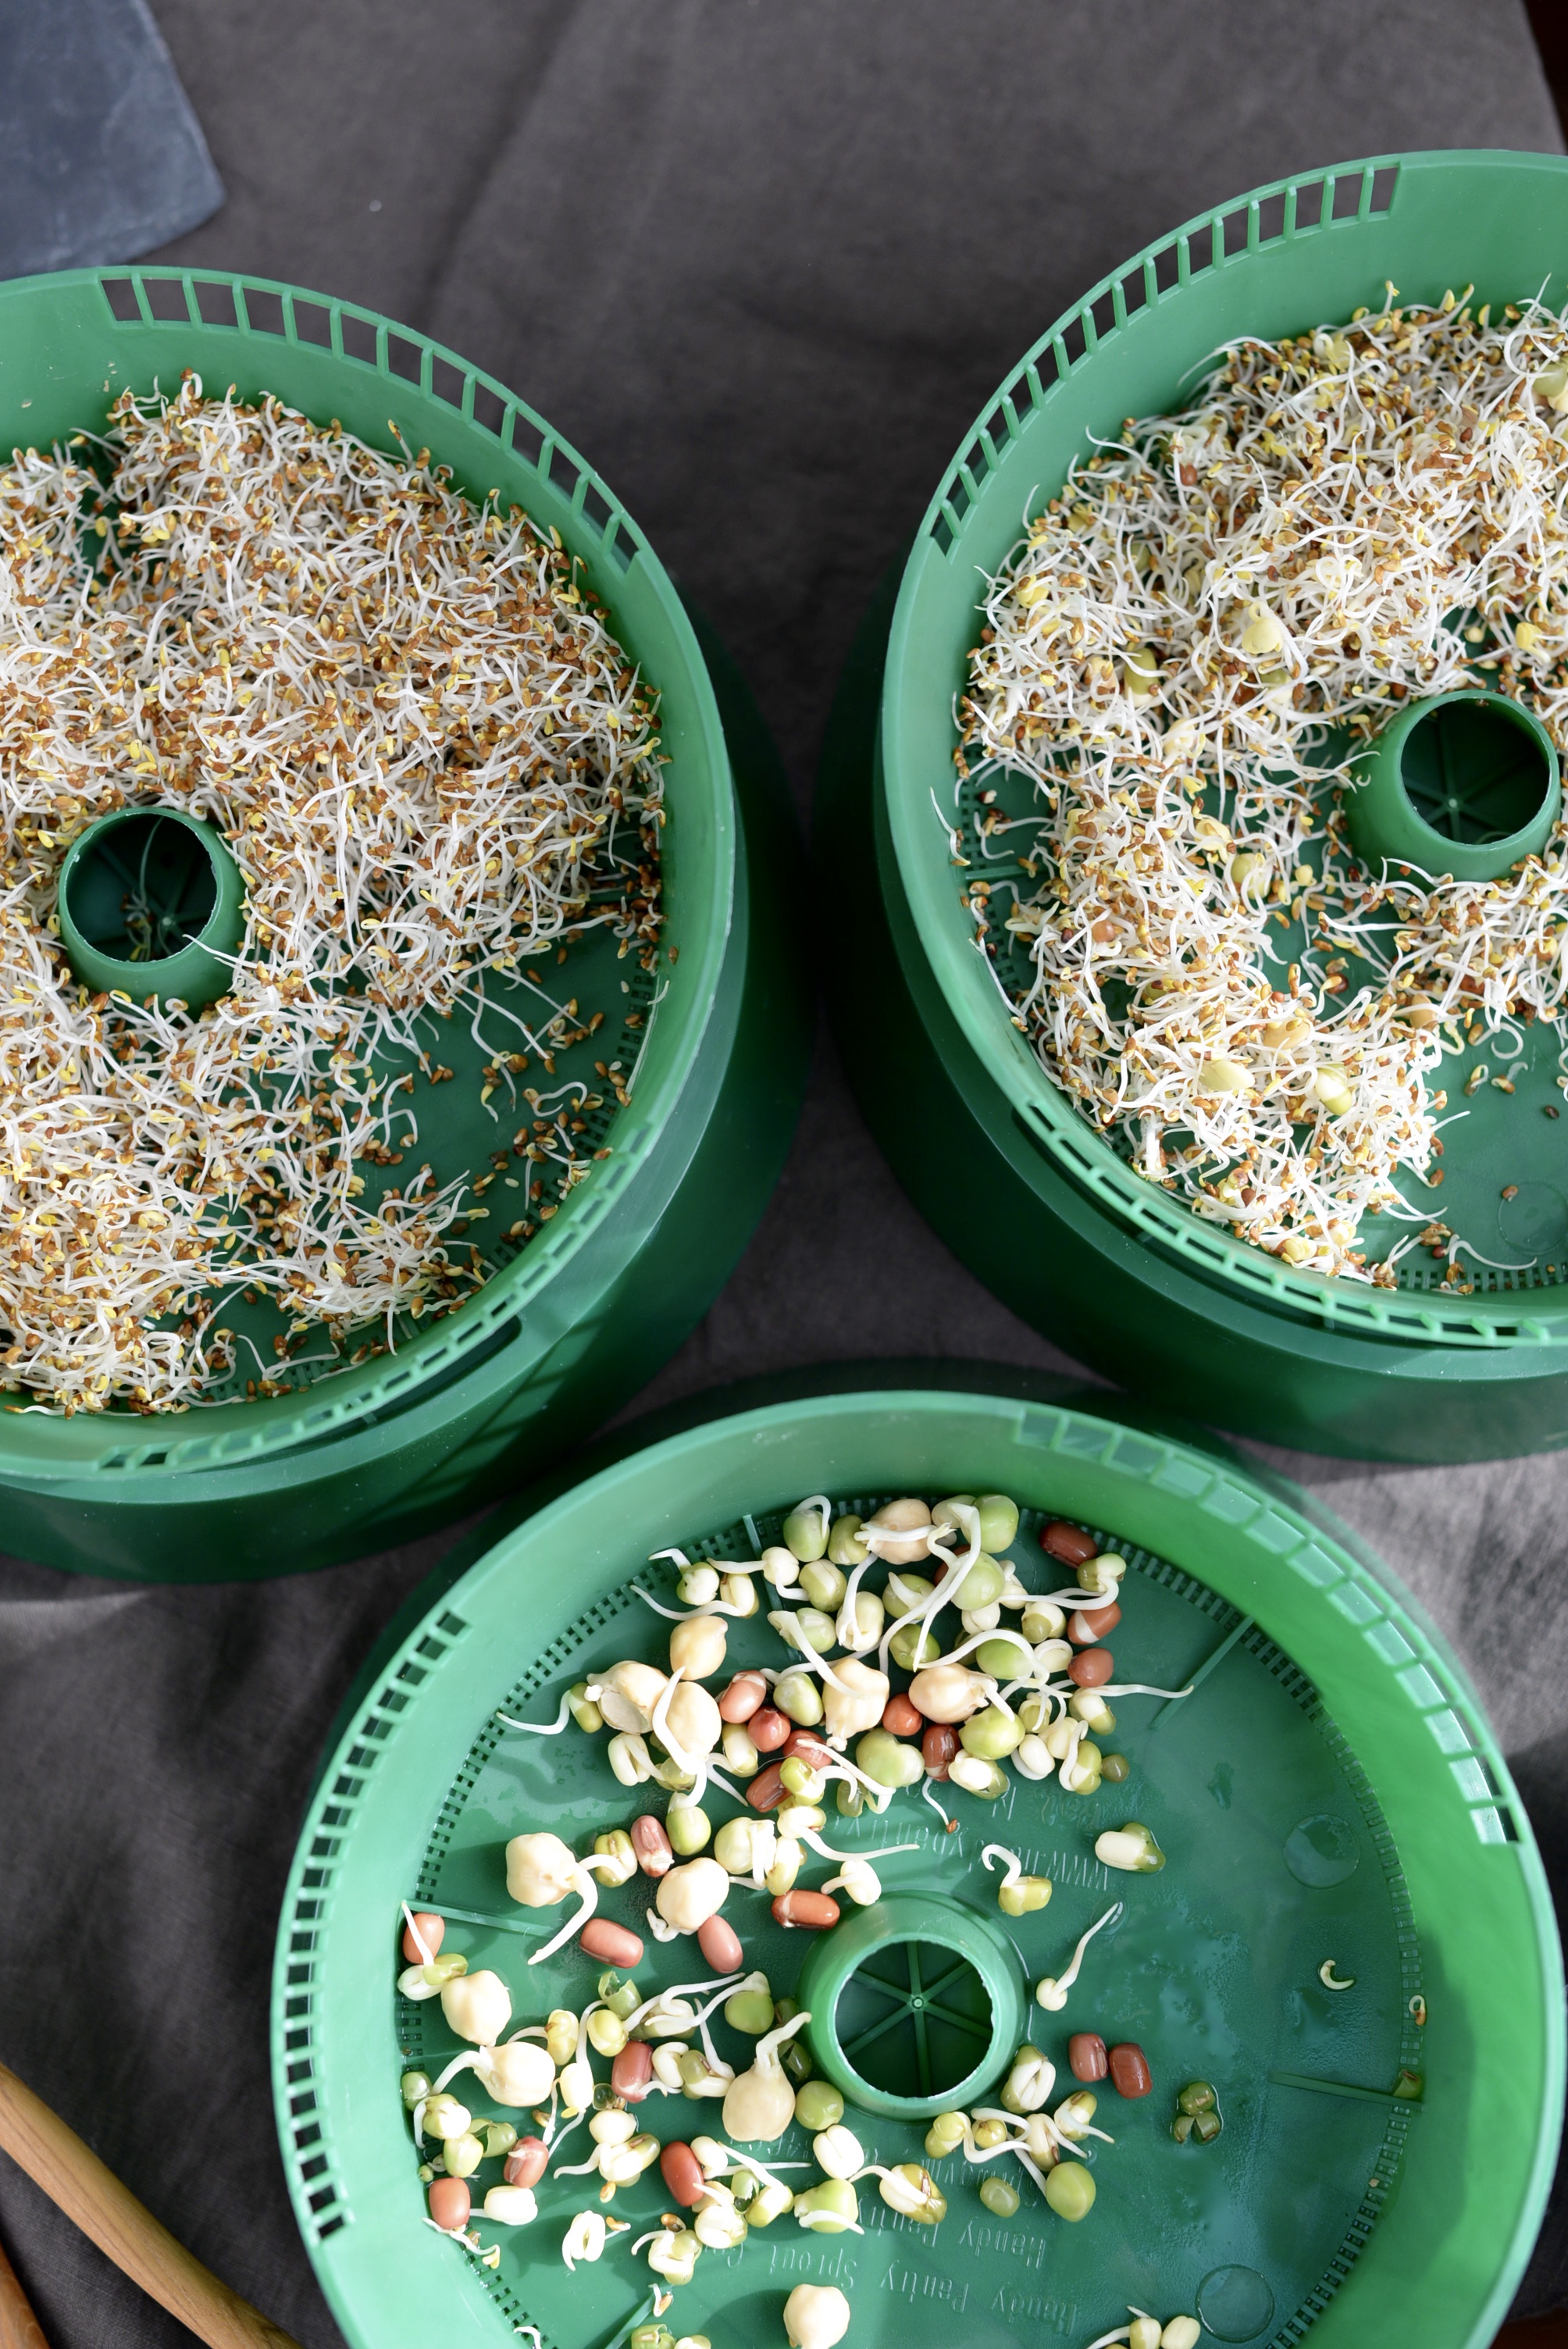
Why am I telling you about sprouts in the middle of winter? For one, they are super-easy to grow inside, right on your counter top—trust me, I have a black thumb and I can grow oodles of them—and two, they are an amazing way to get that much closer to eating healthy. In my second post for Terrain, I discuss how growing your own food can actually help you check off that New Year's resolution to get healthier (here's the first post in case you missed it). I give simple growing instructions, and while all you need is a jar, a few days, and a few rinses under the sink, Terrain sells these cool sprout growing contraptions that enable you to always have sprouts on hand.

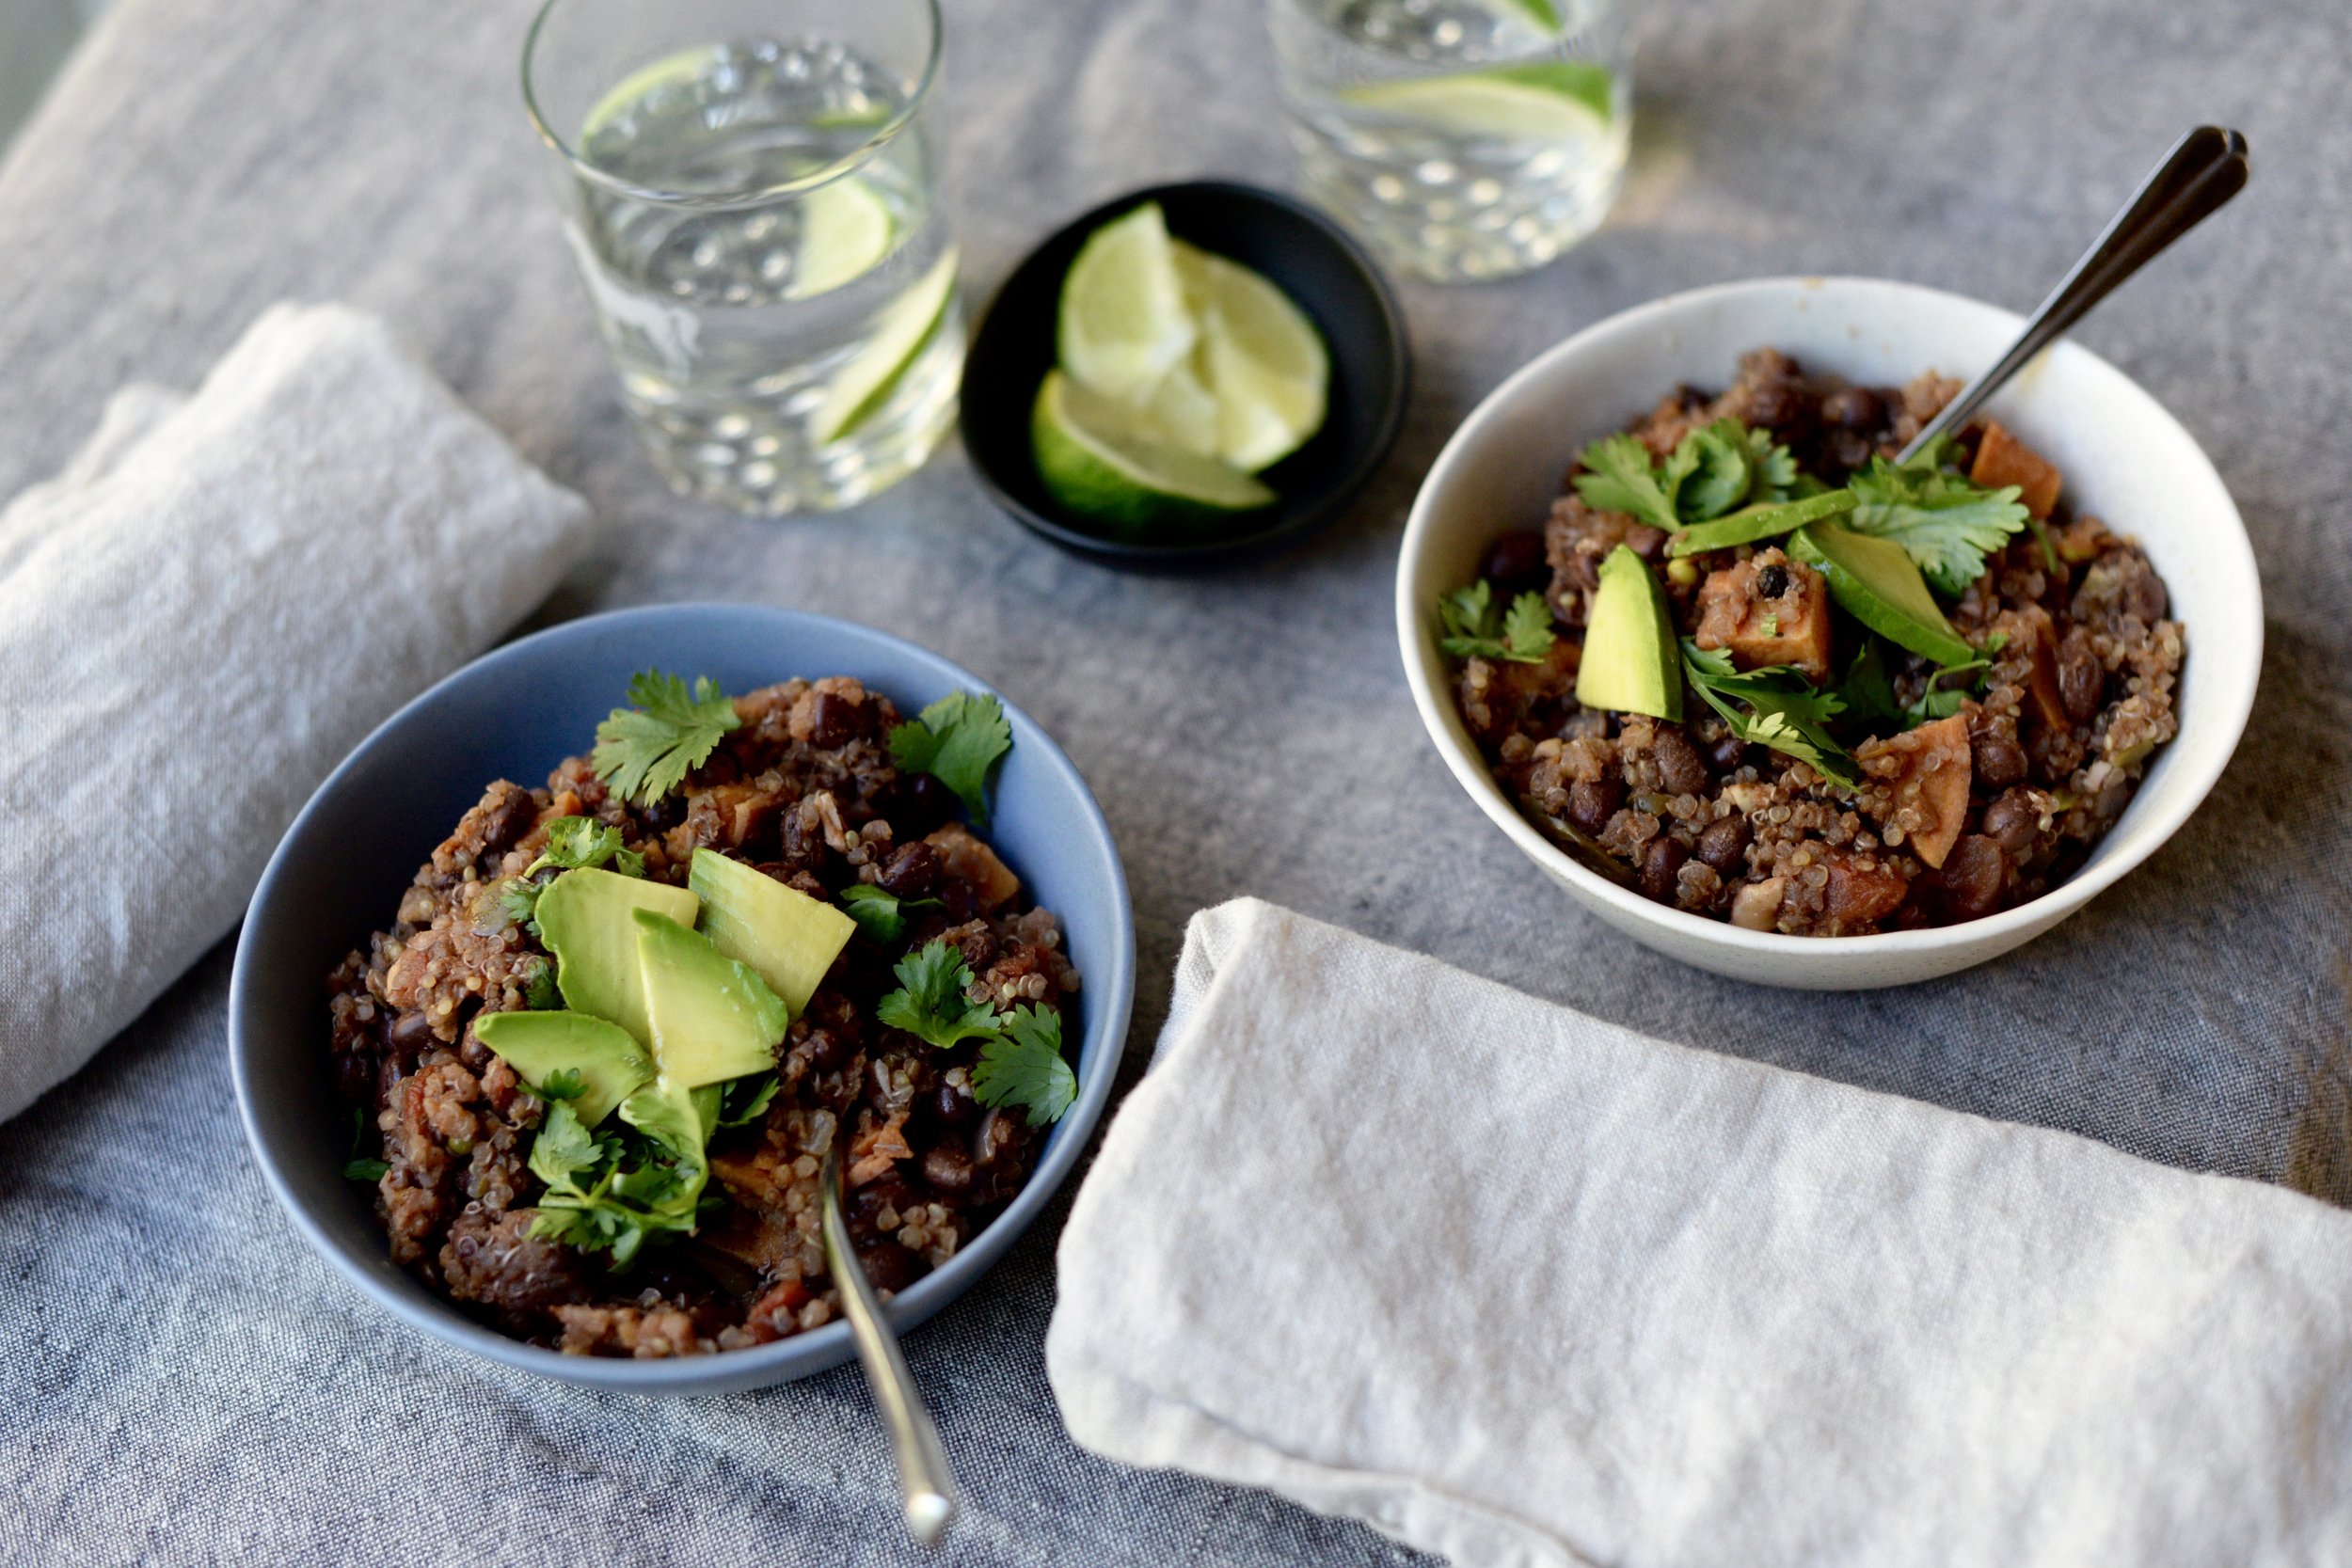
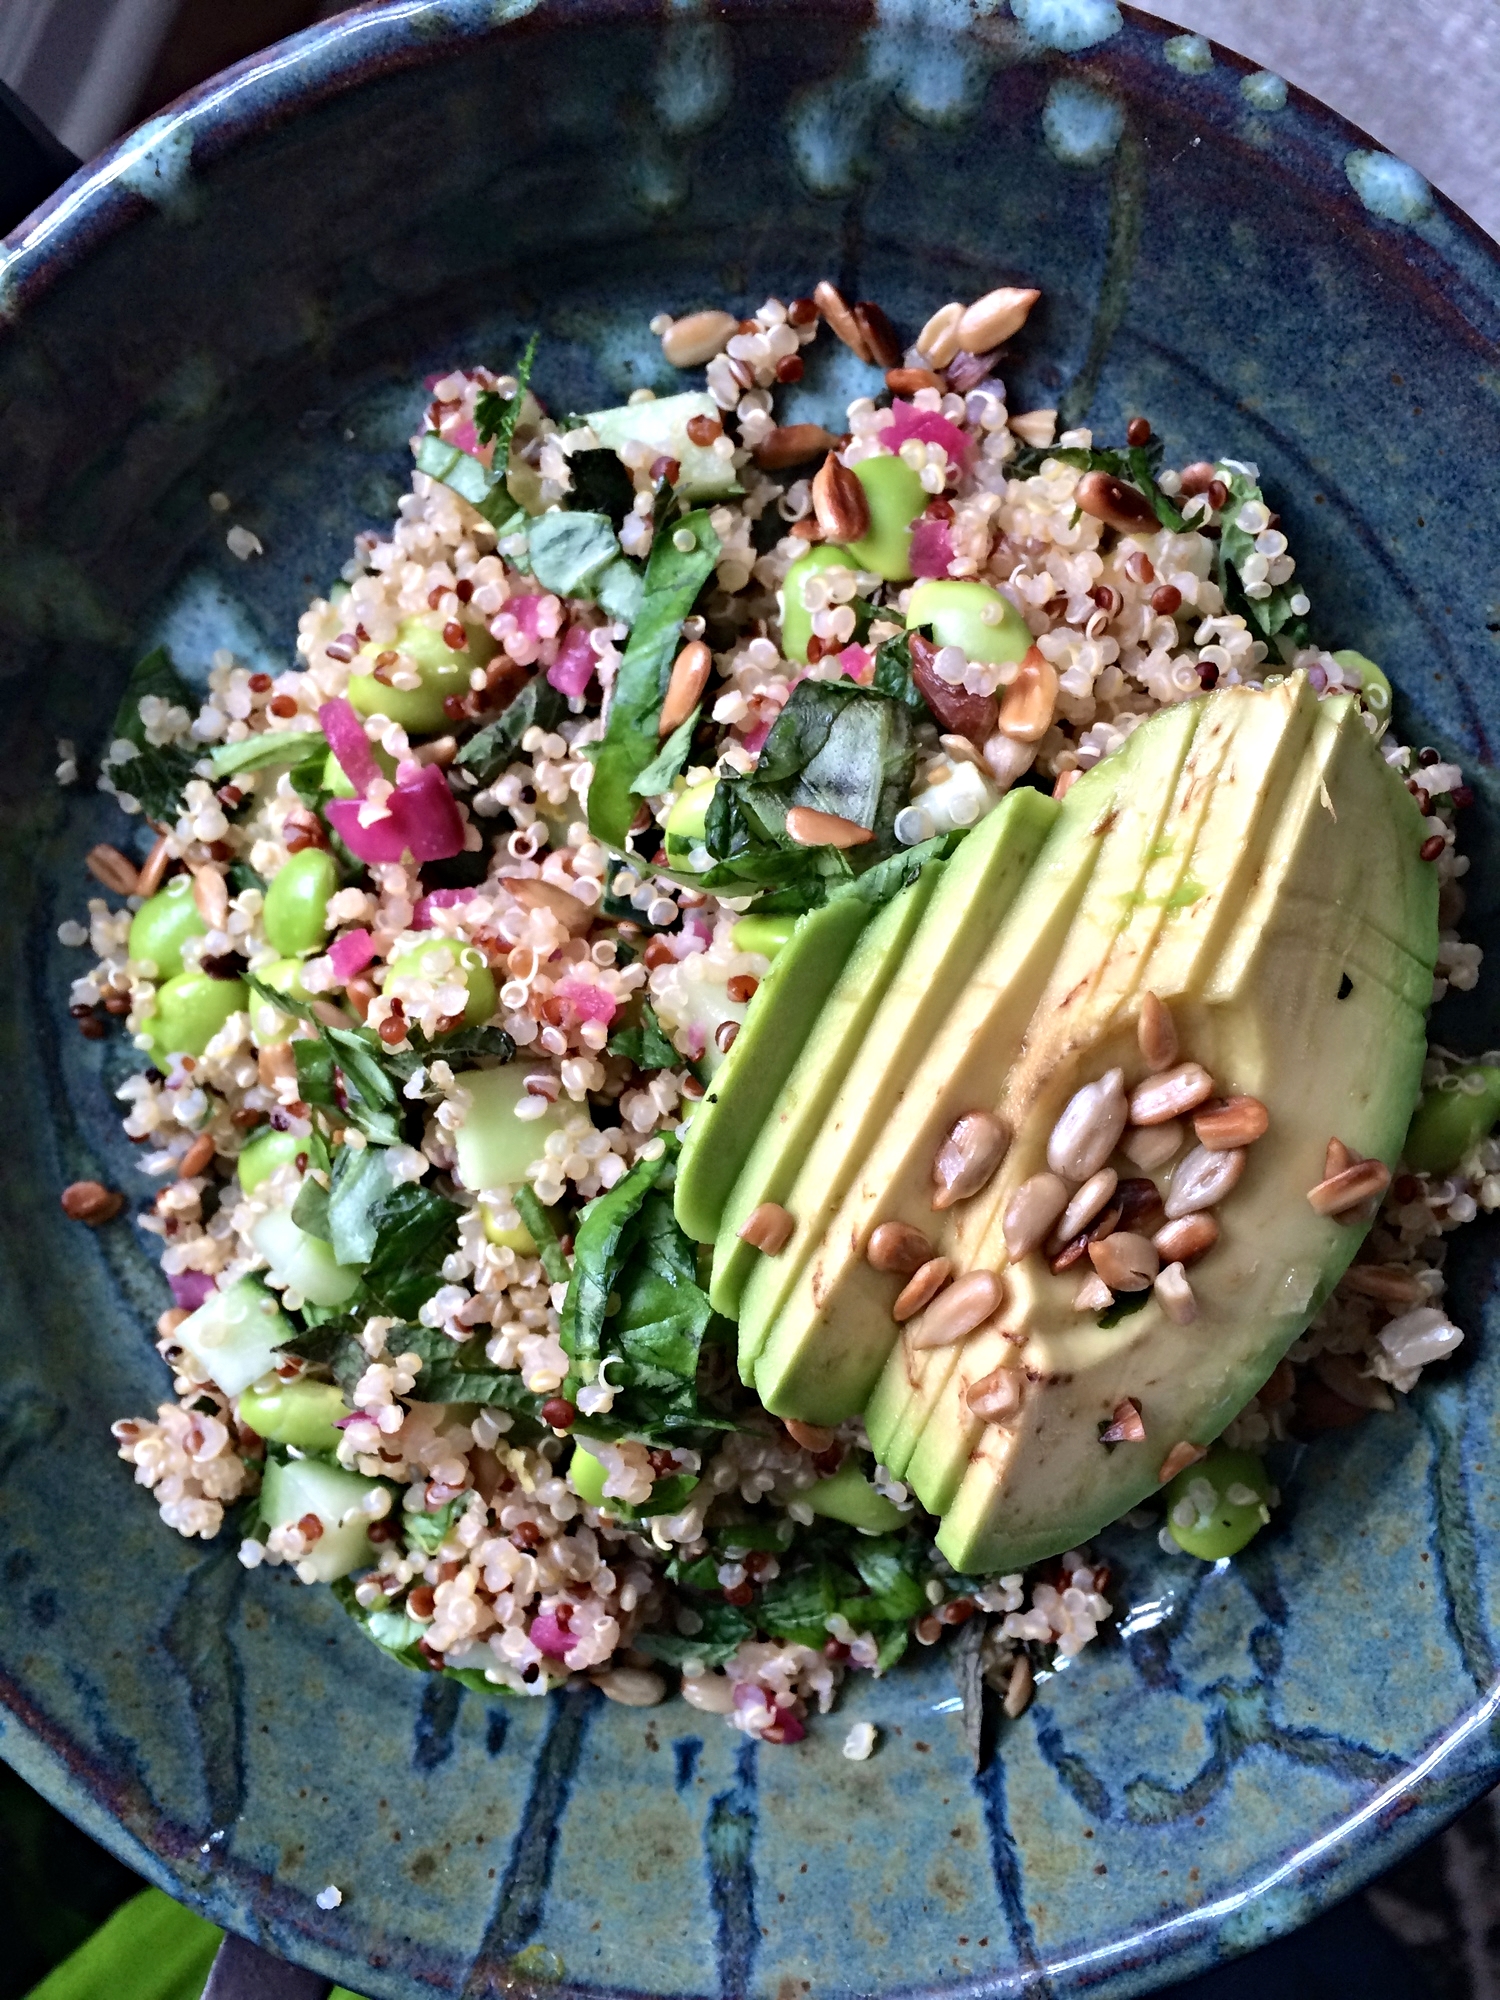
There are so many different types of sprouts if alfalfa isn't your thing, like mung bean, broccoli, radish, lentil. They add a pop of brightness to sandwiches, but I also love them tossed in salads. In this post, I share a recipe for a Winter and Quinoa Sprouts Salad with Tahini Dressing that features some of my favorite winter vegetables like radicchio, beets, and sweet potato alongside quinoa, creamy avocado, and a medley of sprouts. I hope you find it as addicting as I do!

You can find my tips and recipe on the Terrain blog.

Missed the previous Terrain post? Find it here.

DSC_5148.jpg
DSC_5171.jpg
In Salads Tags sprouts, recipe, sweet potatoes, beets, tahini, salad, vegan, gluten-free, quinoa
Comment

Black Bean and Quinoa Chili

September 29, 2016 Emily Watson

One pot meals. How beautiful are they? They save time, stress, time, water, time, and counter space. See a theme here? This chili, loaded with black beans, quinoa, and sweet potatoes, is becoming a go-to in my house as the temps drop and I find myself with fewer and fewer hours in my day. It's delicious by the bowlful, but it's also finding it's way re-purposed into a slew of meals (stuffed into tortillas with plenty of avocado for a hand-held version and ladled over roasted potatoes for a chili-fry combo). Versatile and easily adaptable. For more spice, add in a diced jalapeno as you saute the onions or throw in a chili in adobo sauce. For a richer flavor, toss in a little chunk of dark chocolate and a touch more cinnamon, stir until the chocolate melts. If you're in the need for more greens, toss in a handful until it wilts. Get comfortable with the basics, then try your own.

Did I tell you it was also nutrient-dense? Black beans, quinoa, and walnuts pack lots of healthy plant-based protein. Sweet potatoes are not only look pretty in it, but they offer plenty of good-for-you nutrients like vitamin A and fiber. It's a one pot meal that's filling, satisfying, and It freezes beautifully. As I mention below, it thickens as it cools, so if you'd like it thinner, add a little water, a teaspoon at a time, until your desired consistency. Avocado, a sprinkling of cilantro, a squeeze of lime, and a little red onion or scallion sprinkled on top makes it a chili suited for company.

Black Bean and Quinoa Chili

2 tablespoons olive oil
1 small onion, finely chopped
3 garlic cloves, minced
2 tablespoons tomato paste
1 tablespoon chili powder (ground chipotle pepper for a kick!)
1 tablespoon cumin powder
¾ teaspoon ground coriander
¼ teaspoon cinnamon
¼-½ teaspoon cayenne pepper, depending on preferred spiciness
1 14.5 ounce can diced tomatoes
5 cups water or vegetable stock, depending on preferred thickness
1 medium sweet potato, chopped in ½-inch pieces
2 15.5 ounce can black beans, drained and rinsed
1 cup dry quinoa
½ cup chopped walnuts
Salt and pepper, to taste

Optional toppings: fresh cilantro, avocado, lime, minced red onion or scallion

Heat oil over medium heat. Add onion and saute 5-7 minutes or until golden. Add garlic, tomato paste, chili powder, cumin, ground coriander, cinnamon, and cayenne pepper and cook 1-2 minutes, stirring constantly.

Add tomatoes, water or stock, sweet potato, black beans, quinoa, and generous pinch of salt. Bring mixture to boil, and then reduce to simmer and allow to cook for 15 minutes. Add walnuts, stir, and allow to simmer until quinoa and potatoes are cooked and mixture has thickened, about 7-10 minutes more. You many want to add more liquid as it cooks if chili is becoming too thick for you. Season to taste with salt and pepper.

To serve, top with chopped cilantro, avocado slices, and lime. Serves 6.

**Mixture will continue to thicken as it cools. Add a few tablespoons of water when reheating if a thinner consistency is preferred.

DSC_4294.jpg
In Mains, Soups Tags recipe, dinner, black beans, quinoa, chili, fall, walnuts, vegan, gluten-free, vegetarian
Comment

Pumpkin Pie Spiced Quinoa Crunch Almonds

October 2, 2015 Emily Watson

It's October and pumpkin flavored everything has taken over. I was in the store the other day, and I saw a container of Pumpkin Pie flavored almonds from Blue Diamond. My first thought was "what an awesome idea!" and my second though, after reading the ingredient list, was "there is not even pumpkin in there!" Sadly, that is the case with so many "pumpkin-flavored food items," and pumpkin is just too delicious and nutritious for us not to not actually use it.

So I decided to make my own pumpkin pie almonds with real pumpkin. I could be more ambitious and roast my own pumpkin and then puree it, but I have found that the canned or boxed version (Whole Foods now sells it in easy to open cartons!) work well too. I also wanted to add a little extra crunch factor, so I sprinkled in some quinoa because I love the little pop it gives. It took a few attempts to get it just right, but can I just say these craggy little nuts are addicting? They'll make your kitchen smell just like fall. And the best part? They take about 25 minutes to make, and only 5 of that actually involves work.

Pumpkin Pie Spiced Quinoa Crunch Almonds

2 cups raw almonds
1/4 cup uncooked quinoa
1/4 cup pumpkin puree
2 tablespoons coconut oil, melted, or other neutral oil
2 tablespoons maple syrup
1 teaspoon vanilla extract
2 teaspoons ground cinnamon*
1/2 teaspoon ground ginger*
1/4 teaspoon turmeric powder
1/4 teaspoon ground nutmeg*
1/8 teaspoon ground cloves*
generous pinch of salt

**You can also sub 2 1/2 teaspoons pumpkin pie spice in lieu of these separate ingredients

Preheat oven to 350 degrees Fahrenheit. Line a baking sheet with parchment paper or a Silpat. In a bowl, combine pumpkin puree through salt. Stir in almonds and quinoa until evenly coated. Spread out in a single layer on parchment. Bake for 20-25 minutes or until almonds are toasted and quinoa turns a little golden. Remove from oven and allow to cool completely. Some of the pumpkin and quinoa mixture may not adhere completely, but those pieces are just as tasty! Almonds may be kept at room temperature for about a week. Makes about 2 cups.

DSC_1268.jpg
DSC_1285.jpg
In Snacks Tags recipe, pumpkin, fall, snack, almonds, quinoa
2 Comments

Pickled Deviled Eggs with Dill and Crispy Quinoa

May 1, 2015 Emily Watson

I grew up with deviled eggs making an appearance at least once a week in our house. They were always a little different, depending on the mood of our babysitter, Louise, that week. Sometimes the filling was a tad runny, sometimes it packed a bit more of a mustard punch, sometimes there was relish involved. Louise never really measured anything, but after watching her enough times, I figured out the basic idea of deviled egg-making. Hard-boil some eggs, mash the yolks with mayonnaise, mustard- she used yellow mustard, salt, pepper, maybe a little Mt. Olive relish. Taste and adjust. Fill the egg whites up and sprinkle with a healthy dose of paprika to make them pretty.

My version is a tad more refined and geared towards spring, but I promise the extra work is worth it. Maybe you do not choose to pickle the eggs or make the crispy quinoa topping, and that is absolutely okay. The filling is still bright and creamy, and you will still get a delicious deviled egg.

Pickling the eggs is optional, but it not only creates a beautiful color, but it also gives the egg a meatier texture and a zing. I use plain Greek yogurt in place of the more traditional mayo to fluff the filling. Fresh dill pairs nicely with the lemon and just makes me think of pickles, but leave it out if you wish. A sliver of avocado gives additional richness and toasted quinoa acts like a crunchy breadcrumb. These eggs can be made a day before, but if you are pickling them, be sure to start that process at least 8 hours before hand so that the pink color has a chance to penetrate the whites. These would make a fantastic spring party appetizer either for the Kentucky Derby or Mother's Day maybe?

The pickling of the eggs is based very loosely on the Beet Pickled Eggs at Cookistry. I used a few different spices and just one beet to get the hue because I know how one beet can give off a tremendous amount of color. Beet stains on hands for days, anyone? The crispy quinoa is adapted from a Real Simple magazine recipe.

Pickled Deviled Eggs with Dill and Crispy Quinoa

4 beet-pickled hard-boiled eggs, see recipe below, or just 4 hard-boiled eggs, peeled
3 tablespoons 2% plain Greek yogurt (Fage is my favorite brand)
2 teaspoons Dijon mustard
3 tablespoons fresh dill, finely chopped, divided
zest of 1/2 lemon
1 teaspoon sea salt + more for sprinkling on at very end
1/4 avocado, thinly sliced, for garnish
crispy quinoa, see recipe below (optional)

Slice the hard-boiled eggs in half length-wise. If using beet-pickled eggs, have a towel nearby so you do not stain your hands. Carefully spoon out the yolks and place in a small bowl. Add the yogurt, mustard, 2 tablespoons of fresh dill, lemon zest, and salt. Mash everything together with a fork until smooth and creamy.

Fill the egg whites up with heaping spoonfuls of the yolk mixture. Place a sliver of avocado on top of each half, sprinkle with remaining fresh dill, crispy quinoa, if using, and a little sprinkle of sea salt. Enjoy! Makes 8 deviled egg halves.

IMG_5928.JPG
IMG_5933.JPG
IMG_5943.JPG
IMG_5951.JPG
IMG_6068.JPG

Beet-Pickled Eggs

4 eggs
1 beet, peeled and chopped into 1-inch pieces
1 cup water
3/4 cup apple cider vinegar
1 bay leaf
1 inch piece of ginger, peeled and sliced into 3 pieces
1/4 teaspoon mustard seeds
3/4 teaspoon salt

Hard-boil the eggs. Place the eggs in a pot and add water to cover by 2 inches. Bring the water to a boil, cover with a lid, and remove pot from the heat. Allow eggs to sit 9 minutes. Immediately drain and rinse with cold water. Place eggs in a bowl of ice water and allow to cool. Peel the eggs carefully. I use a spoon to slip under the thin skin just beneath the shell to slide the shell off. Set eggs aside.

Cook the beet. Add the beet to a small pan with about an inch of water. Cover the pot and allow beet to steam on medium-high heat for about 15-20 minutes or until beet is tender. Drain and place the beets in a clean glass jar that is large enough to hold the eggs. Add the eggs on top of the beets.

Make the pickling mixture. Add the water, vinegar, bay leaf, ginger, mustard seeds, and salt to a pot. Bring to boil and then turn off heat and allow to cool to room temperature.

Add the pickling mixture to the beets and eggs in the glass jar. If the eggs are not covered with liquid, add a little water to the jar or stir to rearrange the eggs so that they are covered. Place in the refrigerator and allow to pickle for at least eight hours. Remove from mixture and allow to drain prior to making deviled eggs.

IMG_5792.JPG
IMG_5791.JPG
IMG_5793.JPG
IMG_5797.JPG
IMG_5789.JPG
IMG_5802.JPG

Crispy Quinoa

1/4 cup quinoa
1/4 cup water
1 tablespoon olive oil
1/4 teaspoon salt

Add all ingredients to a non-stick skillet. Heat over medium heat and cook until water evaporates and quinoa begins to toast. Stir often until quinoa is golden brown. Mine took 15 minutes. Remove to drain on a paper towel. Make about 1/3 cup of toasted quinoa which can be used in numerous recipes.

IMG_5825.jpg
In Appetizers Tags eggs, vegetarian, dill, spring, quinoa, recipe, appetizers, yogurt, gluten-free
1 Comment

Quinoa and Edamame Salad with Basil, Mint, and Lemon

April 8, 2015 Emily Watson

I am pretty sure this salad would shout, "Hello, spring!" if it could talk. It is so, so vibrant in color and in taste. It is a lot of green with just a little pink from the pickled onions, and zingy from the red onions, fresh herbs, the lemon juice and the lemon zest. It is a wonderful make-ahead salad, especially if you be sure to slice the avocado either right before serving, or drizzle with a little lemon juice so it does not oxidize. While the avocado provides a wonderful creamy texture and a little extra filling, healthy fat, feel free to leave it out if you are unable to find ripe ones or if you are allergic, like an unlucky friend of mine. It will still be delicious and bright.

I chose quinoa for this for a few reasons. I often have it on hand, it cooks fairly quickly, and it provides a powerful nutrient boost. It is loaded with protein, amino acids, and vitamins and minerals such as B vitamins, calcium, and magnesium which are important for nerve and muscle function and bone strength. I love the crunch of the sunflower seeds in this, and they give a boost of Vitamin E, an important antioxidant. Sunflower seeds also remind me of sunny days, evoking more of the warm weather to come.

When you think of edamame, you may think of the little green pods sprinkled with coarse salt and served at so many Japanese restaurants. Luckily, you do not have to shell each pod individually to get to the soybeans nestled inside. You can now find already shelled edamame in the freezer section of many supermarkets, which makes things incredibly convenient for recipes like this. They have a more substantial toothsome quality compared to peas and a clean green flavor that is most welcome here. Their mild flavor also allows the basil, mint, and lemon to really shine through.

Quinoa and Edamame Salad with Basil, Mint, and Lemon

1 c. quinoa
1 1/2 c. water
1 c. frozen shelled edamame
1/4 c. finely chopped pickled red onions, look here for the recipe
1 lemon, zested and juiced
3 T. extra-virgin olive oil
1 t. Dijon mustard
3/4 t. salt
1/2 cucumber, washed, unpeeled and diced into 1-cm cubes
1 c. loosely packed fresh basil in chiffonade
1/2 c. finely chopped fresh mint
3 T. sunflower seeds, raw or already roasted and salted
1/2 avocado, peeled, pitted, and sliced

Prepare the quinoa. Combine 1 cup quinoa and 1 1/2 cups water in a pot. Bring to boil, reduce the heat to low, and cover. Cook for 25 minutes on low. Allow to rest, covered for 10 minutes.

In the meantime, cook the edamame. Combine the frozen edamame and enough water to cover by an inch in a small pot. Bring to a boil and then reduce heat to a simmer and cook edamame for 5 minutes or until just tender. Drain  and set aside.

IMG_5006.jpg

Prepare the rest of the ingredients. If you are using raw sunflower seeds, toast the sunflower seeds. Heat 1/2 teaspoon olive oil or coconut oil in a skillet over medium heat and add the sunflower seeds. Toast for 5-7 minutes, stirring often or until sunflower seeds are toasted. Remove and allow to cool on a paper towel. Sprinkle with 1/8 teaspoon of salt while still warm. 

IMG_5012.jpg
IMG_5014.jpg
IMG_5015.jpg
IMG_5016.jpg

When the quinoa has finished, add the quinoa to a large bowl. Add the edamame, pickled onions, lemon juice, lemon zest, extra-virgin olive oil, Dijon mustard, and salt. Mix to combine. Toss in the basil and mint. To serve, sprinkle each serving with the toasted sunflower seeds and sliced avocado. Enjoy! Serves 3-4 as a main dish or 6-8 as a side dish.

IMG_5025.JPG
In Salads Tags recipe, gluten-free, vegetarian, vegan, avocado, edamame, sunflower seeds, mint, basil, quinoa, salad, spring
4 Comments
Hi! I'm Emily. I love to cook whole, nourishing foods, and this is where I share my kitchen experiments and sometimes a little bit of life.

Hi! I'm Emily. I love to cook whole, nourishing foods, and this is where I share my kitchen experiments and sometimes a little bit of life.

Featured
  • July 2017
  • May 2017
  • April 2017
  • March 2017
  • February 2017
  • January 2017
  • December 2016
  • November 2016
  • October 2016
  • September 2016
  • August 2016
  • July 2016
  • June 2016
  • May 2016
  • April 2016
  • March 2016
  • February 2016
  • January 2016
  • December 2015
  • November 2015
  • October 2015
  • September 2015
  • August 2015
  • July 2015
  • June 2015
  • May 2015
  • April 2015
  • March 2015
  • February 2015

  • Appetizers 18
  • Breakfast 18
  • Life 4
  • Mains 39
  • Miscellaneous 2
  • Salads 21
  • Sandwiches 6
  • Side Dishes 8
  • Smoothies 4
  • Snacks 10
  • Soups 14
  • Spreads Dips Sauces 5
  • Sweets 6
  • Vegetarian 1

  • almonds
  • appetizers
  • autumn
  • avocado
  • breakfast
  • brown rice
  • chickpeas
  • chocolate
  • cilantro
  • coconut
  • coconut milk
  • fall
  • gluten-free
  • kale
  • lentils
  • make ahead
  • mint
  • oatmeal
  • recipe
  • salad
  • snack
  • soup
  • spring
  • summer
  • sweet potatoes
  • tahini
  • vegan
  • vegetarian
  • walnuts
  • winter

subscribe

Sign up with your email address to receive new posts directly

We respect your privacy.

Thank you!

All photographs, recipes and content are property of Nourishing Matters, unless otherwise noted. Please do not redistribute without my permission. Thank you!

Powered by Squarespace